

In the world of pottery, glaze is an essential part of creating beautiful and functional pieces. It adds color, texture, and protection to the surface of ceramic objects. However, sometimes things don’t go as planned and you may end up with blistered glaze on your pieces. This can be frustrating, but fortunately, it’s not a complete disaster. In this guide on how to fix blistered glaze, we’ll go through the steps you can take to fix blistered glaze and salvage your pottery.
What Causes Blistered Glaze?
Before diving into how to fix it, let’s first understand what causes blistered glaze. There are a few possible reasons for this issue:
Moisture Trapped in the Clay Body:
When moisture is not completely evaporated from the clay before firing, it can create steam bubbles that cause blisters in the glaze.
Incompatibility Between Glaze and Clay Body:
Certain types of clay and glazes may not work well together, causing issues such as blistering.
Poor Application Techniques:
If the glaze is applied too thickly or unevenly, it can lead to blistering during firing.
Now that we know the possible causes, let’s move on to how to fix blistered glaze.
Necessary Materials
Diamond Sanding Pads or a Diamond Grinding Wheel:
These tools are essential for smoothing out the surface of the blistered glaze.
Clay or Glaze in a Similar Color:
If you want to patch up any area with missing glaze, having a similar color clay or glaze will help blend it in.
Brush or Sponge:
You’ll need this to apply the patching material onto the affected areas.
Kiln and Firing Tools:
In order to refire your piece, you’ll need access to a kiln and appropriate firing tools.
11 Step-by-step Instructions on How to Fix Blistered Glaze
Step 1: Identify the Cause
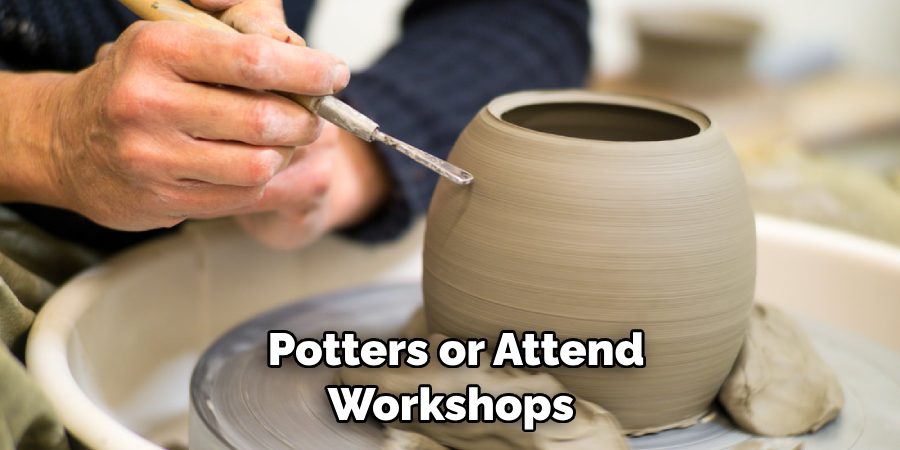
The first step in fixing blistered glaze is to identify the cause. This will help you determine the best course of action. You can refer to the list above to help you narrow down the cause. It’s also important to record any changes you’ve made in your glazing process or materials. But if you’re unable to figure out the cause, don’t worry – the following steps will still help you fix it. You can also seek advice from experienced potters or attend workshops to gain more knowledge about pottery techniques.
Step 2: Let the Piece Cool Down
After firing, allow the piece to cool down completely before inspecting it for the blistered glaze. If you try to handle the piece while it’s still hot, you risk damaging it further. You can also use a heat-resistant glove to handle the piece if you need to.
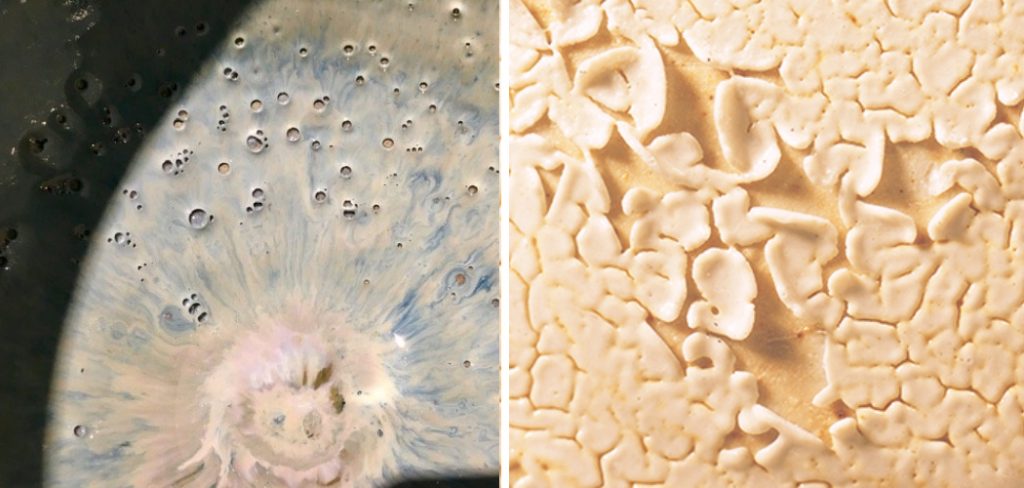
The glaze may look smooth and unblemished when it’s still hot, but blisters will become more apparent as it cools down. It’s also important to handle the piece with care, as blistered glaze can easily flake off. The best course of action is to leave it in the kiln until it’s fully cooled. The longer the piece cools down, the better it will be for fixing. It’s recommended to leave it for at least 24 hours.

Step 3: Assess the Damage
Once the piece has cooled down, carefully inspect it for blistered areas. Note where they are and how severe they are. If there are only a few small blisters, you may not need to do much to fix them. However, if the blisters are large and cover a significant portion of the glaze, you may need to take more drastic measures.
The following steps will guide you through both scenarios. It’s also a good idea to take pictures of the damage for reference. But be careful not to touch or handle the affected areas too much, as this can cause further damage.
Step 4: Remove Small Blisters
If the blisters are small and not too severe, you can try to remove them with a sharp tool, such as a needle or toothpick. Be careful not to damage the underlying clay body while doing this. Once removed, use fine-grit sandpaper to smooth out the area.
This method is best for fixing small blisters on functional pieces, as it will leave a smooth surface that won’t affect the functionality of the piece. It’s important to wear a dust mask while sanding to avoid inhaling silica particles. The use of diamond sanding pads or a grinding wheel is not recommended for this method, as it can create more damage if not used correctly.
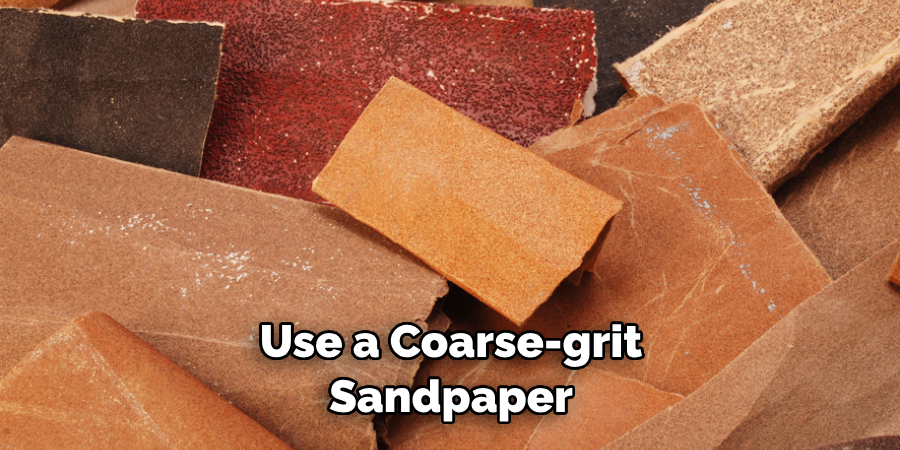
Step 5: Sand Down Large Blisters
For larger and more severe blisters, sanding down the entire glaze surface may be necessary. Use a coarse-grit sandpaper to remove the blisters and then switch to a fine-grit sandpaper to smooth out the surface. This method is best for decorative pieces, as it will remove any imperfections but may leave a slightly rough surface.
The key is to sand gently and evenly, without applying too much pressure. It’s also important to regularly clean the sandpaper with water to prevent it from clogging up and scratching the glaze surface.
Step 6: Repair Any Damaged Areas
In some cases, blistering may have caused cracks or chips in the glaze. If this is the case, you will need to repair these areas before proceeding with fixing the blisters. You can use a ceramic repair kit or mix together a small amount of clay and water to create a paste to fill in the damaged areas.
Smooth out the surface with your finger or a tool and let it dry completely before proceeding. Although the repaired areas may not look perfect, they will blend in better once the piece is refired. It’s important not to skip this step, as it can prevent further damage during the refiring process.
Step 7: Apply a Thinner Glaze Layer
If you believe that moisture trapped in the clay body is causing blisters, try applying a thinner layer of glaze on your next attempt. This will allow for more even evaporation and can prevent blisters from forming. You can also try adding a layer of water between the glaze layers to help with absorption.
The key is to experiment and find the right balance of glaze thickness for your specific clay body. You can also try using a different type of glaze that may work better with your clay. It’s important to document and record your results so you can replicate successful glazing techniques in the future.
Step 8: Test Different Clay Glaze Combinations
If you suspect that incompatibility between clay and glaze is causing blistering, try testing different combinations to see which ones work best together. Keep a record of these tests so you can refer back to them in the future. It’s also helpful to consult with other potters or attend workshops to learn about compatible clay and glaze combinations. It may also be necessary to adjust your firing schedule for different clay and glaze combinations. The key is to find the right combination that produces the desired results without causing blistering.
Step 9: Adjust Firing Temperature
Sometimes changing the firing temperature can help fix blistered glaze. If you normally fire at a high temperature, try reducing it slightly. This will give the moisture in the claymore time to evaporate, preventing steam bubbles from forming. If you normally fire at a low temperature, try increasing it slightly to see if that makes a difference. But be cautious and make small adjustments at a time to avoid damaging the piece. Heavily blistered pieces may need to be refired at a lower temperature.
Step 10: Refire the Piece
If you’ve made changes to your glazing process or materials and want to test them on an already-fired piece with blistered glaze, you can refire it. Place the piece back in the kiln and refire it to the recommended temperature. This may fix the blistering, but keep in mind that there is always a risk of further damage or even cracking during refiring. Although this step is not recommended, it may be necessary in some cases.
You can also try using a torch or heat gun to spot-fire specific areas, but this should be done with caution and only as a last resort. You may also choose to leave the blisters as a unique design element, but be aware that they can affect the functionality of functional pieces. Remember to continue experimenting and learning from each firing to improve your pottery skills.

Step 11: Prevent Future Blistering
To prevent future blistering, it’s important to properly prepare your clay before applying glaze. Make sure it’s well-wedged and free of air pockets. It’s also important to properly dry your piece before firing, as moisture trapped in the clay can cause issues during firing.
Additionally, always make sure to follow recommended glaze application techniques and use compatible materials. By taking these precautions, you can avoid blistered glaze in the future and create beautiful pieces without any unwanted imperfections. Remember, practice makes perfect and don’t be afraid to experiment and learn from your mistakes.
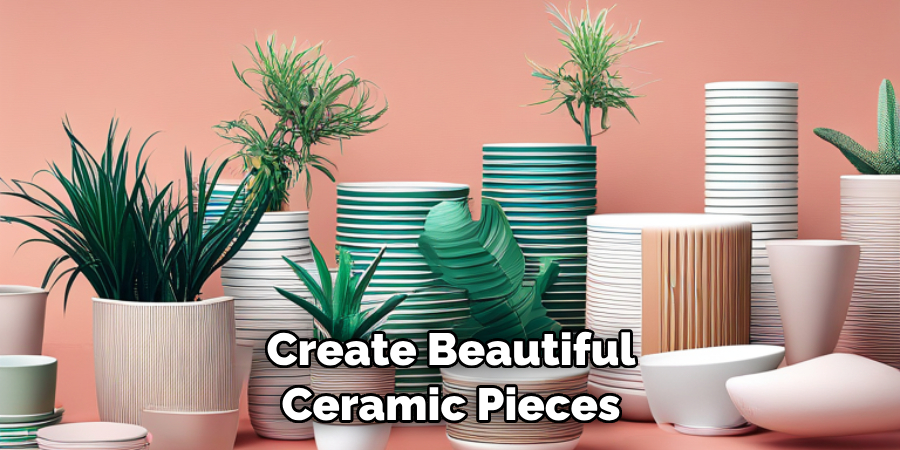
Following these steps on how to fix blistered glaze can help you fix blistered glaze and create beautiful ceramic pieces. But remember, prevention is always better than cure. By taking care of your pottery process and experimenting with different techniques, you can minimize the risk of blistering and other glazing issues. Keep learning and improving your skills to become a master potter! So keep practicing and having fun with clay! Happy potting!
Do You Need to Take Help From Professionals?
In some cases, the blistering may be too severe or widespread to be fixed with DIY methods. If you have tried multiple solutions and still cannot fix the issue, it may be time to seek help from a professional ceramic restorer or repair service.
They have experience and specialized tools that can effectively fix blistered glaze without causing further damage to your piece. Additionally, they can provide valuable insights and advice on how to prevent future blistering.
Although it may cost more, it’s worth considering if you have a valuable or sentimental piece that you want to save. Remember, there is no shame in seeking help when needed – it’s all part of the learning process! So don’t hesitate to reach out for professional assistance if necessary.
With time and experience, you will become familiar with common glazing issues and how to fix them effectively. Keep practicing and experimenting to create beautiful ceramic pieces that are free of blistered glaze!
How Much Will It Cost?
The cost of fixing blistered glaze will vary depending on the severity of the issue and whether you choose to fix it yourself or seek professional help. DIY methods are typically more affordable, as they only require tools and materials that you may already have on hand or can easily purchase.
However, if you need to seek professional assistance, the cost will likely be higher due to the expertise and specialized tools required for the job. It’s important to factor in these costs when considering whether to fix or replace a piece with blistered glaze.
Additionally, keep in mind that prevention is key – by taking proper care and precautions in your pottery process, you can avoid costly repairs in the future. So always take care of your clay and glaze materials to create beautiful and flawless pieces! Happy potting!
Common Mistakes
- Rushing the Preparation Stage, Leading to Poor Adhesion of New Glaze.
- Not Addressing the Root Cause, Such as Temperature or Humidity Issues.
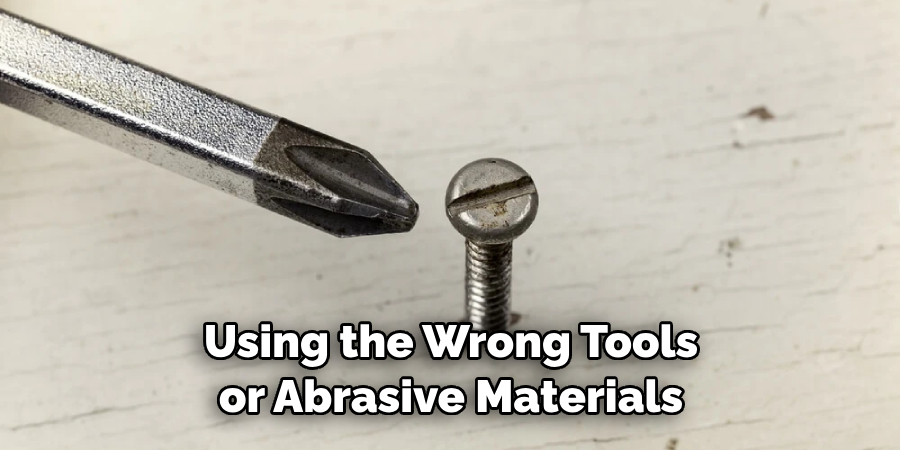
- Using the Wrong Tools or Abrasive Materials, Causing Further Damage.
- Applying Too Thick of a New Glaze Layer, May Result in Uneven Finishes.
- Skipping the Protective Finish Step, Leaving the Repaired Area Vulnerable.
To avoid these mistakes, take your time and follow the steps carefully. Rushing through the process may lead to more frustration and even more blistered glaze. Always remember to properly clean and dry your tools and materials to avoid contamination.
With patience and practice, you can successfully fix blistered glaze and create beautiful ceramic pieces. So don’t get discouraged, keep learning and improving your skills as a potter! Happy creating!
Frequently Asked Questions
Q1: Can the Blistered Glaze Be Fixed?
A1: Yes, it can be fixed with the right tools and techniques. Follow the steps mentioned in this guide to learn how to fix blistered glaze. However, in some cases, it may be best to seek professional help. You can also try refiring the piece, but this should be done with caution as it may cause further damage.
Q2: How Can I Prevent Blistered Glaze?
A2: To prevent blistering, make sure to properly prepare your clay and avoid air pockets. Ensure that your piece is completely dry before firing and follow recommended glazing techniques. Use compatible materials and always clean your tools to avoid contamination. Otherwise, you can also use heat treatment to prevent glaze blistering.
Q3: How Much Does It Cost to Fix Blistered Glaze?
A3: The cost of fixing blistered glaze will vary depending on the severity of the issue and whether you choose to fix it yourself or seek professional help. DIY methods are typically more affordable, but seeking professional assistance may be necessary for severe cases. Always factor in these costs before deciding whether to fix or replace a piece with blistered glaze.
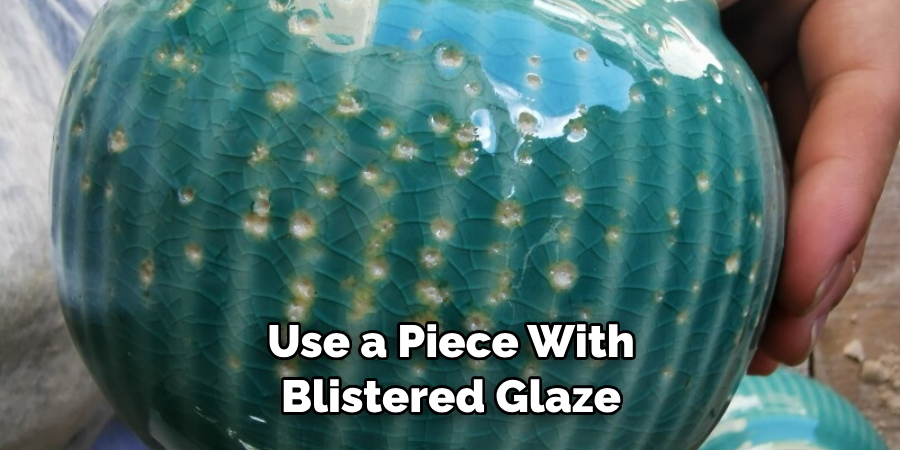
Q4: Can I Still Use a Piece With Blistered Glaze?
A4: It is not recommended to use a piece with blistered glaze, as it may be more susceptible to further damage and potentially harmful if used for food or drinks. It’s best to fix the issue before using the piece for its intended purpose. If the piece has sentimental value, consider displaying it as a decorative item instead.
Q5: How Do I Know When My Glaze Is Dry Enough?
A5: The recommended drying time will vary depending on the type of glaze and atmospheric conditions. It’s best to follow the manufacturer’s instructions or do a touch test – if the glaze feels cool to the touch, it’s likely not dry yet. Be patient and allow for sufficient drying time to avoid blistering. Happy potting!
Conclusion
Fixing blistered glaze may seem daunting at first, but with proper techniques and patience, it can be resolved successfully. Remember to take care in your pottery process and experiment with different techniques, as prevention is always better than cure.
Seek professional help if needed on the project how to fix blistered glaze, and factor in the costs before deciding whether to fix or replace a piece with blistered glaze. Don’t get discouraged – keep practicing and improving your skills to become a master potter!
The journey of pottery is all about learning and growing, and encountering challenges like blistered glaze is just a part of the process. Don’t be afraid to make mistakes, as they are opportunities for growth and improvement. With time and experience, you will become more confident in your abilities and create beautiful ceramic pieces that are free from any imperfections. Happy creating!
Toby Rede is a professional potter focused on creating functional and artistic ceramics. His work blends natural textures with modern forms, often inspired by sustainable gardening and outdoor environments. Toby’s pottery emphasizes both utility and beauty, reflecting his philosophy of intentional craftsmanship. On the blog, he shares insights on integrating handmade objects into everyday life.
Education
Associate Degree in Ceramic Technology, Alfred University
Professional Focus
Pottery creation with a focus on functionality and artistic expression
Techniques exploring texture, glazing, and sustainable materials
Professional Accomplishments
Work featured in regional art shows and garden exhibitions
Collaborations with local craft fairs and home decor shops