Frayed paint brushes are a common issue faced by artists and painters, and they can significantly hinder the quality of painting projects. The problem often arises due to wear and tear, improper cleaning, or storage practices. When bristles become frayed, achieving smooth and even strokes becomes challenging, making it difficult to deliver a professional finish. However, understanding how to fix frayed paint brushes is crucial for restoring their functionality. Various methods exist to address this problem, whether it involves trimming the tips, reshaping with comb and gel, or soaking in hot water.

While it’s true that some brushes may be beyond repair and require replacement, many can be salvaged with proper techniques. Mastering these methods not only extends the life of one’s tools but also enhances painting outcomes, ensuring that creativity is not compromised by damaged equipment.
Identifying Frayed Bristles
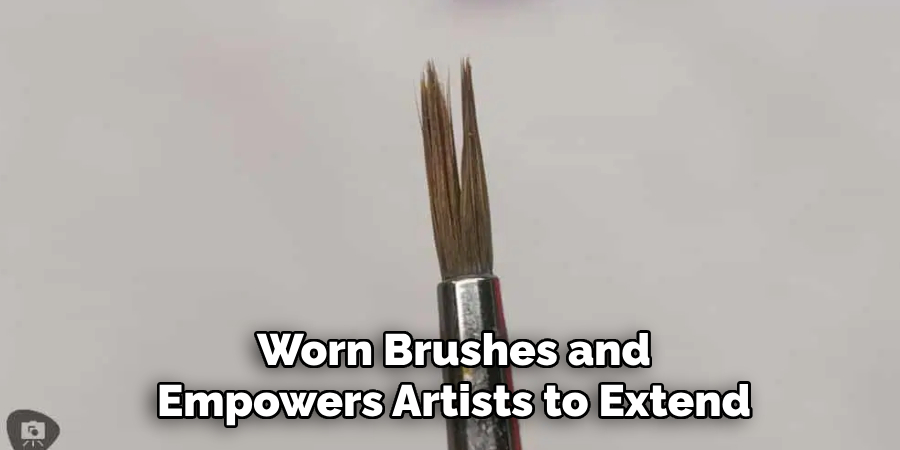
Identifying frayed bristles is the first step in addressing brush damage. When examining a paintbrush for signs of wear, look for bent, split, or uneven hairs that may cause irregular paint application. Bent bristles can indicate mishandling or improper storage, while split or uneven bristles suggest long-term wear from rough surfaces or intense use.
Common causes of frayed bristles include improper cleaning techniques, such as leaving paint to dry in the bristles or using harsh cleaning solutions that weaken the fibers. Additionally, incorrect drying methods, like leaving brushes upright with weight on the bristles, can lead to deformation. Choosing the wrong brush type for certain paints or surfaces can also contribute to fraying, as the bristles are not designed to withstand the specific textures or consistencies involved.
Assessing the severity of the fraying is crucial in deciding the best course of action. In less severe cases, where only a few bristles are affected, the brush can often be repaired with simple techniques. However, if the fraying is extensive with significant bristle loss or damage, replacing the brush might be the more effective and economical option.
Preparing the Brush for Repair
Proper preparation is vital before attempting any repair on a frayed paintbrush. The initial step involves cleaning the brush thoroughly to eliminate all traces of paint residue. For brushes used with water-based paints, using soap and warm water is effective; simply work the soap into the bristles, rinse well, and repeat until no color bleeds out. Mineral spirits can dissolve and remove any lingering paint from brushes used with oil-based paints. It is essential to swirl the brush gently in the solvent rather than pressing against the container, which could further damage the bristles.

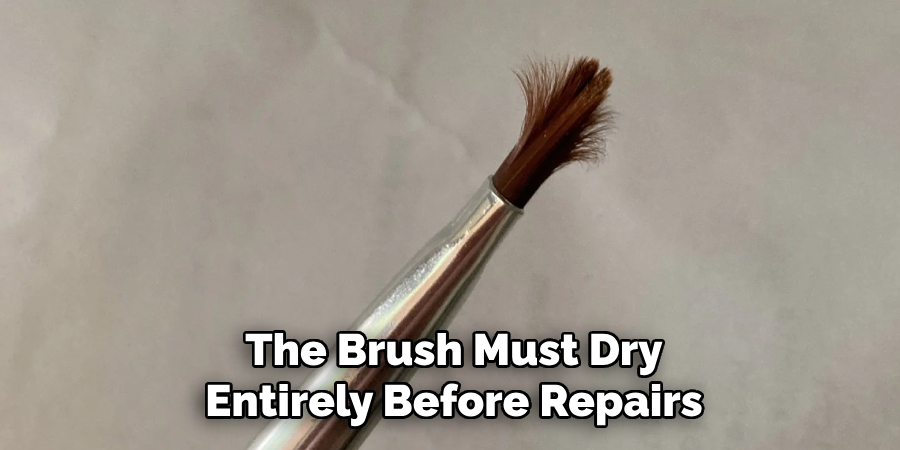
Once cleaning is complete, the brush must dry entirely before repairs. Moisture can affect the adhesion of any reshaping gels or hinder precise trimming, making it crucial to lay the brush flat or hang its bristles down to air dry fully. Finally, gather the necessary tools for fixing frayed brushes. A pair of sharp scissors can be used to trim any split ends, while a fine-toothed comb is useful for detangling and aligning the bristles. Additionally, a brush reshaping gel can aid in maintaining the brush’s form. Having these items ready streamlines the repair process, ensuring efficient and effective restoration of the paintbrush.
How to Fix Frayed Paint Brushes: Methods for Fixing Frayed Paint Brushes
Method 1: Trimming the Bristles
Trimming the bristles is one of the simplest methods for restoring a frayed paintbrush. Start by examining the brush to identify any split or excessively bent bristles affecting your brush strokes. Sharp scissors are used for the task, as they provide precision to restore a clean edge. For flat brushes, carefully snip small amounts from the outer fringes to maintain a straight line, ensuring you don’t cut too much and alter the shape needed for your painting technique. Round brushes require a more gentle touch, typically trimming around the circumference to preserve the tapered tip essential for detailed work. Remember, less is more when trimming, as cutting too much can affect the brush’s performance significantly.
Method 2: Comb and Brush Reshaping
A fine-toothed or specialized brush comb can work wonders for detangling and aligning frayed bristles. Begin by gently holding the brush in one hand, and with the comb in the other, start at the base of the bristles. Run the comb smoothly from the base to the tip, applying even pressure to straighten the bristles without pulling too hard. This technique is particularly helpful in realigning misbehaving bristles and eliminating knots that may have formed. Repeat this process several times for best results, and focus on being as delicate as possible to avoid further damage.

Method 3: Soaking in Hot Water
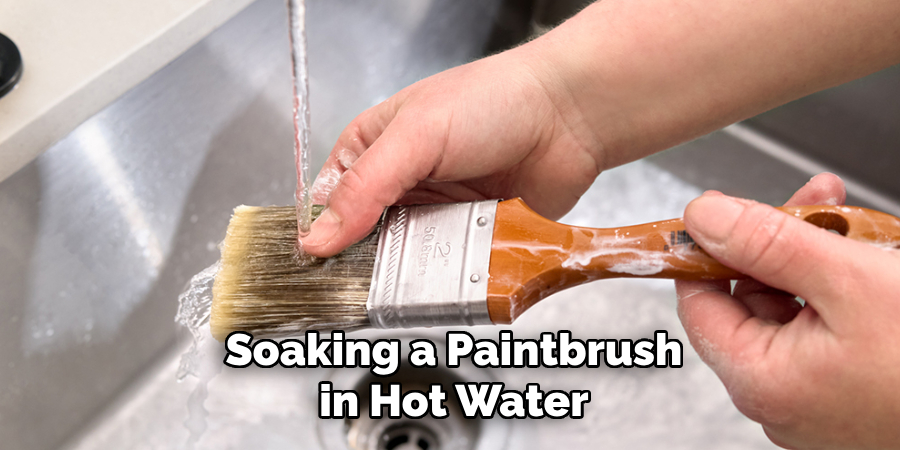
Soaking a paintbrush in hot water effectively relaxes the bristles, allowing them to be reshaped. Begin by filling a container with hot (but not boiling) water and immerse the bristles completely. Let the brush soak for several minutes to soften the bristles. As the bristles become pliable, shape them using your fingers or a comb, directing them into the desired form. This is particularly useful for stubborn brushes that have become misshapen due to improper storage or cleaning. Once you’ve achieved the desired shape, remove the brush from the water and let it cool in its new shape, laying it flat or hanging it bristles down to dry completely. This step helps the brush retain its corrected form.
Method 4: Using Brush Shaping Gel
Applying a brush-shaping gel or conditioner is a beneficial way to maintain the bristles’ shape and prevent future fraying. After cleaning and drying the brush, apply a small amount of gel to the bristles, ensuring even distribution from base to tip. Mold the bristles into their original shape with your fingers, encouraging them to hold form during painting sessions. Once shaped, let the brush dry naturally, which allows the gel to harden slightly, giving the bristles stronger structural support. Regular application of shaping gel can prolong the life of your brushes by keeping fibers aligned and reducing the chance of fraying over time.
Preventive Measures to Avoid Fraying
Implementing preventive measures is crucial to prolong the life of your paintbrushes and prevent fraying. Begin with proper cleaning techniques; avoid harsh chemicals and remove all paint residue after each use. Warm, soapy water works well for water-based paints, while mineral spirits are best for oil-based paints. Thorough rinsing is key and refrain from pressing bristles against surfaces during cleaning. Storing brushes correctly is equally important. Lay them flat or hang the bristles down to dry completely, preventing any weight or pressure that may cause bending or deformation.

Use protective sleeves or caps to shield bristles from dust and damage. Using the right brush for the job is imperative; match the brush type to the paint and surface, considering factors like bristle texture and paint consistency, to minimize unnecessary stress. Finally, conduct regular maintenance by inspecting your brushes for signs of wear and tear. Timely repairs, such as trimming split ends or applying shaping gel, extend their usability. Performing these checks ensures your brushes remain in top condition, ultimately enhancing their performance and longevity in your artistic endeavors.
When to Replace a Frayed Brush
Repairing or replacing a frayed brush involves considering its condition and effectiveness. Economically, if repeated repairs fail to restore the brush to functional form or if the cost of repairs outweighs the price of a new brush, replacing it may be the better option. Severely damaged brushes may exhibit persistent issues like split ends or loose bristles, compromising precision and paint application, even after attempted repairs. Replacement offers a fresh start and improved performance for those seriously impaired brushes. When selecting new brushes, prioritize quality over cost.
Opt for brushes crafted from materials like sable or high-grade synthetic fibers, known for their durability and ability to hold shape. Consider the brush design, such as a comfortable handle and secure ferrule, ensuring the new tool meets your artistic needs and lasts longer, reducing future replacement frequency.
Frequently Asked Questions (FAQs)
1. How Can I Identify if A Paintbrush Is Too Frayed to Be Repaired?
A paintbrush may be too frayed to repair if it consistently loses bristles, has multiple split ends, or fails to maintain its shape even after multiple attempts at restoration. If these conditions persist despite using methods like trimming or reshaping, it might be time to consider a replacement.
2. What Types of Protective Sleeves or Caps Are Recommended for Storing Paintbrushes?
Protective sleeves or caps made from breathable materials that do not crush the bristles are ideal. Look for silicone or rubber sleeves designed specifically for brushes, as these materials gently keep the bristles in place without trapping moisture, which can lead to mold.

3. How Often Should I Inspect My Paintbrushes for Signs of Wear and Tear?
Regular inspection is key to maintaining brush quality. Check your brushes each time before a painting session. Frequent usage warrants more frequent checks, possibly every few weeks, to address minor issues before they lead to significant damage.
4. Are There Any Alternatives to Brush-Shaping Gel that Can Help Maintain Bristle Shape?
Yes, alternatives to brush-shaping gel include hair conditioner or mild soap, which can act as a temporary solution for maintaining a bristle shape. After cleaning the brush, apply a small amount and shape the bristles with your fingers, then rinse thoroughly before the next use. These alternatives help in giving structure to the bristles when shaping gel is unavailable.
Conclusion
In conclusion, mastering how to fix frayed paint brushes is an essential skill for any artist seeking to maintain the quality of their tools and enhance their painting outcomes. We explored several effective methods, such as trimming split bristles, using combs for realignment, soaking hot water for reshaping, and applying brush shaping gel to preserve and restore brushes. Each technique breathes new life into worn brushes and empowers artists to extend their usability, thus saving resources.
By committing to diligent care and regular maintenance, including proper cleaning and storage practices, you can substantially prolong the life of your brushes. There is immense satisfaction in rescuing a cherished brush with simple DIY repairs and witnessing its performance revived. Ultimately, investing time in brush maintenance ensures you consistently achieve the finest artistic expression possible.
Toby Rede is a professional potter focused on creating functional and artistic ceramics. His work blends natural textures with modern forms, often inspired by sustainable gardening and outdoor environments. Toby’s pottery emphasizes both utility and beauty, reflecting his philosophy of intentional craftsmanship. On the blog, he shares insights on integrating handmade objects into everyday life.
Education
- Associate Degree in Ceramic Technology, Alfred University
Professional Focus
- Pottery creation with a focus on functionality and artistic expression
- Techniques exploring texture, glazing, and sustainable materials
Professional Accomplishments
- Work featured in regional art shows and garden exhibitions
- Collaborations with local craft fairs and home decor shops

