

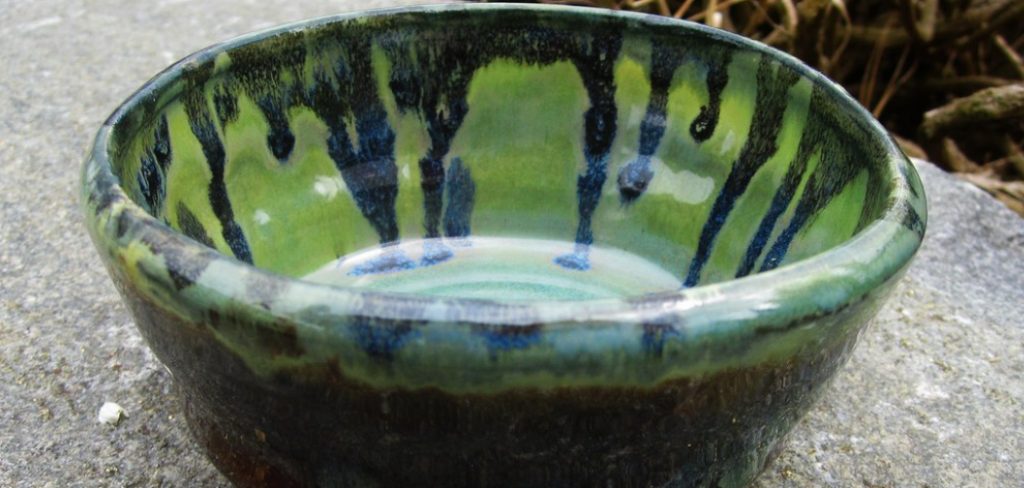
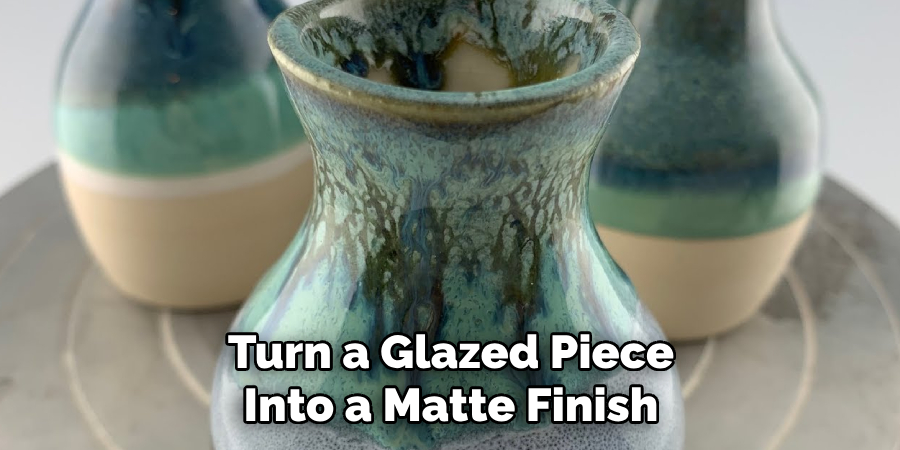
Ceramic glazing is a process that involves applying a layer of liquid glass over ceramic pottery and then firing it in a kiln. This results in a glossy finish, which is often desired by potters for its attractive and durable nature. However, sometimes the desired outcome is not always achieved, and instead of a shiny surface, a matte or satin-like finish is produced. This may be due to a variety of reasons such as the type of glaze used, firing temperature, or application technique.
In this guide, we will discuss how to turn a glaze matte on ceramic, and provide tips for achieving a consistent and desirable finish, and troubleshoot any issues that may arise.
Tools and Materials You Will Need to Turn a Glaze Matte on Ceramic
- Ceramic pieces to be glazed
- Glaze of your choice (matte or satin)
- Kiln
- Gloves and safety glasses
- Brushes or sponges for applying the glaze
- Wax resist (optional)
- Sandpaper or steel wool (optional)
- Glaze sprayer (optional)
Step-by-step Guidelines on How to Turn a Glaze Matte on Ceramic
Step 1: Choose the Right Glaze
The first step in achieving a matte finish on your ceramic pieces is choosing the right glaze. Matte and satin glazes are specially formulated to produce a non-glossy finish, unlike traditional glossy glazes. They contain materials that create a more diffused reflection of light, resulting in a softer, velvety appearance.
You can purchase ready-made matte and satin glazes from ceramic supply stores, or you can make your own using a base glaze and adding matte ingredients such as silica, talc, or alumina.
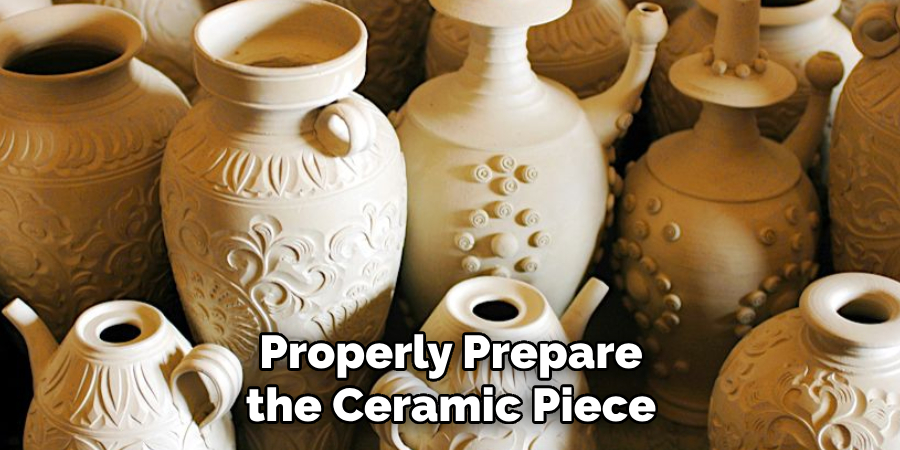
Step 2: Prepare Your Ceramic Pieces
Before applying the glaze, it is essential to prepare your ceramic pieces properly. Make sure they are completely dry and free of any dust or debris. You can use a damp sponge or cloth to wipe them clean, and then allow them to air dry completely. Preparing your pieces will ensure that the glaze adheres evenly and produces a smooth finish.
Step 3: Apply the Glaze
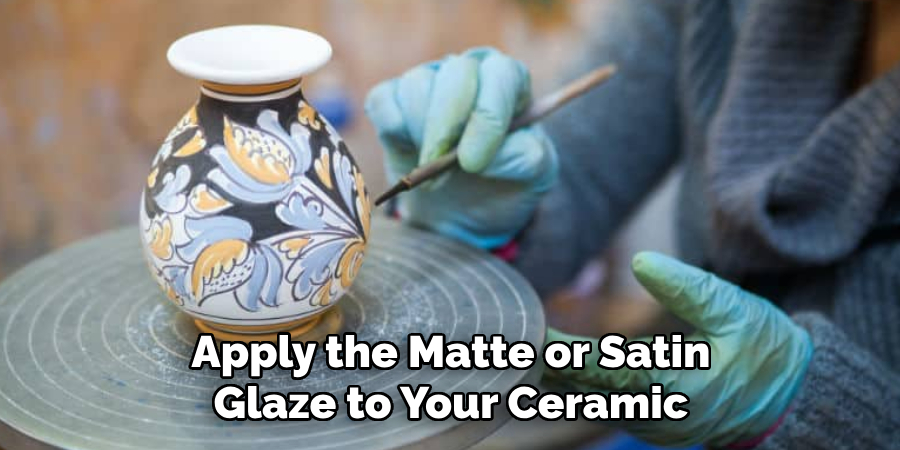
Using gloves and safety glasses, apply the matte or satin glaze to your ceramic piece using a brush, sponge, or sprayer. Make sure to follow the manufacturer’s instructions for application techniques and thickness.
For best results, it is recommended to apply two to three coats of glaze, allowing each coat to dry before applying the next one. While applying the glaze, be careful not to leave any brush marks or uneven areas.
Step 4: Apply Wax Resist (Optional)
If you want to add a decorative design or pattern to your ceramic piece, you can use wax resist. This is a liquid wax that prevents the glaze from adhering to specific areas of the pottery. You can apply it before or after the glaze, depending on your desired outcome. Applying it before the glaze will create a design with exposed clay while applying it after the glaze will leave a glossy design on top of the matte or satin finish.
Step 5: Fire in the Kiln
Once your piece is completely glazed and dried, it is ready to be fired in the kiln. Follow the firing schedule recommended by the glaze manufacturer to ensure the best results. Firing temperatures and times may vary depending on the type of glaze used, so it is essential to read the instructions carefully.
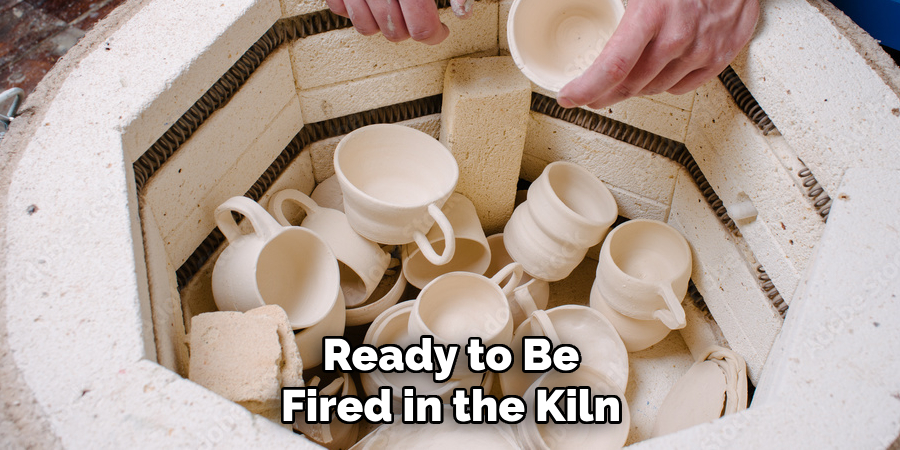
After firing, allow your piece to cool down before handling. If you want to achieve a more matte finish, you can try firing at a lower temperature or for a shorter duration. Make sure to test different firing schedules on smaller pieces before applying them to larger ones.
Step 6: Finishing Touches (Optional)
If you are not satisfied with the level of matte or satin finish achieved, you can lightly sand the surface using sandpaper or steel wool. This will create a smoother and more polished appearance. However, be careful not to sand too much, as this can remove the glaze and expose the clay underneath. Make sure to wear a mask and work in a well-ventilated area when sanding.
Following these steps will help you turn a glazed matte on ceramic and achieve the desired finish for your pottery pieces. It is essential to experiment with different types of glazes, application techniques, and firing schedules to find what works best for you. Remember, practice makes perfect, so don’t be afraid to try new things and have fun with the process! Happy glazing!
Additional Tips and Tricks to Turn a Glaze Matte on Ceramic
- If you want a more satin or semi-gloss finish, you can try adding a small amount of silica to your glaze recipe. Silica is known for creating a softer, less shiny surface.
- To achieve a crackled effect on your matte glaze, you can mix in some fine-grained manganese dioxide. This will create small cracks and texture on the surface of your ceramic piece.
- Another method to create a matte finish is by using a glaze with a larger particle size. This will give your ceramic piece a more textured and rough appearance, perfect for achieving a rustic or earthy look.
- If you are working with low-fire clay, you can achieve a matte finish by reducing the amount of flux in your glaze recipe. This will decrease the glaze’s ability to melt and create a glossy surface.
- Experiment with different firing temperatures and schedules when working with matte glazes. Sometimes, a slight variation in temperature or length of time in the kiln can drastically change the appearance of your glaze.
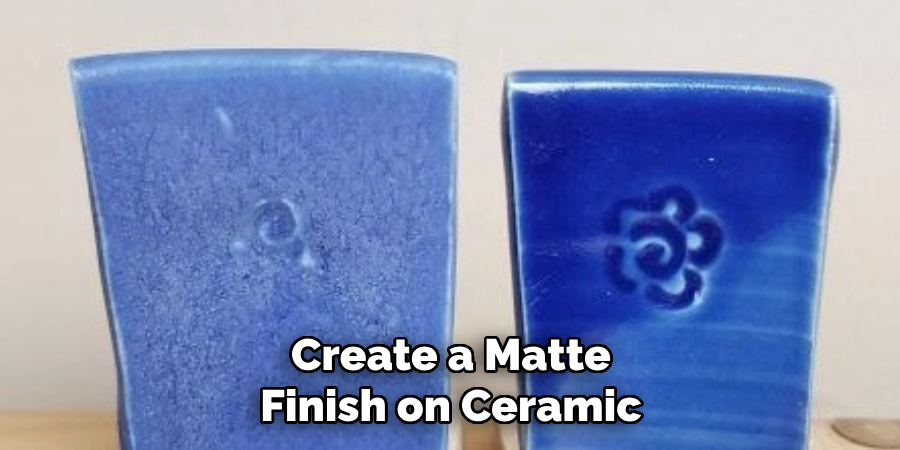
- Keep in mind that certain colors tend to appear more matte than others. For example, darker colors like black or navy blue may have a more matte finish compared to brighter colors like yellow or pink.
- To add depth and dimension to your matte glaze, you can try layering it with a glossy glaze. Apply the matte glaze first and then add a layer of glossy glaze on top. The contrasting finishes will create an interesting visual effect.
- Matte glazes also tend to look different on different types of clay bodies. Experiment with different clay bodies, such as stoneware or porcelain, to see how your matte glaze reacts and looks.
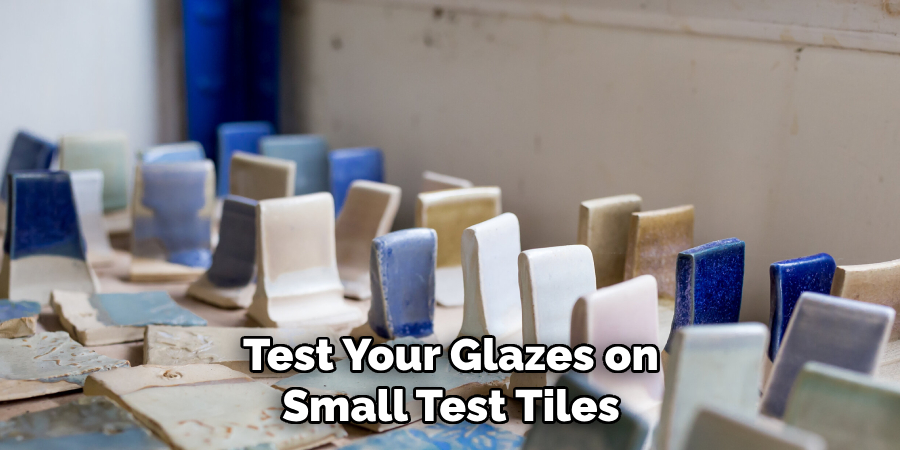
- It is important to test your glazes on small test tiles before applying them to your ceramic pieces. This way, you can make adjustments and fine-tune your recipe before committing to a larger piece.
- Lastly, don’t be afraid to mix and match different techniques and glaze recipes to achieve your desired matte finish.
Following these tips and tricks can help you achieve a variety of matte finishes on your ceramic pieces. Remember to always experiment and have fun with the process! So, go ahead and explore the world of matte glazes and see what unique effects you can create. Happy glazing!
Things You Should Consider to Turn a Glaze Matte on Ceramic
1. The first thing you should consider when trying to turn a glazed matte on ceramic is the type of clay body you are using. Different types of clays have different properties, which can affect the outcome of your glaze. For example, high-iron clays tend to produce more vibrant colors and shinier surfaces, making it difficult to achieve a matte finish.
2. Another important factor to consider is the type of glaze you are using. Some glazes naturally give a matte finish, such as matt or satin glazes, while others require additional additives or techniques to achieve a matte look.
3. Adding a matting agent to your glaze can also help in creating a matte finish on ceramic. These agents, such as silica or kaolin, work by creating tiny imperfections on the surface of the glaze, scattering light and reducing glossiness. It’s essential to experiment with different amounts of matting agents to achieve the desired level of matte.
4. The firing temperature and atmosphere also play a significant role in turning a glazed matte. Higher firing temperatures and oxidizing atmospheres tend to produce shinier surfaces, while lower temperatures and reducing atmospheres can create a matte finish.
5. It’s crucial to test your glazes before applying them to your ceramic pieces. This will allow you to see how each glaze responds to different firing temperatures and types of clay bodies, giving you an idea of the best way to achieve a matte finish.
6. Additionally, consider using layering techniques to create a matte finish on your ceramic pieces. By layering different glazes or applying multiple coats of the same glaze, you can achieve unique and subtle variations in the matte effect.
7. Surface texture is another factor to keep in mind when trying to create a matte finish on ceramic. Rougher textures tend to diffuse light more effectively, resulting in a more pronounced matte look.
8. Lastly, be patient and persistent in your experimentation with turning a glazed matte on ceramic. It may take several tests and adjustments to achieve the desired result, but the result will be worth it. Remember that practice makes perfect, so keep trying new techniques and methods until you find the perfect matte finish for your ceramic pieces.
Following these considerations, you can successfully turn a glazed ceramic matte and create unique and stunning pieces of art. With the right combination of materials and techniques, you can achieve a smooth or textured matte finish that will add depth and character to your ceramics. Keep exploring and experimenting, and don’t be afraid to try new things to find your signature matte style. Happy glazing!
Troubleshooting Common Issues to Turn a Glaze Matte on Ceramic
1. Pinholes or Bubbles:
One common issue when turning a glazed matte is the appearance of pinholes or bubbles on the surface of the ceramic piece. This can be caused by a variety of factors such as improper application, trapped air, or impurities in the glaze.
To troubleshoot this issue, start by ensuring that you are applying the glaze correctly. Make sure to mix it thoroughly and apply it evenly, avoiding missed spots or excessive thickness. If bubbles are forming during the application, try tapping the piece gently to release any trapped air. Additionally, check your glaze for any impurities and strain it if necessary before use.
2. Cracking or Crazing:
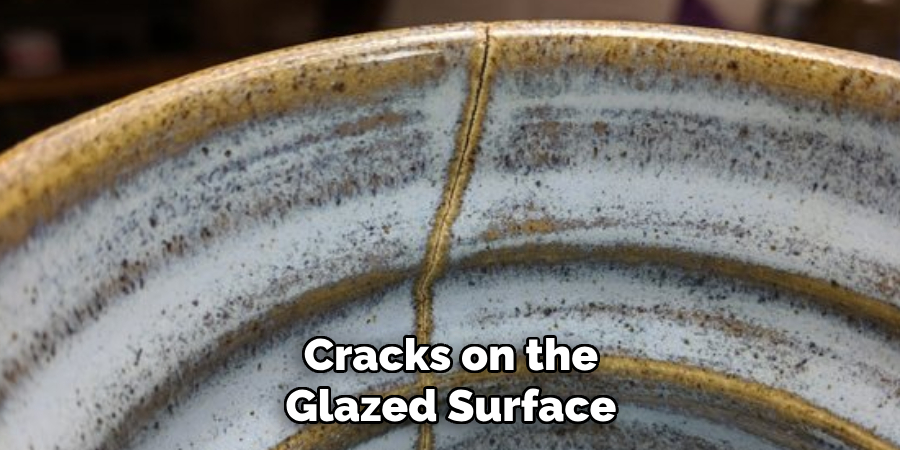
Cracks or small hairline cracks on the glazed surface, known as crazing, can also occur when trying to turn a glazed matte. This can be due to the mismatch of thermal expansion between the clay and glaze, inadequate firing temperature or time, or improper cooling.
To troubleshoot this issue, first, check your firing temperature and time to ensure they are appropriate for the clay and glaze used. If this is not the issue, try adjusting the cooling process by slowing it down or using a different kiln shelf material. It is also essential to choose glazes that have similar thermal expansions as the clay body to prevent cracking or crazing.
3. Uneven Matte Finish:
Another common issue when turning a glazed matte is an uneven finish, with some areas appearing glossy while others have the desired matte look. This can be caused by inconsistent application or thickness of the glaze.
To troubleshoot this problem, make sure to apply the glaze evenly and consistently across the entire piece. You may also need to adjust your glaze’s thickness by adding water or using a different application method to achieve a more uniform finish. Additionally, consider experimenting with different firing temperatures and times to see if this affects the appearance of the glaze.
Following these troubleshooting tips can help you overcome common issues when trying to turn a glazed piece into a matte finish. However, every ceramic piece is unique, and it may take some trial and error to find the perfect technique for achieving your desired results.
Don’t be afraid to experiment and learn from any mistakes along the way. With patience and practice, you will be able to master the art of turning a glazed matte on ceramic pieces. So keep practicing and have fun creating beautiful, matte ceramic pieces! Happy glazing!
Precautions Need to Be Followed for Turning a Glaze Matte on Ceramic
1. First and foremost, it is important to note that the process of turning a glazed matte on ceramic requires expertise and experience. It is not recommended for beginners or inexperienced individuals to attempt this process as it involves certain risks and can result in undesirable outcomes.
2. Before beginning the process, it is essential to have all the necessary tools and materials on hand. This includes a kiln, glaze materials, a scale for accurate measurements, a brush or sprayer for application, and safety equipment such as gloves and goggles.
3. It is important to carefully read the instructions provided by the manufacturer of the glaze materials. Different brands may have different methods or ratios for achieving a matte finish. Following their recommended guidelines will help ensure success.
4. Before applying the glaze, it is crucial to properly prepare the ceramic piece. This includes cleaning it thoroughly to remove any dirt or debris and ensuring that the surface is smooth and free of any cracks or imperfections.
5. When handling glaze materials, it is important to take necessary safety precautions. Wear protective gloves and goggles to avoid direct contact with the materials, as they may contain harmful chemicals.
6. When applying the glaze, it is important to do so in a well-ventilated area. The fumes from the glaze can be harmful if inhaled, so proper ventilation is necessary.
7. For best results, it is recommended to apply multiple thin coats of glaze rather than one thick coat. This will help achieve a more even and consistent matte finish.
8. After applying the glaze, carefully place the ceramic piece in the kiln according to its recommended firing temperature and duration. It is important to closely monitor the kiln during this process to ensure that the desired matte finish is achieved without any mishaps.
Following these precautions will help ensure a successful outcome when turning a glazed matte on ceramic. It is important to take the time and effort to properly prepare, apply, and fire the glaze to achieve the desired result. Don’t hesitate to seek advice from experienced potters or ceramic artists if needed, as their expertise can be invaluable in this process.
With careful attention and patience, a beautiful matte finish can be achieved on your ceramic pieces. So, keep practicing and experimenting with different techniques to perfect your skills in turning glaze matte on ceramic. Happy potting!
Conclusion
Now you know how to turn a glaze matte on ceramic and pottery. It’s important to remember that every glaze and firing process is unique, so you may need to experiment with different combinations of ingredients and temperatures to achieve your desired matte finish. Additionally, always make sure to thoroughly test a new glaze on a small piece before using it on a larger project.
In conclusion, creating a matte finish can add depth and texture to your ceramic and pottery pieces, enhancing their overall aesthetic. The process may require some trial and error, but the result will be worth it. Keep practicing and experimenting with different techniques to find your perfect matte glaze!
Additionally, don’t be afraid to ask for advice from other potters or attend workshops to learn more about creating matting finishes. With time and patience, you’ll become a master at creating stunning matte finishes on your ceramic and pottery pieces. Happy glazing!
Toby Rede is a professional potter focused on creating functional and artistic ceramics. His work blends natural textures with modern forms, often inspired by sustainable gardening and outdoor environments. Toby’s pottery emphasizes both utility and beauty, reflecting his philosophy of intentional craftsmanship. On the blog, he shares insights on integrating handmade objects into everyday life.
Education
Associate Degree in Ceramic Technology, Alfred University
Professional Focus
Pottery creation with a focus on functionality and artistic expression
Techniques exploring texture, glazing, and sustainable materials
Professional Accomplishments
Work featured in regional art shows and garden exhibitions
Collaborations with local craft fairs and home decor shops