

Making clay mugs by hand is a rewarding craft that combines creativity and functionality, allowing you to design unique pieces that reflect your personal style. Handcrafting a clay mug not only results in a custom, one-of-a-kind item but also offers the joy and satisfaction of creating something with your own hands. Beyond aesthetics, handmade clay mugs are practical, durable, and can be tailored for specific purposes, such as serving your favorite beverage or gifting to a loved one.
This article provides a comprehensive guide on how to make clay mugs by hand, breaking down each step from material preparation to the final firing process. Whether you’re a beginner or looking to refine your skills, you’ll find helpful tips and techniques to help you craft your clay mug confidently and easily.
Materials and Tools Needed
Before starting your project, gathering the right materials and tools is vital to ensure a smooth crafting process. Below is a list of essential materials and tools needed to make your handmade clay mug.
Essential Materials
- Clay (earthenware, stoneware, or porcelain): Choose your clay type based on the desired look, texture, and durability of your mug.
- Water: Used for smoothing and sealing edges as you shape your mug.
- Underglazes or glazes: These are applied for decoration and to achieve a finished, glossy appearance.
- Kiln: A vital piece of equipment for firing the clay to harden it.
- Pottery wheel (optional): Useful for shaping the mug if you prefer wheel-throwing. Alternatively, handbuilding tools can be used.
Tools You’ll Need
- Rolling pin: Used to flatten the clay evenly for handbuilding.
- Pottery knife or carving tool: Essential for cutting, shaping, and refining your design.
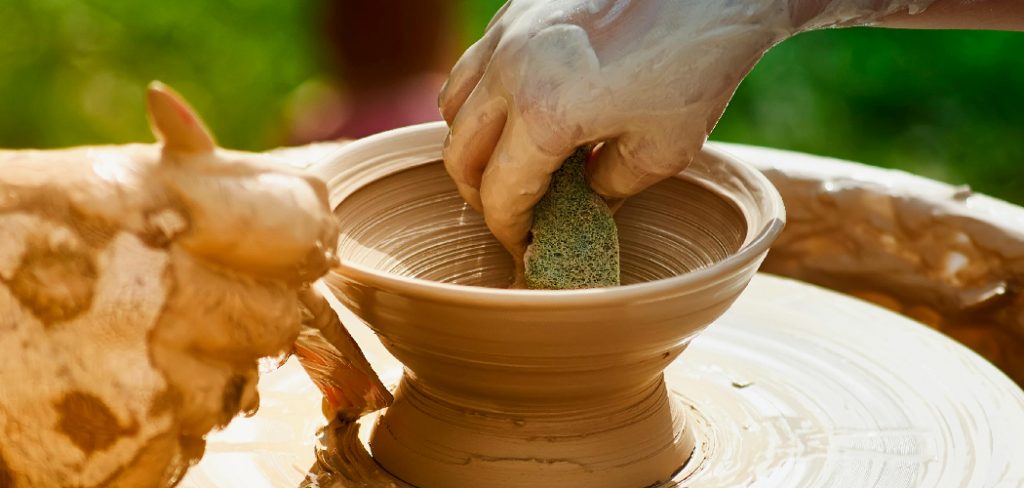
- Sponge: Helps smooth the surface of the clay and eliminate imperfections.
- Brush: For precise application of glazes or decorative details.
- Pin tool or needle: Great for creating intricate textures or fine details.
- Wooden rib tool: Very useful for shaping and smoothing the clay surface during the building process.
With these materials and tools ready, you can start crafting your unique clay mug!
Choosing the Right Clay
Selecting the appropriate clay is a crucial step in crafting a clay mug. The type of clay you choose will influence both the crafting process and the final product’s appearance and functionality.
Clay Types for Mugs
- Stoneware Clay: This is a popular mug choice due to its durability and ease of use. It fires to a dense, non-porous finish, making it ideal for practical, everyday items like mugs.
- Porcelain Clay: Known for its fine-grained and smooth texture, it is perfect for delicate or refined designs. While slightly more challenging to handle, it produces a high-end, elegant finish.
- Earthenware Clay: Though less durable than stoneware or porcelain, it provides excellent options for creating decorative pieces or rustic-style mugs. It remains porous unless fully glazed and is ideal for artistic designs.
Clay Color and Texture
Consider whether you want the natural beauty of the clay to shine through or if you plan to add color later during glazing. Different clays offer various hues, from earthy browns to pure whites. Additionally, assess the smoothness and workability of the clay; smoother clays are typically easier to hand-build and manipulate, which can benefit beginners.
Preparing the Clay
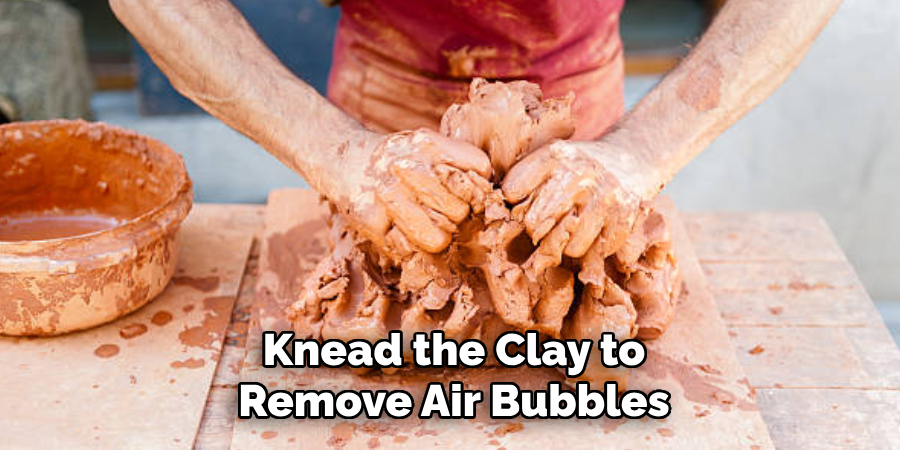
Step 1: Kneading the Clay
Knead the clay to remove air bubbles and make it pliable. This is a crucial step to prevent cracking during firing. Use the “wedge” technique by pressing down and folding the clay repeatedly while rotating it. This process ensures an even consistency and eliminates trapped air, which can cause issues during the firing process.
Step 2: Rolling Out the Clay
Use a rolling pin to flatten the clay to your desired thickness, typically between 1/4 to 1/2 inch. Place guide sticks on either side of the clay to help maintain an even thickness. An even slab is crucial for avoiding uneven drying or firing, which can lead to warping or cracks. Smooth out any irregularities or air pockets as you roll.
Step 3: Cutting the Mug Shape
Using a template or freehand technique, cut out the shape of your mug’s body from the rolled-out clay. Typically, this will be a rectangular piece serving as the mug’s walls. Cut out a circle for the base that fits snugly with the bottom of your mug’s body. Pay attention to the edges, ensuring that all cuts are smooth and even to simplify later assembly and achieve a professional finish.
How to Make Clay Mugs by Hand Shaping the Mug
Step 1: Forming the Body of the Mug
Roll the cut clay into a cylinder by gently rolling the edges together and smoothing the seam. Use your fingers and a wooden rib tool to smooth the sides and base, giving it a clean and even shape. Take your time to ensure the seam is fully blended with the rest of the body, as this will contribute to the strength and durability of the finished mug.
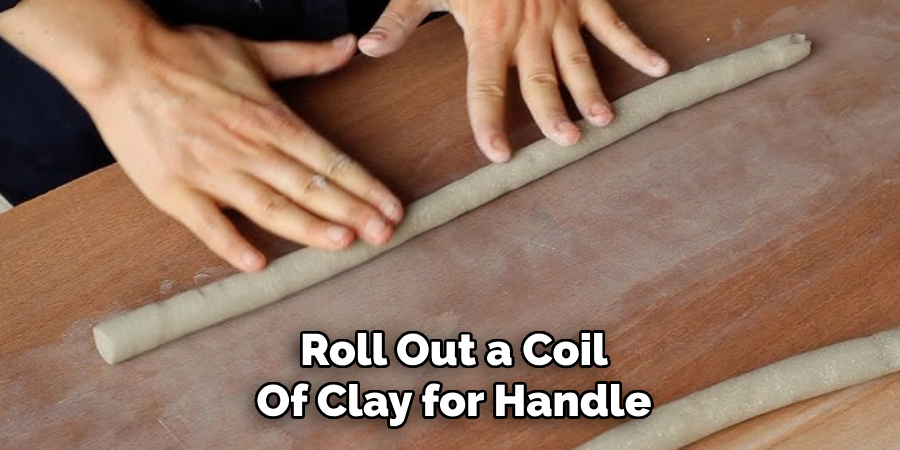
Step 2: Shaping the Handle
Roll out a coil of clay for the handle, ensuring that it is uniform in thickness and free of cracks. Shape it into a smooth, even curve that will fit comfortably in your hand. Carefully measure the handle to match the size of the mug for proper balance. To attach the handle, score the areas where the handle and mug body will meet by creating small crosshatch marks with a needle tool. Apply water or slip to these areas to help the clay pieces adhere securely. Press the handle into place, ensuring it is firmly attached while maintaining its comfortable curve.
Step 3: Smoothing and Refining the Shape
Use a damp sponge or soft cloth to smooth out any rough edges on the body and handle, blending them seamlessly with the rest of the mug. Pay close attention to the mug’s rim, ensuring it is comfortable to drink from, and refine the handle placement to optimize comfort when holding. This step is crucial for both aesthetics and functionality.
Drying and Firing the Clay
Step 1: Drying the Mug
Allow the freshly shaped mug to dry slowly by placing it on a drying rack in a cool, dry area. This prevents premature drying, which could lead to cracking or warping. Monitor the mug regularly to check that it is drying evenly. If the mug becomes deformed, gently reposition or flip it to promote consistent drying. Avoid exposure to direct sunlight or heat, as this may cause the clay to dry unevenly and crack.
Step 2: Bisque Firing
Once the mug is completely dry, it is ready for the bisque firing process. This involves placing the mug in a kiln and firing it at a bisque temperature, usually ranging between 1,800°F and 1,900°F (982-1,038°C). During bisque firing, the clay transforms, becoming hard but still porous enough to absorb glaze. This crucial step strengthens the mug, ensuring it can withstand the glazing and final firing stages. Always allow the kiln to cool completely after firing before removing the mug to prevent any cracks or thermal shock.
Glazing and Decorating the Mug
Step 1: Choosing Your Glaze
Select a glaze color or underglaze that aligns with your artistic vision and the intended use of the mug. Glazes come in various finishes, such as transparent, opaque, matte, or glossy, each offering a unique aesthetic. Explore different glazing methods, such as dipping the mug into a bucket of glaze, brushing on layers with a soft brush, or even spraying for a smoother application. Take your time to experiment with techniques to achieve the desired look.
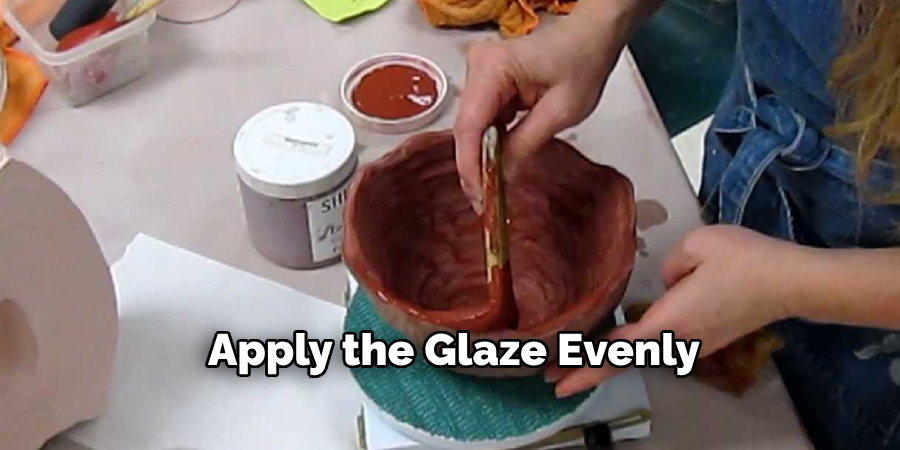
Step 2: Applying the Glaze
Once the bisque-fired mug has completely cooled, gently clean off any dust or residue with a damp sponge to prepare the surface for glazing. Apply the glaze evenly across the entire surface of the mug, including the handle, paying attention to create a uniform layer to prevent pooling or uneven textures. For added creativity, incorporate decorative patterns or textured designs. This can be achieved through carving, stenciling, or painting with a contrasting glaze to add depth and character to your mug.
Step 3: Firing the Glazed Mug
After the glaze has dried completely, the mug is ready for its final firing. Place the glazed mug carefully in the kiln, and fire it at a higher temperature, usually between 2,100°F and 2,300°F (1,149-1,260°C). This step vitrifies the glaze, creating a smooth, waterproof, and durable finish. Allow the kiln to cool fully before removing the mug to reveal its completed glossy or textured surface.
Finishing and Final Touches
Step 1: Checking the Mug
After the final firing, carefully inspect the mug for any imperfections such as cracks, uneven glaze, or rough edges. If the base feels rough due to residual kiln shelf marks, lightly sand it with fine-grit sandpaper to ensure a smooth finish. This step enhances the mug’s appearance and ensures that it sits evenly on surfaces.
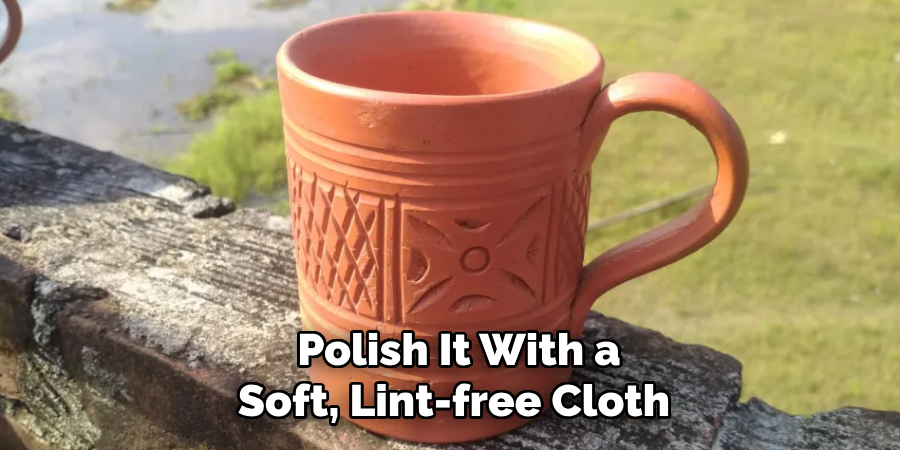
Step 2: Polishing the Mug
To highlight the mug’s craftsmanship, polish it with a soft, lint-free cloth. This will enhance the shine and smoothness of the glaze, giving the piece a professional finish. Polishing is particularly effective for glossy glazes, allowing their vivid colors or textures to stand out fully.
Step 3: Testing the Mug
Finally, fill the mug with water to test for leaks or visible cracks. This functional check ensures the mug is visually appealing, durable, and ready for everyday use.
Conclusion
From preparing the clay to shaping, glazing, and firing, crafting a handmade clay mug is both creative and rewarding. Each step, from molding the form to adding the final touches, presents an opportunity to learn and refine your skills. Practice is key when exploring how to make clay mugs by hand—over time, you’ll master intricate designs and achieve smoother finishes. Don’t hesitate to experiment with various techniques, such as unique glazing styles, handle shapes, or different clay types, to create one-of-a-kind pieces. Enjoy the process and celebrate the joy of handmade craftsmanship!
Toby Rede is a professional potter focused on creating functional and artistic ceramics. His work blends natural textures with modern forms, often inspired by sustainable gardening and outdoor environments. Toby’s pottery emphasizes both utility and beauty, reflecting his philosophy of intentional craftsmanship. On the blog, he shares insights on integrating handmade objects into everyday life.
Education
Associate Degree in Ceramic Technology, Alfred University
Professional Focus
Pottery creation with a focus on functionality and artistic expression
Techniques exploring texture, glazing, and sustainable materials
Professional Accomplishments
Work featured in regional art shows and garden exhibitions
Collaborations with local craft fairs and home decor shops