

Are you looking to take your pottery pieces up a notch with a touch of elegance and luxury? Glazing opulent on pottery is the perfect way to add depth, shine, and sophistication to any piece.
Glazing pottery is more than just a final touch; it’s the application of your creative signature that infuses opulence into your ceramic pieces. This introduction will guide you through the transformative journey of converting an earthy creation into a lustrous and lavish work of art. We’ll explore the selection of the right glaze to complement your piece’s texture and form, techniques to apply it for optimal brilliance, and tips to ensure a rich color and quality finish.
Whether you’re an enthusiastic beginner or a seasoned potter, how to glaze opulent on pottery will elevate your craft and imbue each piece with a sense of luxury.
What is Opulence Glaze?
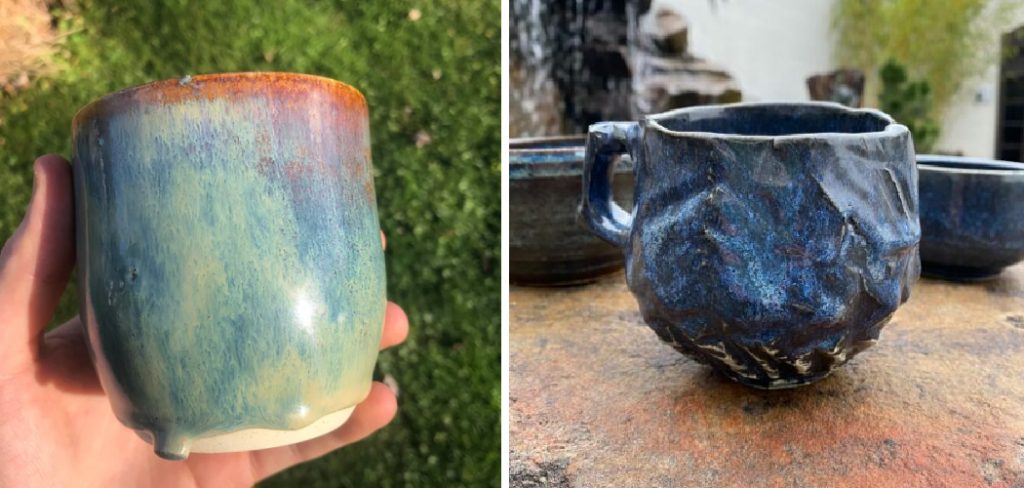
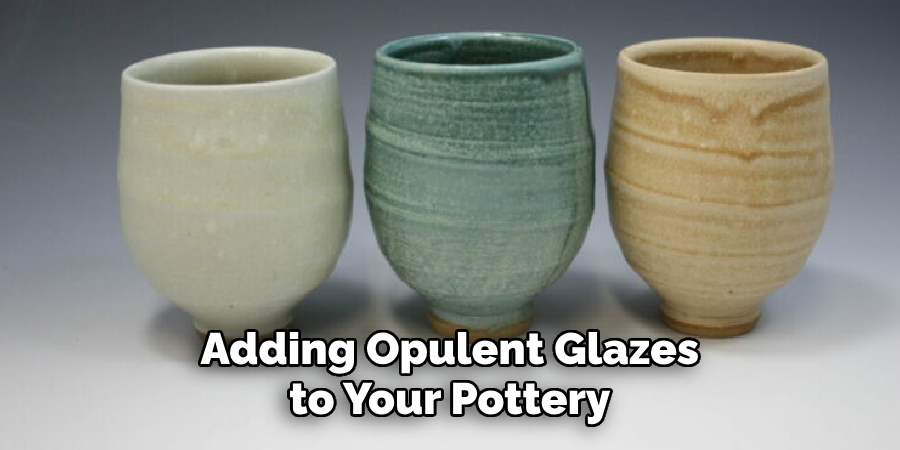
Opulent glaze is a type of glaze that creates a bold and luxurious finish on pottery. It typically has a high gloss or metallic sheen, giving the surface of the pottery a rich and opulent appearance. The glaze itself may contain metallic oxides or special additives to create its unique effect. Opulence glazes are available in various colors and finishes, allowing for endless creative possibilities.
What are the Benefits of Glazing Opulent on Pottery?
Incorporating opulent glazes into your pottery brings a range of benefits that go beyond just aesthetics. Here are some key advantages to consider:
- Adds Depth and Dimension: Glazing with metallic or iridescent colors can create an illusion of depth and enhance the texture of your piece, giving it a multi-dimensional appearance. This can make your pottery stand out and catch the eye of potential buyers or admirers.
- Provides a Protective Layer: Glazes act as a protective layer for your pottery, making it more durable, resistant to scratches and stains, and easier to clean. This is especially important if you plan on using your pieces for functional purposes like serving food or holding water.
- Enhances Color and Shine: Opulent glazes have a lustrous quality that can add a luxurious sheen to your pottery, making it more visually appealing. They also intensify the colors of your piece, giving them a vibrant look.
- Allows for Artistic Expression: Glazing is an art form, and incorporating opulent glazes onto your pottery will enable you to express your creativity and personal style. You can experiment with different colors, techniques, and combinations to create one-of-a-kind pieces that reflect your unique artistic vision.
- Increases Value: Adding opulent glazes to your pottery can increase its value, making it more desirable for collectors or buyers. This is especially true if the glazing is done well and adds to the overall aesthetic and quality of the piece.
These are just some of the many benefits of glazing opulent on pottery. Now, let’s dive into your steps to achieve this stunning technique.
What Will You Need?
Before starting the glazing process, ensure you have all the necessary materials and tools. Here’s an essential list of what you’ll need:
- Pottery Piece: This can be any ceramic creation that has been fired at least once and is ready for glazing.
- Glaze: Choose an opulent glaze that best complements your piece in color and texture. You can also mix different glazes to create unique shades and effects.
- Glazing Tools: These include brushes, sponges, or sprayers for applying the glaze onto your piece.
- Glazing Tongs: These are used to hold your pottery piece while dipping it into the glaze. Make sure they are made with heat-resistant materials and have a secure grip.
- Kiln: A kiln fires and hardens the glaze onto your pottery. Make sure to follow all safety precautions when using a kiln.
Now that you have everything you need, here’s a step-by-step guide on how to glaze opulent on pottery.
10 Easy Steps on How to Glaze Opulent on Pottery
Step 1. Begin with a Clean Surface:
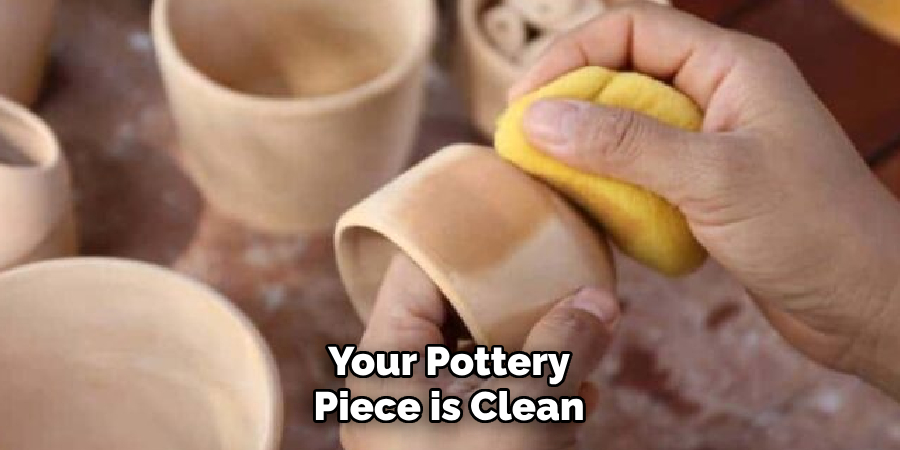
Ensure that your pottery piece is clean and devoid of dust or grease. Wipe the surface with a damp sponge to remove particles that might interfere with glaze adhesion. If your piece has cracks or chips, repair them before glazing.
Step 2. Select Your Glaze:
Choose a high-quality opulent glaze that complements the style and design of your pottery. Consider the final look you desire: a metallic sheen, a glossy finish, or rich, deep colors. Pay attention to the compatibility of the glaze with your clay body and the firing temperature it requires. It’s also beneficial to test your ice on a small sample piece to preview the results before applying it to your main work.
Step 3. Prepare the Glaze:
Mix your glaze thoroughly to ensure an even consistency. If you’re using a powdered glaze, follow the manufacturer’s instructions for mixing it with water. For ready-made glazes, stir well until all settled particles are evenly dispersed. Strain the glaze to remove any lumps that could mar the finished surface if necessary. The glaze must be smooth and homogenous for an even application.
Step 4. Apply Wax Resist (Optional):
If your design requires, apply wax resist to areas you want to keep free from glaze, such as the bottom of your pottery piece, which will sit on the kiln shelf. The wax prevents the glaze from adhering to these sections. Use a brush to carefully apply the wax, and allow it to dry completely before proceeding to the next step. Remember that any area covered in wax will remain unglazed, so use it judiciously to achieve the desired effect.
Step 5. Apply the Glaze:
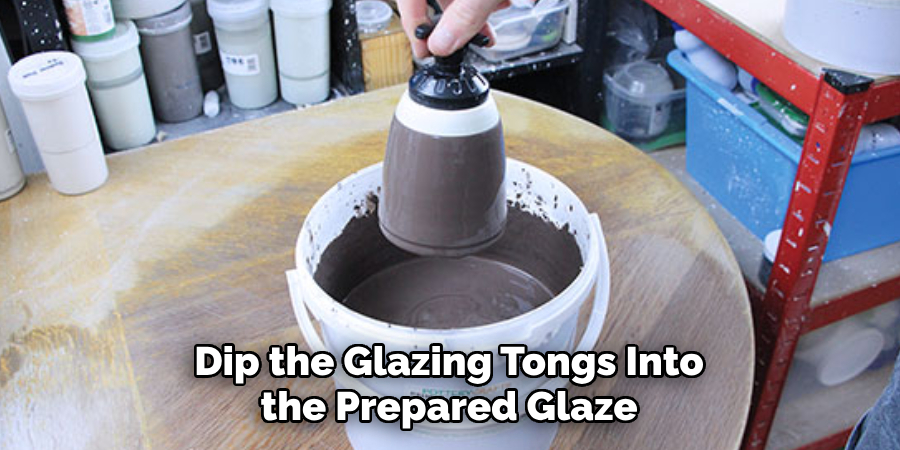
Dip the glazing tongs into the prepared glaze, or use your selected tools to apply the glaze onto the pottery piece. Aim for a uniform coating, ensuring that the glaze is neither too thick, which can cause runs or bubbles, nor too thin, which might diminish the vividness of the color.
Alternatively, you can pour the glaze over the piece or use a brush for more detailed work. Overlap your strokes for even coverage, and avoid letting the glaze pool in crevices unless that’s a part of your design. After application, allow the glaze to dry to the touch before firing.
Step 6. Clean-Up and Touch-Up:
Once the glaze has dried, inspect your piece for any drips, uneven patches, or areas where the glaze may have settled too thickly. Use a damp sponge or a clean, dry brush to smooth out imperfections gently.
Be meticulous with this process to prevent flaws in the final result. If any glaze accidentally covers areas meant to be wax-resist or unglazed, carefully scrape it away with a tool before it dries completely. Touch up any thin spots with additional glaze if necessary, ensuring an even coat throughout.
Step 7. Let the Glaze Dry Completely:
After touch-ups, let the glaze dry thoroughly. This is a critical step; a completely dry ice ensures a smooth firing process and helps avoid any unwanted blisters or defects in the final product. The drying time can vary depending on the thickness of the glaze application and the humidity of your environment, but it typically takes at least 24 hours. Be patient and do not rush this step to guarantee the best results for your opulent glazed pottery.
Step 8. Load Your Kiln:
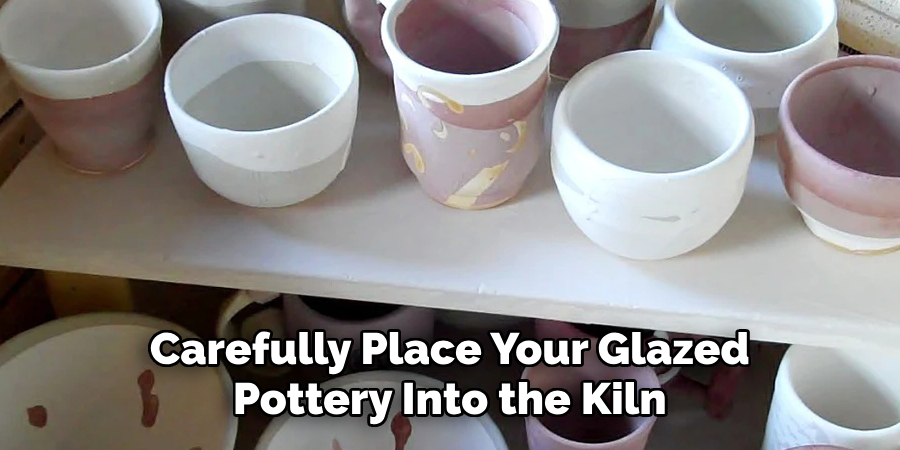
Carefully place your glazed pottery into the kiln, ensuring each piece stands clear of others to avoid sticking during the firing. Load the kiln to promote even air circulation for consistent temperatures throughout. Use kiln posts and shelves as necessary to maximize space and maintain the stability of your pieces.
Check the kiln’s manufacturer guidelines for the recommended firing schedule for your specific glaze, and program the kiln accordingly. Remember that the proper firing temperature and duration are crucial for the maturity of the glaze and the success of your final product.
Step 9. Monitor the Firing Process:
While the kiln does its work, it’s essential to monitor the firing process if possible. Many modern kilns are equipped with electronic controllers that can display the temperature and stage of the firing cycle.
Check periodically to ensure that the kiln is following the set program, and watch out for any error messages or malfunctions. If you have a manual kiln, use pyrometric cones to gauge the inside temperature and progress. This vigilance helps in averting potential mishaps and contributes to achieving a perfectly fired opulent glaze on your pottery.
Step 10. Unload and Inspect Your Pottery:
After the kiln has completed the firing process and has cooled down sufficiently, it’s time to unload your pottery carefully. Make sure to handle each piece with care to avoid any damage. Once unloaded, conduct a thorough inspection of your selections. Look for a consistent glossy finish of the opulent glaze, ensuring no cracking, crazing, or blistering.
Check that the colors have appropriately matured and that the frost has fully fused to the clay body. If there are any imperfections, consider whether they can be embraced as part of the piece’s unique character or if there’s a need for refiring. Remember, every finished work reflects your dedication to the craft and stands as a testament to your artistic vision.
By following these steps, you can confidently create opulent glazed pottery that showcases your style and craftsmanship.
6 Additional Tips and Tricks
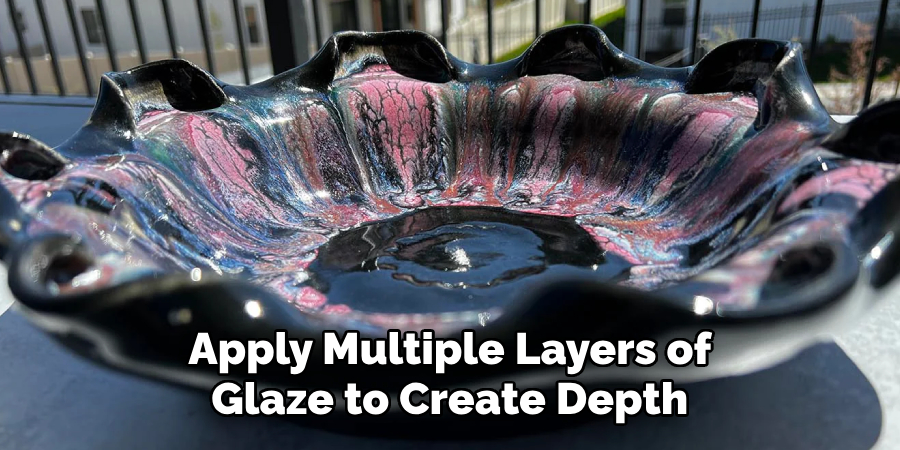
- Layering Techniques: Apply multiple layers of glaze to create depth and richness in the finish. Allow each layer to dry thoroughly before adding the next to avoid blending colors unintentionally.
- Texturing Methods: Before applying the glaze, consider adding texture to your pottery. Textures can be highlighted with the use of opulent glazes, which pool in the recesses to emphasize the design.
- Glaze Thickness: Control the thickness of your glaze application. A thicker application can result in a more vivid color and a more pronounced glossy finish, contributing to the opulent look.
- Accent with Gold Luster: For an ultimate touch of opulence, consider using gold luster over your glazed pottery. Apply it carefully to specific details after your initial glaze has been fired.
- Temperature Precision: Fine-tune your firing temperature to suit the specific glaze you’re using. Opulent glazes often contain elements that can change dramatically with slight temperature variations, so precision is critical.
- Experiment and Have Fun: The best way to perfect your opulent glazing technique is through practice and experimentation. Don’t be afraid to try new techniques and glaze combinations, and have fun with the process!
With these additional tips and tricks, you can take your glazing skills to the next level and create magnificent opulent pottery pieces.
6 Things You Should Avoid When Glazing Opulent Pottery
- Neglecting Preparation: Failing to prepare your pottery properly before glazing can produce inferior results. Ensure the surface is clean and free of dust or oils, which can prevent the glaze from adhering correctly.
- Rushing the Process: Opulent glazes require patience and attention. Rushing through any stage, especially drying and firing, can disrupt the glaze’s development and lead to a flawed finish.
- Overloading the Kiln: Placing too many items in the kiln or setting them too close together can lead to uneven firing and glazes sticking together. Always allow ample space for air circulation.
- Ignoring Test Results: Always test your glazes on similar clay bodies before applying them to your final piece. Ignoring test outcomes can lead to unexpected colors or textures that may need to align with your envisioned opulent design.
- Disregarding Safety Measures: Glazes can contain harmful chemicals, and kilns produce intense heat. Neglecting to wear protective gear or to follow safety protocols can lead to accidents or health hazards. Always prioritize safety when working with glazes and firing pottery.
- Being Afraid to Innovate: While it’s essential to follow guidelines and best practices, be bold and experiment and innovate when glazing opulent pottery. Sometimes, the most unique and stunning pieces are born from taking risks and trying new techniques.
By avoiding these common mistakes, you can ensure your opulent glazed pottery turns out beautifully every time.
How Can You Make Glaze Shiny?
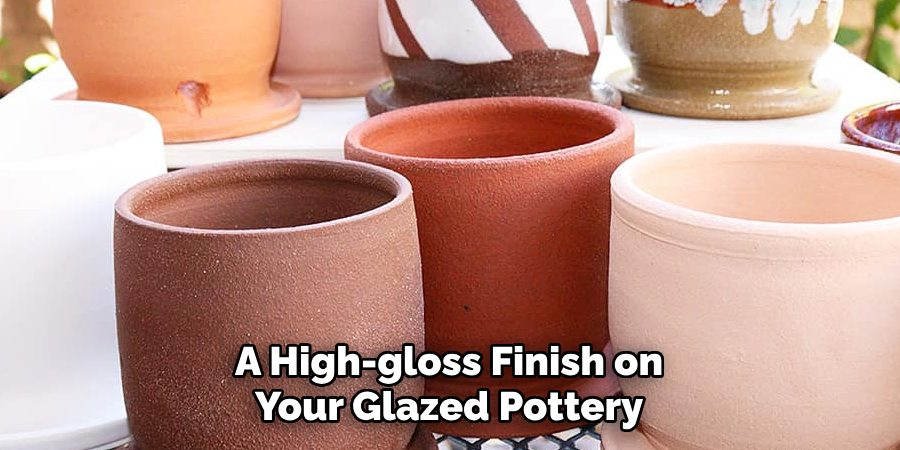
To achieve a high-gloss finish on your glazed pottery, it’s essential to understand the properties of the glazes you’re working with. Opulent glazes that offer a shiny finish often contain a higher proportion of glass-forming materials such as silica. Including fluxes in the glaze formula, such as lead, boric oxide, sodium, or potassium, allows the glaze to melt at lower temperatures, forming a smooth and glossy surface.
For safety reasons, if you use lead or other harmful substances, always ensure that they are encapsulated in the glaze and that the pottery is not intended for functional use where it may come into contact with food or drink.
Adjusting the firing cycle can also impact the shine of the glaze. A slower cool-down process will permit the glass in the ice to form more thoroughly, resulting in a shinier surface. Control the kiln’s atmosphere towards the end of the firing cycle; an oxidizing atmosphere can help enhance the glaze’s glossiness.
Finally, the application of the glaze plays a pivotal role. Apply the glaze in thin, even layers to avoid drips or an overly thick coat, which can diminish the shine. Some potters may also perform a final fire polish, a brief, high-temperature firing that can give the glazed pottery an extra level of sheen.
Take care with this technique, as it risks overfiring if not monitored closely. With these considerations in mind, achieving a lustrous, glossy finish on your opulent pottery will become an attainable hallmark of your artistic expression.
Why Add Salt to the Glaze?
Adding salt to the glaze can create a unique and organic effect on the surface of pottery. When salt is introduced into the kiln at high temperatures, it makes a vapor that combines with the molten glaze, causing a chemical reaction. This results in a textured or mottled appearance on the glazed surface.
The amount and placement of salt can significantly affect the final outcome. Sprinkling salt onto the surface of a glazed piece before firing can create a speckled effect while placing salt balls inside the kiln can produce more pronounced and unpredictable patterns.
Some potters also use soda ash, which has a chemical reaction similar to salt but produces a slightly different result. The addition of these materials adds an element of unpredictability to the glazing process, making each piece unique.
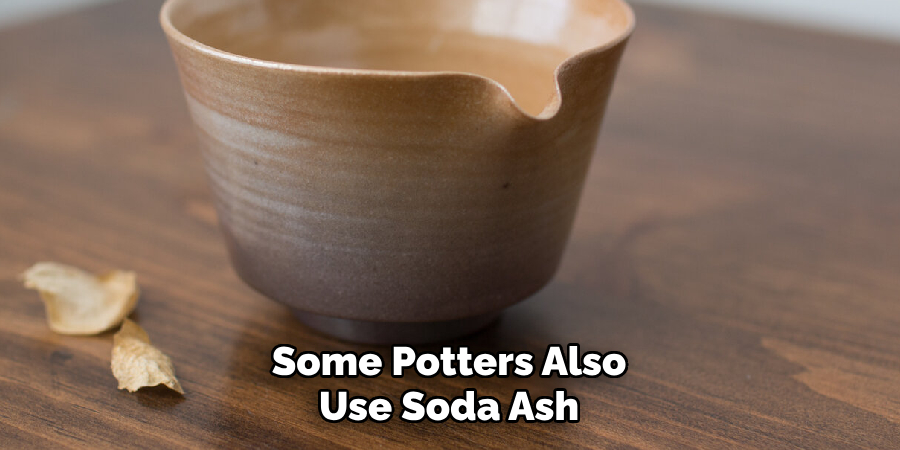
It’s important to note that adding salt or soda ash to a glaze can also have adverse effects, such as pitting or flaking. It’s best to test these techniques on small clay samples before applying them to your final piece. With careful experimentation and attention, incorporating salt or soda ash into your opulent pottery designs can lead to stunning and distinctive results.
Conclusion
In conclusion, how to glaze opulent on pottery requires a harmonious blend of preparation, patience, and creativity. You elevate the probability of achieving a magnificent finish by meticulously cleaning and handling your pottery, exercising precision in glaze application, and closely monitoring the firing processes.
Experimentation is the beating heart of innovation—dare to blend traditional techniques with personal quirks, always armed with the knowledge of best practices coupled with safety protocols. A thorough understanding of your materials and processes, counterbalanced with a willingness to embrace the unforeseen effects of materials like salt, can transform your glazed pottery into a testament to skill and imagination.
Use the complexities of glazes to your advantage, allowing every piece to narrate its own opulent story.
Toby Rede is a professional potter focused on creating functional and artistic ceramics. His work blends natural textures with modern forms, often inspired by sustainable gardening and outdoor environments. Toby’s pottery emphasizes both utility and beauty, reflecting his philosophy of intentional craftsmanship. On the blog, he shares insights on integrating handmade objects into everyday life.
Education
Associate Degree in Ceramic Technology, Alfred University
Professional Focus
Pottery creation with a focus on functionality and artistic expression
Techniques exploring texture, glazing, and sustainable materials
Professional Accomplishments
Work featured in regional art shows and garden exhibitions
Collaborations with local craft fairs and home decor shops