

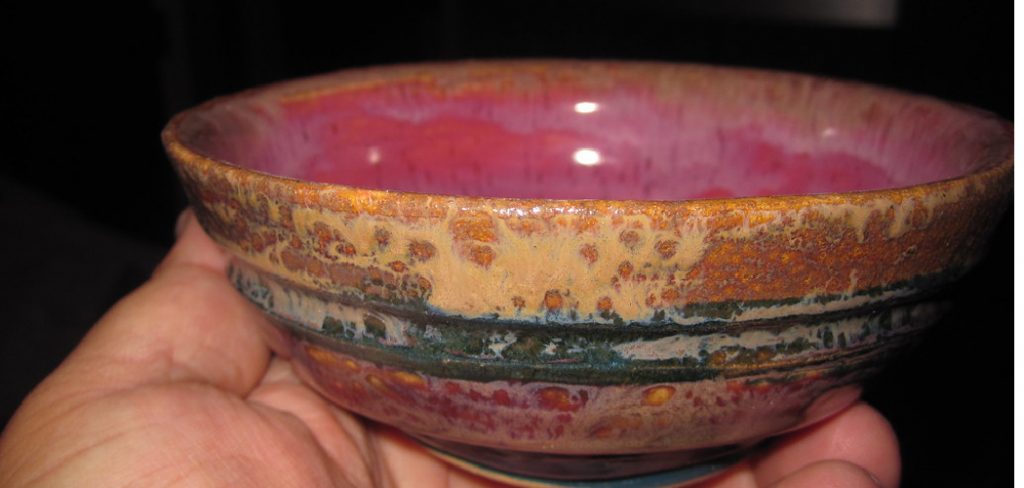
Glaze blush is a delightful method for potters to imbue their work with soft, subtle color variations that enhance the inherent elegance of their ceramic pieces.
Whether choosing a transparent glaze for just a whisper of hue or an opaque option for a more pronounced effect, glaze blushes are available in forms to suit any artist’s vision—be it liquid for a smooth application or powder for interesting textural elements. This guide demystifies the process of how to apply glaze blush on pottery, making it equally accessible to novices and veterans in the craft wishing to infuse a touch of finesse into their handcrafted treasures.
Unveiling the Glaze Blush: Composition and Characteristics
Glaze blush, a ceramic glaze finishing technique, is renowned for bestowing a piece of pottery with a gentle hue or a more vivid tint. Derived from a blend of silica, alumina, and fluxes, with metal oxides or stains for color, glaze blush creates the perfect balance between the textural feel of the clay and a visually appealing surface.
The glazes that facilitate this blush effect can be applied transparently for a subtle wash of color or opaquely for a more dramatic statement. Each type serves a unique purpose; liquid forms are smooth and convenient for complete coverage, while powders are ideal for dry brushing, offering a chance for expressive textural detail.
The intricacies of glaze blush do not end with application and aesthetics. The ultimate success of this method depends on firing temperatures, which generally range from Cone 06 (1828°F/998°C) up to Cone 10 (2381°F/1305°C), depending on the desired finish and the glaze manufacturer’s specifications. Compatibility with clay bodies also plays a vital role, as different compositions can interact variably with the blush, influencing the final outcome.
When handling any glaze blush – whether in liquid or powder form – it’s crucial for potters to consider safety. Wearing gloves, using dust masks for powders, and ensuring proper ventilation in the workspace are essential precautions to avoid skin irritation or inhalation risks. Through understanding its composition, key characteristics, and safety measures, artists can confidently employ glaze blush to produce exquisite pieces with the desired quality and charm.
Preparing Your Ceramic Canvas
Before one can revel in the myriad of hues of glaze blush, you must present a pristine canvas. Ensuring that pottery is clean and dry is crucial for optimal glaze adhesion. The pottery should be thoroughly dusted using a soft brush for bisque-fired pieces. Any remaining debris can interrupt the uniform glaze application, leading to unexpected variations in color and texture. Hand washing with clear water and allowing the piece to air dry completely can remove finer particles and oils.
Unfired pieces need a delicate touch using a lightly damp sponge to eliminate dust without compromising the greenware structure. It’s paramount to understand that different clay bodies respond uniquely to glaze. Porcelain’s smooth surface may promote even glaze blush spreading, whereas stoneware can potentially introduce challenges with its more textured nature. For pieces with rougher bodies, consider lightly sanding or smoothing to create a more even foundation for glaze application.
Tools and equipment are the silent partners in achieving glaze blush perfection. Soft-tipped brushes offer precision and gentleness, while sponges enable a uniform base coat. Containers should be chosen to fit the size of the piece to prevent glaze waste, and a mister or spray bottle allows for the subtle manipulation of glaze moisture levels. Wielded with knowledge and care, these tools can overcome challenges presented by different clay body tendencies and set the stage for the transformative blush of the glaze as it unfurls in the kiln’s embrace.
How to Apply Glaze Blush on Pottery
1. Embracing the Delicate Touch
The journey to painting pottery with glaze blush begins by deciding on the intended intensity and visual outcome. Artists seeking a light, ethereal touch might opt for a translucent glaze thinly applied, while bolder expressions require denser applications or multiple layers of an opaque blush.
For liquid glazes, begin with a well-mixed medium to ensure even color distribution. Use a soft brush, and apply the glaze with even, deliberate strokes. For larger pieces, consider pouring glazes directly onto the pot and rotating it to allow the glaze to flow over the surface, thereby achieving a natural gradient. With powdered blushes, dry brushing can imbue textural elements that reflect light differently, creating depth and visual interest. A light-handed flick of a stiff brush can achieve a sporadic, natural feel, while a denser powder accumulation can intensify the area’s hue.
Sponging is yet another technique, perfect for creating soft textures or mottled backgrounds. Dip a sponge into the glaze, lightly press to remove excess, and dab onto the pottery. Overlapping sponges of varying sizes can mimic natural formations such as stone patterns or cascading colors. This method is particularly forgiving, allowing for the layering of colors to build up depth.
Blending at the intersections of colors encourages a seamless transition, softening harsh lines and creating a cohesive look. Utilize a clean, damp brush to gently coax the colors into one another, much like watercolor on canvas.
For artists encountering issues with uneven application, the use of latex resist or wax can facilitate sharper edges and prevent bleeds. Stencils and masking techniques can generate complex patterns and guarantee precision for those seeking control.
Advanced potters may explore incorporating gravity in their technique, tilting the piece as the glaze is applied to encourage natural flow and gradients, thereby enhancing the blush’s dynamism. Always mindful of potential challenges such as drips, undesirable bleeding, or uneven gradients, potters should practice patience and finesse to invite complexity and beauty into their work with the brushstroke of blush.
2. Drying and Preparing for the Kiln
Once a piece is adorned with the lustrous hues of glaze blush, it’s paramount not to rush into firing. Proper drying is essential to prevent cracking or damage resulting from too much moisture within the glaze. Drying times can vary, typically from a few hours to overnight, depending on the climate and the thickness of the glaze application. Humidity plays a critical role – in damp environments, extended drying periods may be necessary, while arid conditions might shorten the wait.
For optimal drying, ensure the work area is well-ventilated, protected from direct sunlight, and at a stable temperature. Circulating air gently using a fan can aid the drying process. As a rule of thumb, the pottery should feel room temperature to the touch, indicating that the moisture from the glaze has evaporated.
Before the kiln firing, meticulous preparations are needed. Ensure kiln shelves are clean, free from glaze residue, and positioned horizontally to promote even heat distribution. Placing kiln spacers allows for better airflow, which is crucial for consistent firing and preventing thermal shock. Kiln posts can help layer shelves efficiently while ensuring delicate pieces remain undisturbed. These steps collectively contribute to seamless drying and firing, where the blush transforms into a permanent, mesmerizing finish upon the ceramic canvas.
3. Firing Your Blushed Beauty

The zenith of pottery glazing arrives with kiln firing, endowed with its transformative power. The ideal firing temperature range for glaze blush hinges on the specific formulation; however, typical cone ranges for earthenware lie between 1828°F (Cone 06) and 1945°F (Cone 04), while stoneware and porcelain usually fire at higher temperatures – up to 2381°F (Cone 6). Firing schedules should be methodical: a slow initial ramp to dry the work thoroughly, a steadied increase to the target peak, and a controlled cooldown to prevent thermal shock. Attention to a soak period at peak temperature can deepen the blush, enriching the glaze’s spectacle. Remember, the kiln’s atmosphere—oxidation or reduction—can dramatically alter the blush’s final character, making attention to the firing cycle essential for the expected outcome.
4. Unveiling the Blush: Unpacking and Inspecting
The unveiling of glazed pottery from the kiln is akin to the silent crescendo of an artist’s symphony – it’s a moment filled with anticipation and trepidation as the kiln’s gate opens. This pivotal event reveals the fiery alchemy that has transpired, showcasing the subtle variations the glaze blush has etched upon each piece—no two are ever the same. The glaze blush’s true beauty lies in these unique expressions, where shadows of color intertwine and crystalize in the heat, bestowing upon each creation a distinct fingerprint of the firing process.
As pieces emerge, still warm and fragile from their transformative journey, handling them with care is crucial. Protective gloves should be worn to shield hands from the residual heat, and pieces must be placed on heat-resistant surfaces to cool completely. Inspecting the works, one marvels at the slight shifts and gentle gradients that now dance across the surface—a testimony to the potter’s skill and the kiln’s mysterious influence.
That’s it! You’ve now learned how to apply glaze blush on pottery, from selecting the right materials and tools to mastering various application techniques and finally firing your creations. With practice, patience, and a touch of creativity, you can incorporate glaze blush into your pottery pieces, elevating them into unique works of art that capture the eye and heart. Join the vibrant community of potters experimenting with this mesmerizing technique and unleash the full potential of glaze blush in your pottery journey.
Troubleshooting Blush Hiccups
Every potter faces challenges with glaze blush at some point, often manifesting as uneven application, unwanted pooling, or dramatic and unintended color differences.
Uneven Blush:
This frequently occurs when the glaze is applied inconsistently. To prevent this, ensure the brush is adequately loaded with glaze and moves steadily over the ceramic surface. The application should be fluid and confident—hesitation often leads to unevenness. With practice, one feels the right glaze viscosity and brush saturation.
Unwanted Pooling:
Pooling happens when glaze accumulates in crevices or on flat surfaces, leading to an overly concentrated area of color. To address this, apply glaze with a sweeping motion, using a dryer brush or sponge to absorb excess glaze. Adjusting the angle of application may also help distribute the glaze more evenly.
Unexpected Color Differences:
Many variables, including kiln temperature fluctuations and the chemical components of the glaze, can cause color to differ from expectations. A firm understanding of one’s materials is essential; conduct test fires to better predict outcomes. Additionally, meticulous note-keeping of firing schedules and glaze mixtures can help replicate success and understand failures.
For advanced troubleshooting, consider the firing cycle. Experiment with hold times at certain temperatures to influence blush development or adjust the ramp-up and cooling-down periods to affect glaze maturation. Engaging in trials with various brushes—from soft squirrel hair to stiffer hog bristle—can also be enlightening, revealing how different tools can yield contrasting results. Sometimes, the solution lies in embracing the unpredictability of the process, refining one’s ability to adapt and innovate with each subsequent firing.
Beyond the Blush: Exploring Additional Effects
Once a potter has mastered the art of the glaze blush, the creative journey into advanced glazing techniques begins. An exciting approach is to layer different glaze blushes, a process not unlike painting, which allows for the creation of deep, rich textures and complex hues. By carefully overlaying various glazes, one can achieve gradients and shades that grant each piece a unique depth, telling its own story through the interplay of colors.
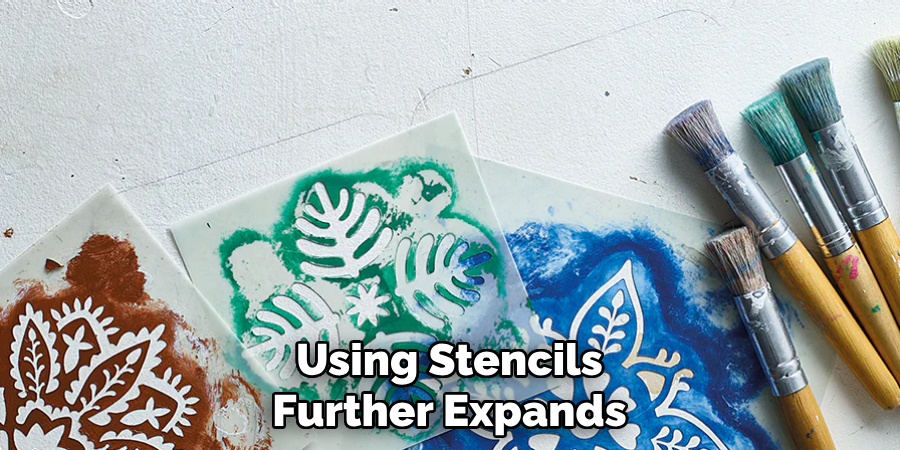
Incorporating contrasting glazes alongside blushes can produce striking visual effects akin to a dialogue between the subtle and the bold. One can imagine the subtle brushes of blush glazes punctuated by the intense, eye-catching accents of a glossy or matte finish, each enhancing the other’s presence. Using stencils further expands the potter’s toolkit, allowing for precision and repeatability in pattern application or isolating clay body areas for different glaze treatments.
Texturing tools open up another dimension of possibility, allowing potters to imprint intricate designs into glazes before firing. This can combine tactile and visual delight, inviting both hand and eye to explore the surface. Masking specific areas through wax resistance or other techniques can also produce stunning effects as different parts of the ceramic work respond distinctively to the firing process, revealing a canvas of textures.
Experimentation is key for those wanting to push the boundaries of glazing. Employing various application methods, from dipping and pouring to spray applications, can result in outcomes as unique as a potter’s signature. Techniques like sgraffito, where glazes are selectively scratched away to reveal layers of base clay, can also add another element to the work.
For the experienced potter seeking advanced firing techniques, raku or smoke firing can be transformative. These methods produce irreplicable patterns and hues attributed to the variable conditions and materials used during the firing. Raku, with its dramatic post-firing reduction, can create lustrous metallic effects and dramatic crackles. Conversely, smoke firing, a low-temperature technique, imbues pottery with a rich, smoked patina that is beautifully organic in appearance. Whether aiming to augment the blush or introduce a whole new effect, these methods beckon the potter to experiment, embracing the unpredictable and often serendipitous nature of high-temperature alchemy.
Caring for Your Blushing Gem
Proper care ensures the lasting beauty of your blushing ceramic piece, particularly when it serves a functional role in your daily life. For items intended for culinary use, the glaze blush must be food-safe — always confirm this with your glaze supplier before use.
When cleaning your ceramics, hand-washing with mild soap and a soft sponge or cloth, which is gentler on the glaze than a dishwasher’s abrasive environment and harsh detergents. This will prevent premature wear of the glaze blush’s vibrant colors and unique textures. Although some pieces may be dishwasher safe, hand washing will better preserve the glaze’s luminous qualities.
Particular glaze blushes might be more sensitive to extreme temperatures; thus, avoid sudden temperature changes that could induce thermal shock and crack the glaze. Always rinse with warm, not hot, water and let pieces air dry or softly towel them off.
Long-term care includes storing your ceramics where they are safe from collisions with other items that may cause chipping or cracking. Regular dusting can prevent buildup that might otherwise become baked into the glaze when used in the oven or microwave if such use is deemed safe for your piece.
Minimize prolonged exposure to direct sunlight, leading to fading or unwanted color changes in some glaze compositions. Nurturing the unique characteristics of your glaze blush through these mindful practices will continue to delight both the eye and the touch for years to come.

Finding Inspiration: A Blush of Resources
Exploring the work of other artists can be profoundly inspiring, especially regarding the subtle artistry of glaze blush. Potters like Steven Showalter and Eva Zethraeus have harnessed this technique to create breathtaking effects on their ceramic pieces. Their work showcases a mastery of color, with blushes that transition smoothly across delicate forms, evoking feelings of movement and emotion within the medium of clay.
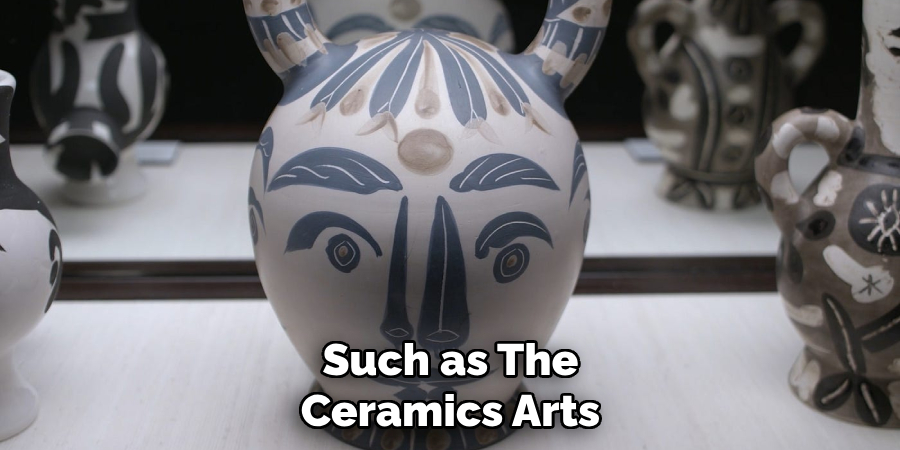
The digital sphere offers a treasure trove of resources for those seeking to expand their glaze blush repertoire. Online ceramic communities such as the Ceramics Arts Network and The Potters Cast are bustling hubs of inspiration and insight, allowing artists to share their triumphs and challenges. Blogs dedicated to ceramic techniques, like Pottery Making Info and Musing About Mud, consistently spotlight innovative uses of glaze blushes and provide a platform for learning through the experiences of fellow potters.
Additionally, forums such as the Reddit r/pottery community or the Ceramic Arts Daily forums connect potters of all levels, from novice to expert. Through these forums, members can ask for advice, give feedback, and discuss the intricacies of their craft, including the complexities involved in perfecting glaze blush.
The journey of learning is best complemented by practical experience. Workshops and courses, available at local studios and through craft schools like Penland School of Crafts or Haystack Mountain School of Crafts, offer guided opportunities to experiment with glazing techniques. Under the tutelage of seasoned professionals, potters can explore the nuanced variables that affect glaze outcomes and indulge in the hands-on practice necessary to evolve their skill set.
By taking advantage of these resources and communities, potters are encouraged to broaden their artistic horizons, deepen their technical understanding, and embrace the vast possibilities that glaze blush—this endlessly versatile technique—has to offer.
Conclusion: Embrace the Subtlety
In the world of ceramics, applying glaze blush is both an art and a science, one that invites a potter’s patience and creativity. Mastery of how to apply glaze blush on pottery hinges on understanding the interplay between color, heat, and form—crafting finishes that range from subtle gradations to vibrant bursts.
These techniques, from sgraffito to raku, offer endless opportunities for personal expression and innovation. As potters experiment and exchange knowledge with peers in physical workshops or online forums, they forge beautiful objects and a community enriched by shared experiences. We encourage you, the reader, to delve into the nuances of glaze blush with an adventurous spirit and enjoy the distinct journey that each fired piece represents—a journey embellished with the strokes of your own evolving artistry.
Toby Rede is a professional potter focused on creating functional and artistic ceramics. His work blends natural textures with modern forms, often inspired by sustainable gardening and outdoor environments. Toby’s pottery emphasizes both utility and beauty, reflecting his philosophy of intentional craftsmanship. On the blog, he shares insights on integrating handmade objects into everyday life.
Education
Associate Degree in Ceramic Technology, Alfred University
Professional Focus
Pottery creation with a focus on functionality and artistic expression
Techniques exploring texture, glazing, and sustainable materials
Professional Accomplishments
Work featured in regional art shows and garden exhibitions
Collaborations with local craft fairs and home decor shops