

Clay is a versatile material used in various artistic and functional applications, from pottery and sculpture to construction. However, one common issue that artisans and builders face is cracking, which can compromise the integrity and aesthetics of their projects. Understanding the causes of clay cracking and implementing effective strategies to prevent it is crucial for achieving successful results. In this guide, we will explore practical tips and techniques for how to stop clay from cracking, ensuring that your work stands the test of time.

Understanding the Problem of Cracking Clay
Cracking in clay can occur for various reasons, often stemming from the material’s natural properties and environmental conditions. One primary cause is the drying process; as clay loses moisture, it contracts, which can lead to tension and ultimately cracks.
Additionally, uneven drying can be exacerbated by changes in temperature and humidity, creating stress points within the clay structure. Other factors include the type of clay used, the thickness of the application, and even the presence of air pockets or impurities within the clay. By understanding these underlying causes, artists and builders can better anticipate potential cracking issues and take proactive measures to mitigate them.
Choosing the Right Clay
Selecting the appropriate type of clay is fundamental in preventing cracking and ensuring the longevity of your work. Different clays possess varying properties that can affect their susceptibility to cracking during the drying and firing processes. For instance, earthenware is typically more porous and may shrink significantly, while stoneware has a lower shrinkage rate and tends to be more durable.
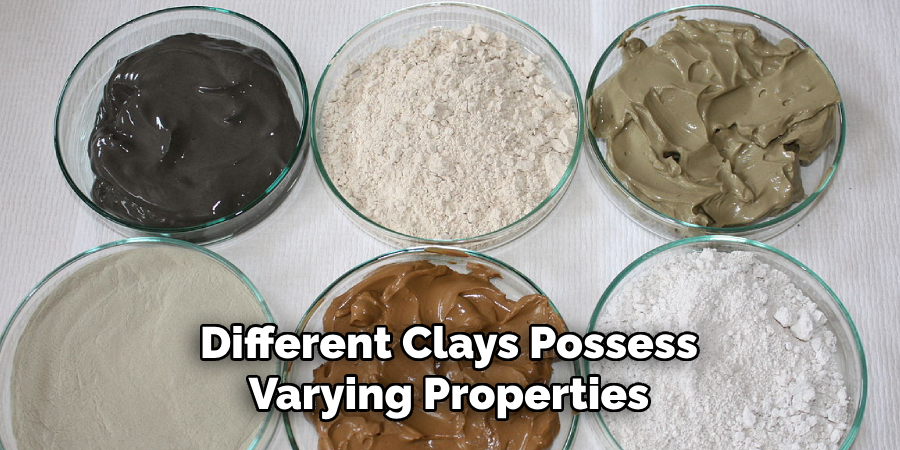
Additionally, consider the clay’s firing temperature, as higher-fired clays usually exhibit greater stability. It’s also wise to choose a clay body designed specifically for your intended technique, whether that be hand-building, throwing on a wheel, or sculpting. By making informed choices about the type of clay used, artists and builders can significantly reduce cracking and enhance the quality of their final products.
10 Methods How to Stop Clay from Cracking
1. Properly Wedging the Clay
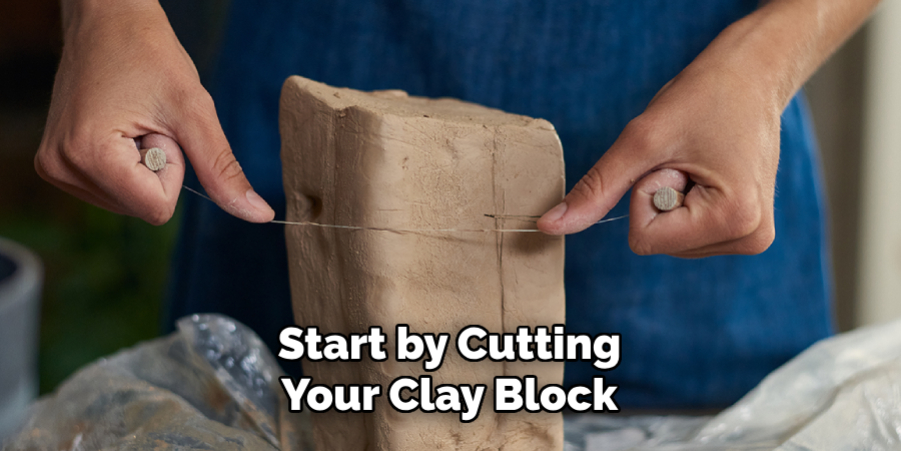
Wedging is a crucial step in preparing clay, and doing it properly can significantly reduce the risk of cracking. Wedging helps to homogenize the clay, remove air bubbles, and align the clay particles. Start by cutting your clay block into manageable pieces and then use the spiral or ram’s head wedging technique. Press the clay down and forward with the heels of your hands, then fold it back on itself and repeat. Consistent wedging ensures that the clay is evenly moist and free from air pockets, which can cause cracks.
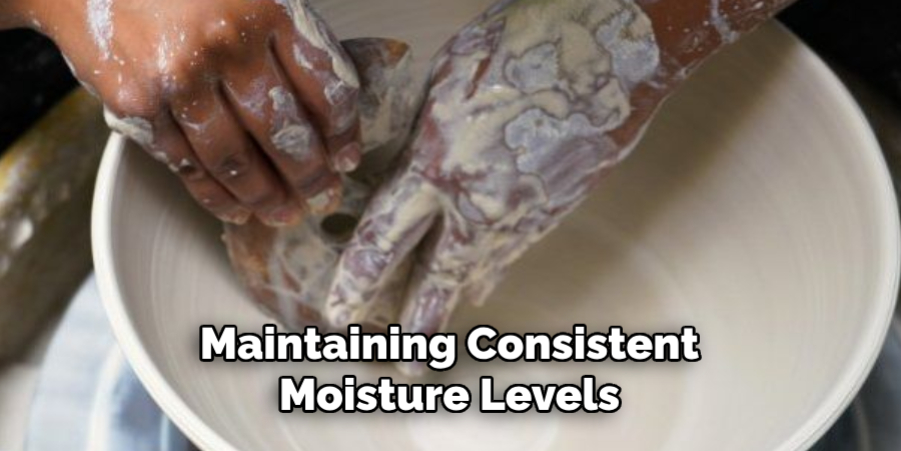
2. Maintaining Consistent Moisture Levels
Maintaining consistent moisture levels throughout your clay project is essential to prevent cracking. If the clay dries unevenly, different parts of your piece will shrink at different rates, leading to cracks. Keep your work covered with plastic sheeting or damp cloths when you’re not working on it. Mist your project with water if you notice any areas starting to dry out faster than others. Using a damp sponge to smooth out the surface can also help maintain moisture balance.
3. Controlling the Drying Process
Controlling the drying process is critical for preventing cracks in clay. Allowing clay to dry too quickly can cause stress and uneven shrinkage. To control drying, place your clay piece in a plastic bag or cover it loosely with plastic sheeting. Gradually increase air exposure over several days by partially opening the bag or removing the plastic. Ensure the drying environment is even and avoid placing your piece in direct sunlight or near heat sources, as rapid drying can lead to cracking.
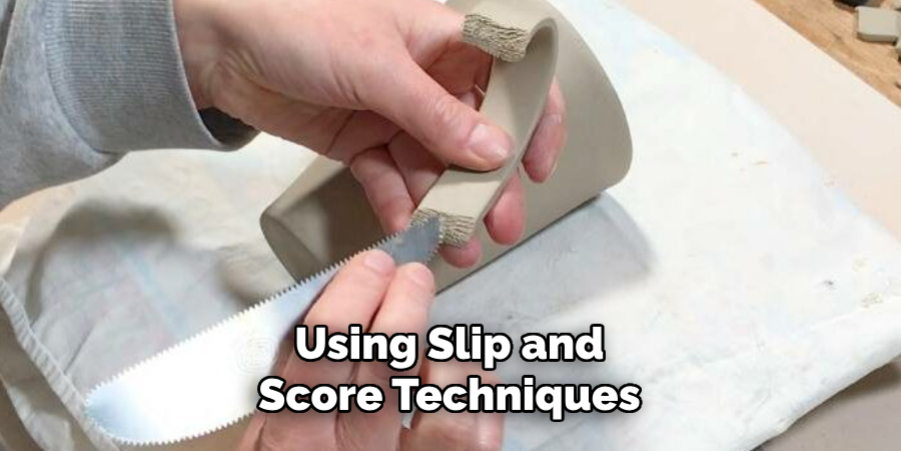
4. Using Slip and Score Techniques
Using slip and score techniques when joining pieces of clay together can prevent cracks at the seams. Scoring involves scratching the surface of the clay where two pieces will be joined, creating a rough texture. Apply slip (a mixture of clay and water) to the scored areas before pressing the pieces together. This technique ensures a strong bond and prevents cracks from forming at the joints. Always ensure the slip is the same consistency as the clay to maintain uniform moisture levels.
5. Choosing the Right Clay Body
Different clay bodies have varying properties, and choosing the right one for your project can help prevent cracking. Stoneware and porcelain clays are less prone to cracking than earthenware due to their higher plasticity and stronger particle bonds. Consider the specific requirements of your project, such as the size and complexity of the piece, and choose a clay body that is suitable for those needs. Experiment with different types of clay to find one that works best for your techniques and desired outcomes.
6. Proper Handling and Construction Techniques
Proper handling and construction techniques are essential for preventing cracks in clay. Avoid handling your piece excessively, as this can introduce stress and weaken the structure. Use consistent, gentle pressure when shaping and joining pieces. Avoid adding too much water during construction, as overly wet clay is more prone to cracking. For larger or more complex pieces, build in stages, allowing each section to firm up slightly before adding more clay. This approach helps maintain the structural integrity of your piece.
7. Using Armatures and Supports
Using armatures and supports can prevent cracking in larger or more intricate clay pieces. An armature is an internal support structure that helps the clay maintain its shape and stability during construction and drying. Common materials for armatures include wire, wood, or Styrofoam. For larger flat pieces, use boards or other flat supports to prevent warping and cracking. Ensure the armature or support is removed carefully once the clay is leather-hard to avoid damaging the piece.
8. Monitoring and Adjusting Humidity Levels
Monitoring and adjusting the humidity levels in your workspace can help prevent clay from cracking. A consistent humidity level helps maintain even drying and reduces the risk of cracks. Use a hygrometer to measure the humidity in your workspace. If the air is too dry, consider using a humidifier to add moisture to the environment. Conversely, if the air is too humid, use a dehumidifier to reduce moisture levels. Maintaining an optimal humidity level (around 50-60%) will help your clay pieces dry evenly and reduce the likelihood of cracking.
9. Employing Slow and Even Drying Techniques
Employing slow and even drying techniques is crucial for preventing cracks in clay. Slow drying allows the clay to shrink gradually and evenly, reducing stress and the potential for cracking. One effective technique is to dry your piece on a wooden board covered with newspaper or cloth, which absorbs moisture slowly. Rotate the piece periodically to ensure all sides dry evenly. For larger or more complex pieces, consider covering them loosely with plastic and drying them in a cool, shaded area to prolong the drying time.
10. Repairing Cracks During the Leather-Hard Stage
Even with the best practices, cracks can sometimes occur. Repairing cracks during the leather-hard stage (when the clay is partially dried but still workable) can prevent them from becoming larger and more problematic. To repair a crack, dampen the area with water and apply a thin layer of slip. Use a tool or your fingers to press the slip into the crack, ensuring it fills completely. Smooth the surface with a damp sponge or tool, then allow the piece to dry slowly and evenly. For deeper cracks, consider reinforcing the repair with a small coil of clay pressed into the slip-filled crack.
Common Mistakes to Avoid
When working with clay, there are several common mistakes that can lead to issues such as cracking or structural weaknesses. One frequent error is neglecting to wedge the clay properly before use. Failing to eliminate air bubbles within the clay can result in unexpected cracking during the drying or firing process. Additionally, overworking the clay can lead to excessive drying and loss of plasticity; make sure to handle it gently and efficiently.
Another mistake involves skipping the drying control measures; allowing sections to dry at different rates is a surefire way to create tension that may lead to cracks. Not using slip when joining pieces, or applying it incorrectly, can also compromise adhesion and increase the likelihood of seam-related issues. Lastly, ignoring environmental factors such as humidity and temperature can have detrimental effects on your project, so it’s essential to be mindful of these conditions.
Conclusion
Preventing cracks in pottery clay requires a combination of proper techniques, careful handling, and environmental control. By wedging the clay properly, maintaining consistent moisture levels, controlling the drying process, using slip and score techniques, choosing the right clay body, handling the clay with care, using armatures and supports, monitoring humidity levels, employing slow and even drying techniques, and repairing cracks during the leather-hard stage, you can significantly reduce the risk of cracking and create beautiful, durable clay pieces.
Each method plays a vital role in ensuring your clay projects remain intact and achieve the desired results. Thanks for reading, and we hope this has given you some inspiration on how to stop clay from cracking!
Toby Rede is a professional potter focused on creating functional and artistic ceramics. His work blends natural textures with modern forms, often inspired by sustainable gardening and outdoor environments. Toby’s pottery emphasizes both utility and beauty, reflecting his philosophy of intentional craftsmanship. On the blog, he shares insights on integrating handmade objects into everyday life.
Education
Associate Degree in Ceramic Technology, Alfred University
Professional Focus
Pottery creation with a focus on functionality and artistic expression
Techniques exploring texture, glazing, and sustainable materials
Professional Accomplishments
Work featured in regional art shows and garden exhibitions
Collaborations with local craft fairs and home decor shops