

The chattering surface technique is a widely-used method in machining processes. It involves creating small, rapid vibrations on the workpiece while it is being machined. This process results in a textured surface that has numerous benefits for various applications.
The main advantage of using chattering surface technique is that it allows for a variety of textures and patterns to be created on the surface of the material. This can add aesthetic value to the final product, making it more visually appealing. You can find step-by-step instructions on how to apply chattering surface technique in this blog article.
Materials You Will Need
- Hammer
- Nails
- Measuring Tape
- Level
- Screwdriver
- Drill and drill bits
- Saw (hand or power)
- Pliers
- Sandpaper
The materials listed above are essential for any DIY project, whether you are a beginner or an experienced DIY enthusiast. However, depending on the specific project, there may be additional materials required.
Preparing the Clay Before Applying Chattering Surface Technique
In addition to the basic materials listed above, there are some additional tools and supplies that you will need for preparing the clay before applying the chattering surface technique. These include:
- Clay (of your choice)
- Canvas or plastic sheeting
- Rolling pin
- Sharp knife or clay cutter
- Water spray bottle
- Paddle tool or rib tool
These materials and tools are specifically used for preparing the clay before adding the chattering surface technique. You may also need to have a clean work area and access to water for cleaning your tools during the process.
Step-by-step Instructions for How to Apply Chattering Surface Technique
Step 1: Inspect the Surface
Inspecting the surface is an essential first step in applying the chattering technique. This involves thoroughly examining the surface for any flaws or imperfections that may affect your application process. Check for any cracks, chips, or uneven areas that could cause issues with adhesion.
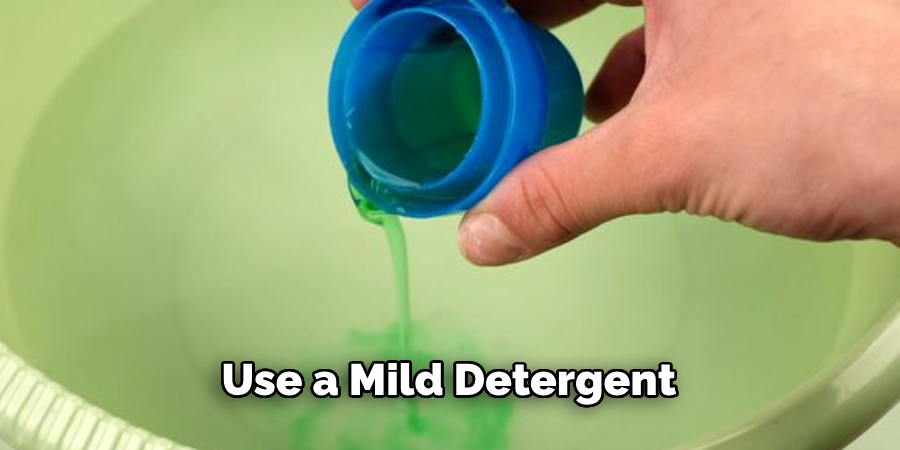
Step 2: Clean and Prepare the Surface
Before beginning the chattering process, it’s crucial to clean and prepare the surface. Use a mild detergent or degreaser to remove any dirt, oil, or other contaminants that may prevent the chattering medium from adhering properly.
To successfully apply the chattering technique, you will need a few essential materials. These include a chattering medium (such as sandpaper, metal wire, or a chattering tool), a surface sealant (such as varnish or lacquer), and appropriate protective gear (such as gloves and goggles).
Step 3: Test the Chattering Medium
It’s essential to test your chosen chattering medium on a small, inconspicuous area of the surface before proceeding. This will allow you to gauge the desired effect and make any necessary adjustments before applying it to the entire surface.
Once you have tested your chattering medium, you can begin applying it to the surface. Use a consistent pressure and motion to create the desired patterns or textures on the surface. Be careful not to overdo it, as this could result in an uneven or unpleasant finish.
Step 4: Allow for Drying Time
After applying the chattering medium, it’s essential to allow enough time for it to dry completely before moving on to the next step. This could take anywhere from a few hours to overnight, depending on the type of medium and environmental conditions.
To protect the surface and preserve the chattering effect, it’s crucial to apply a surface sealant once the medium has dried. This will also enhance the overall appearance of the surface.
Step 5: Repeat if Desired
If you want to achieve a more pronounced chattering effect, you can repeat the process by adding another layer of chattering medium and sealant. Just be sure to allow for proper drying time between each layer.
After the final layer of chattering medium has dried, you may notice some rough or uneven spots on the surface. Use sandpaper to smooth these areas and create a more uniform finish. Be gentle and take your time to avoid damaging the chattering effect.
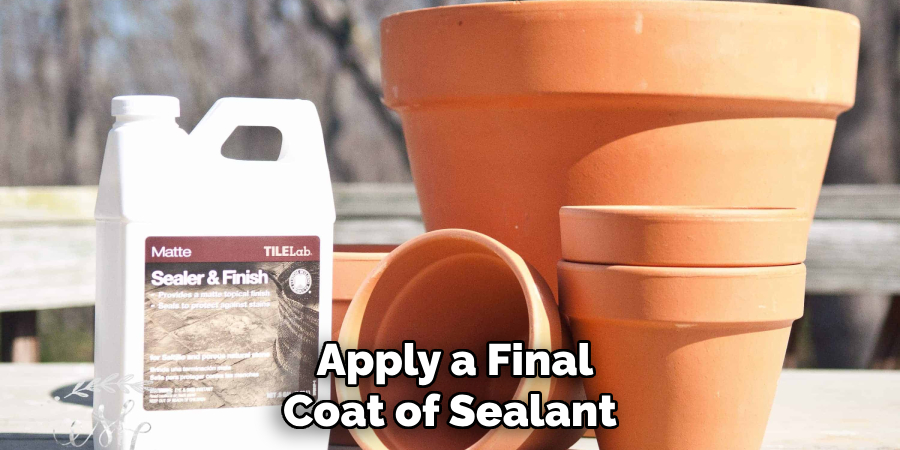
Step 6: Apply Final Coat of Sealant
To complete the chattering surface technique, apply a final coat of sealant to protect the surface from scratches, stains, and other damage. This will also give it a glossy finish and enhance its visual appeal.
By following these step-by-step instructions, you can successfully apply the chattering surface technique to any surface and achieve stunning results. Remember to always be patient and careful throughout the process, and don’t be afraid to experiment with different mediums for unique effects.
Safety Tips for How to Apply Chattering Surface Technique
- Always wear protective gear, such as gloves and goggles, to avoid any direct contact with the chattering medium or sealant.
- Work in a well-ventilated area to prevent inhaling fumes from the sealant.
- If using power tools for chattering, make sure to follow proper safety guidelines and use them with caution.
- Test the chosen chattering medium on a small, inconspicuous area before applying to the entire surface. This will help avoid any unwanted or unpleasant results.
- Follow all manufacturers’ instructions and recommendations for the chattering medium and sealant.
- Avoid overdoing it with the chattering medium, as this could result in an uneven or unappealing finish.
- Always allow sufficient drying time between each layer of chattering medium and sealant to ensure the best results.
Remember, safety should always be a top priority when working on any project involving potentially hazardous materials or tools. By following these precautions, you can minimize the risk of accidents and injuries while applying the chattering surface technique.
Glazing Techniques for Applying Chattering Surface Technique
- You can experiment with different glazing techniques after applying the chattering surface technique to add depth and dimension to your surface.
- Try layering transparent glazes over the chattering pattern to create a subtle, multi-dimensional effect.
- For a bolder look, use multiple colors of opaque glazes over the chattering pattern. You can even mix and blend different colors to create a unique finish.
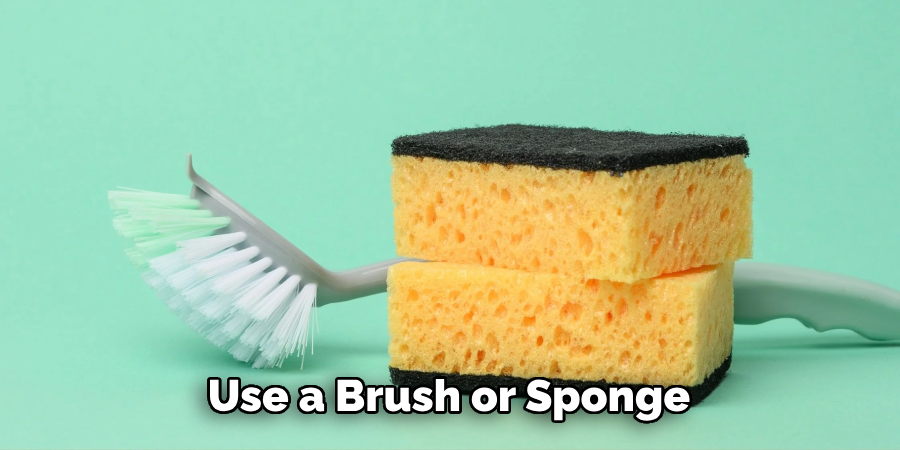
- You can also use a brush or sponge to apply glazes in various patterns and textures, adding even more visual interest to the surface.
- Don’t be afraid to combine different glazing techniques with the chattering surface technique for truly one-of-a-kind results.
By incorporating glazing techniques into your chattering surface process, you can take your project to the next level and create a truly stunning finished product. Remember to always experiment and have fun with different techniques to achieve your desired results.
Glaze Firing for Applying Chattering Surface Technique
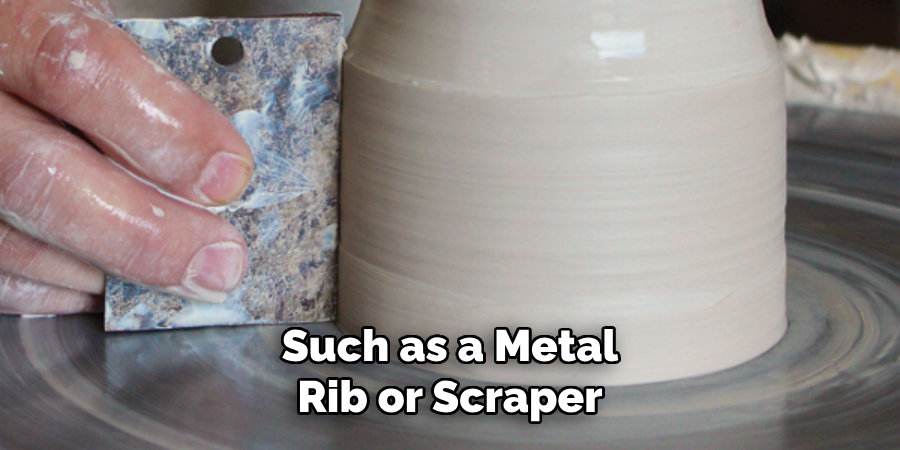
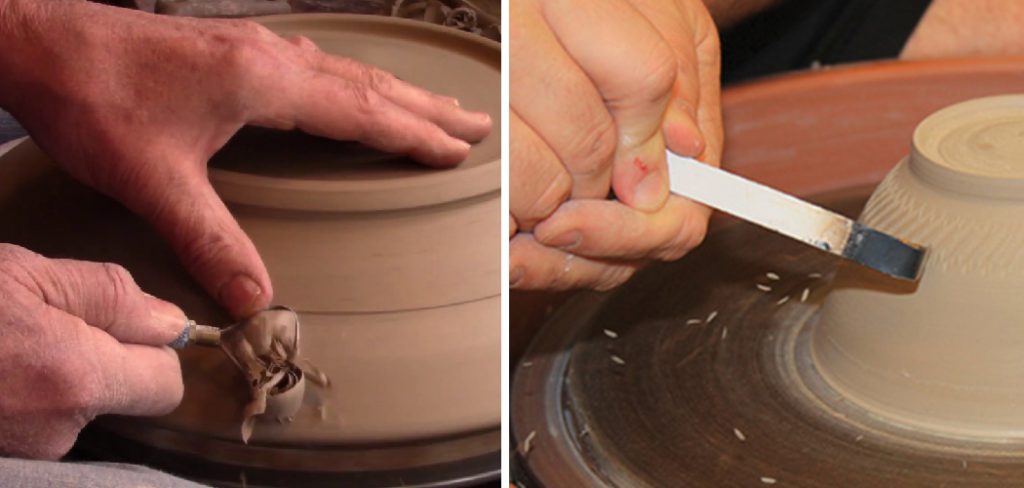
The glaze firing process can be used to create unique and eye-catching surfaces on ceramic pieces through a technique called chattering. This technique involves using a sharp tool, such as a metal rib or scraper, to create intentional grooves or ridges in the surface of the clay before it is glazed and fired. To begin, it is important to have a well-prepared clay body that is free of air bubbles and thoroughly dried. This will help prevent any cracking or warping during the firing process.
Once the piece has been shaped and smoothed, use a metal rib or scraper to create desired patterns on the surface. These can be straight lines, curves, or even more intricate designs. It is important to keep the tool at a consistent angle and pressure to achieve clean and consistent grooves. After chattering the entire surface of the piece, allow it to fully dry before applying glaze. The type and color of glaze used will greatly affect the final result, so consider experimenting with different combinations for desired effects.
Finishing Touches After Applying Chattering Surface Technique
After successfully applying the chattering surface technique to your pottery piece, there are a few finishing touches that can be done to enhance its appearance and make it stand out.
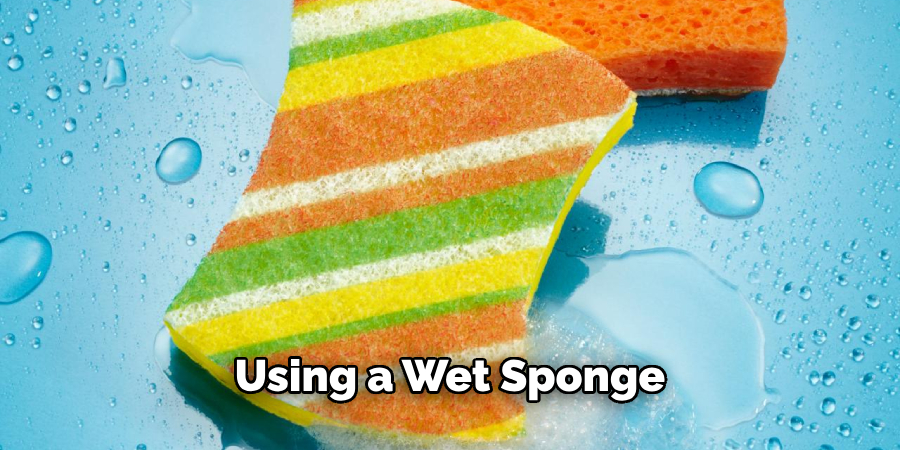
1. Smoothing Rough Edges
While chattering creates interesting patterns on the surface of the clay, it can also leave rough edges that may need to be smoothed out. Using a wet sponge or fine-grit sandpaper, gently smooth out any rough areas on the edges of your piece. Be careful not to over-sand or apply too much pressure as this can affect the chattering texture.
2. Adding Color
Chattered surfaces look great with a pop of color added to them. This can be done by using underglazes, glazes, or even paint. Experiment with different colors and application techniques to see what works best for your piece.
3. Highlighting the Texture
To make the chattering texture stand out even more, you can use a technique called “rub-and-buff”. This involves rubbing metallic wax or paste onto the surface of the clay and then buffing it off, leaving behind a shiny metal finish on the raised areas of the chattering. This adds depth and dimension to the piece.
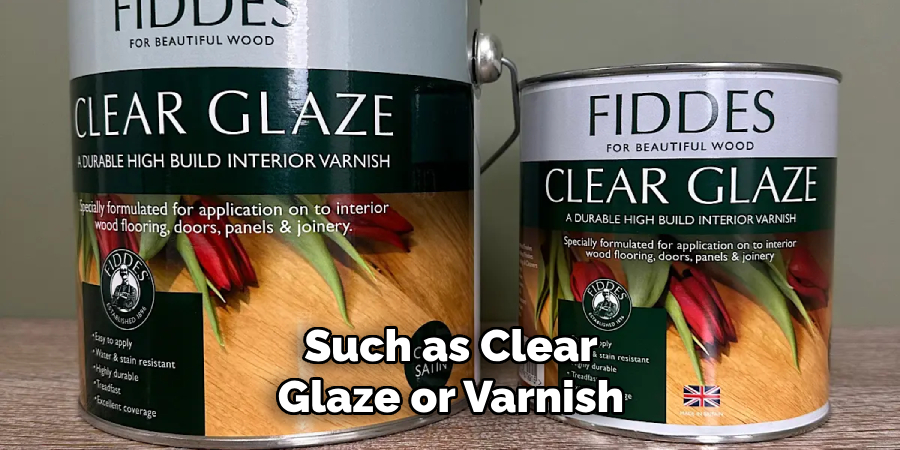
4. Finishing with a Sealant
To protect your chattered surface and add a glossy finish, consider applying a sealant such as clear glaze or varnish. This will not only make the colors more vibrant but also make the texture more durable.
By following these steps, you can take your chattered pottery piece to the next level and create a unique and eye-catching work of art. Have fun experimenting with different techniques and finishes to find what works best for you and your pottery style.
Advanced Chattering Techniques for Applying Chattering Surface Technique
Chattering is a common machining phenomenon that results in poor surface finish and high tool wear. To overcome this issue, various techniques have been developed, including the chattering surface technique.
What is the Chattering Surface Technique?
The chattering surface technique involves creating a pattern of small grooves on the cutting tool’s surface. This pattern helps to break up the vibrations caused by chattering, resulting in a smoother cutting process.
Advantages of Using Chattering Surface Technique
- Improved Surface Finish: The primary advantage of using the chattering surface technique is that it results in a significantly improved surface finish compared to traditional machining methods.
- Increased Tool Life: By reducing the intensity of chattering vibrations, the chattering surface technique helps to increase the tool’s lifespan.
- Improved Dimensional Accuracy: Chattering can cause a loss of dimensional accuracy in machined parts. With the use of the chattering surface technique, this issue can be minimized, resulting in more precise and accurate components.
Applying Chattering Surface Technique
To apply the chattering surface technique effectively, there are a few key factors to consider:
- Material: The type of material being machined plays a crucial role in determining the effectiveness of the chattering surface technique. Softer materials tend to experience more severe chattering, making them ideal candidates for this technique.
- Tool Geometry: The tool’s geometry, including its cutting edge angle and flute design, can impact the intensity of chattering. Choosing an appropriate tool geometry is essential for achieving the desired results with the chattering surface technique.
- Cutting Parameters: The speed, feed rate, and depth of cut all play a significant role in determining the effectiveness of the chattering surface technique. Optimal cutting parameters should be selected to achieve the best results.
Advanced Chattering Techniques
While the chattering surface technique has proven to be an effective solution for reducing chattering, there are also advanced techniques that can further improve its effectiveness:
- Variable Pitch Tools: These cutting tools have varied flute spacing along their length, which helps to disrupt chatter vibrations more effectively.
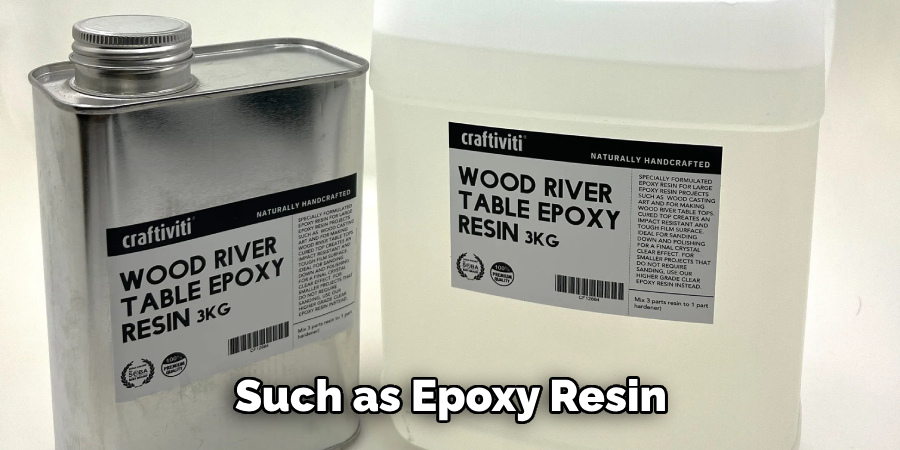
- Dampening Materials: Applying a layer of dampening material, such as epoxy resin or rubber, on the cutting tool’s surface can help to reduce the intensity of chattering vibrations.
- Active Control Technology: This technique involves using sensors and actuators to detect and counteract chatter vibrations in real-time. It has shown promising results in minimizing chattering and improving machining performance.
The chattering surface technique is a valuable tool for achieving better surface finish, increased tool life, and improved dimensional accuracy in machining operations. By considering the material being machined, tool geometry, and cutting parameters, this technique can be applied effectively.
Troubleshooting Common Issues for Applying Chattering Surface Technique
While the chattering surface technique can provide many benefits, there are some common issues that may arise during its application. Here are a few troubleshooting tips to overcome these challenges:
- Tool Wear: If the cutting tool is experiencing excessive wear while using the chattering surface technique, it could be due to incorrect tool geometry or cutting parameters. Check these factors and adjust accordingly.
- Poor Surface Finish: If the desired surface finish is not achieved, it could be a result of incorrect cutting parameters. Adjusting the speed, feed rate, or depth of cut can help to improve the surface finish.
- Dimensional Accuracy Issues: Inaccurate dimensions may be caused by improper tool geometry or chattering vibrations affecting the workpiece. Check these factors and make any necessary adjustments.
- Excessive Noise: While some level of noise is expected when using the chattering surface technique, excessive noise could indicate a problem. Check for any loose or damaged components and make sure the cutting parameters are appropriate for the material being machined.
By following these troubleshooting tips and fine-tuning the application of the chattering surface technique, you can overcome these common issues and achieve the desired results. Remember to regularly monitor and maintain the tool and make adjustments as needed for optimal performance.
Conclusion
In conclusion, the chattering surface technique is an effective solution for reducing chattering and improving machining performance. By creating a pattern of small grooves on the cutting tool’s surface, this technique helps to break up vibrations and achieve a smoother cutting process.
To apply it effectively, factors such as material, tool geometry, and cutting parameters must be carefully considered. Additionally, advanced techniques such as variable pitch tools, dampening materials, and active control technology can further enhance its effectiveness. I hope this article has been beneficial for learning how to apply chattering surface technique. Make Sure the precautionary measures are followed chronologically.
Toby Rede is a professional potter focused on creating functional and artistic ceramics. His work blends natural textures with modern forms, often inspired by sustainable gardening and outdoor environments. Toby’s pottery emphasizes both utility and beauty, reflecting his philosophy of intentional craftsmanship. On the blog, he shares insights on integrating handmade objects into everyday life.
Education
Associate Degree in Ceramic Technology, Alfred University
Professional Focus
Pottery creation with a focus on functionality and artistic expression
Techniques exploring texture, glazing, and sustainable materials
Professional Accomplishments
Work featured in regional art shows and garden exhibitions
Collaborations with local craft fairs and home decor shops