

Firing clay in a kiln is a critical process that transforms soft, pliable clay into a durable ceramic material. This involves heating the clay at high temperatures to harden it, ensuring it undergoes proper vitrification—a process where the clay particles fuse, enhancing strength and water resistance. Proper firing is essential for lasting durability, effective glaze adhesion, and a polished finish. Mistakes during this stage can lead to cracks, underfired pieces, or other defects. This article aims to provide a clear, step-by-step guide on how to fire clay in a kiln, addressing crucial aspects such as preparation steps, firing schedules, and important safety precautions.

By following these guidelines, both beginners and experienced ceramicists can achieve reliable results while maintaining safety throughout the process.
Types of Kilns and Their Differences
When it comes to firing clay, choosing the right kiln is crucial in achieving the desired results. Below are the primary types of kilns and their distinct characteristics:
Electric Kilns
Electric kilns are the most common choice for home studios and small-scale ceramicists due to their convenience and accessibility. Equipped with digital or manual controls, they allow precise temperature management, making them ideal for consistent and predictable firings. These kilns are highly reliable for firing both bisque and glaze pieces.
Gas Kilns
Gas kilns operate using propane or natural gas and are favored for their ability to perform reduction firings. This process creates an oxygen-limited atmosphere within the kiln, resulting in unique glaze effects that are difficult to achieve in electric kilns. Proper ventilation is essential when using gas kilns, as they produce exhaust gases during operation.
Wood-Fired Kilns
Wood-fired kilns represent a traditional and labor-intensive firing method. They require constant monitoring and the manual addition of wood to maintain consistent temperatures. This technique, however, rewards effort with one-of-a-kind textures and surface variations from the ash and flames interacting with the pottery.
Raku Kilns
Raku kilns are specially designed to use rapid cooling techniques in raku pottery. After pieces are pulled from the kiln at high temperatures, they are placed into combustible materials to create dramatic, unpredictable surface effects. These kilns are best suited for experimental and artistic approaches to ceramics.
Preparing the Clay for Firing
Drying the Clay
Before firing, it is crucial to ensure that the greenware (unfired pottery) is completely dry, also called “bone dry.” Any residual moisture within the clay can cause issues such as cracking or, in extreme cases, explosions in the kiln due to the rapid expansion of water vapor. To achieve this level of dryness, pieces should be left to dry in a well-ventilated, low-humidity environment for several days or even weeks, depending on their thickness and size.
Bisque Firing vs. Glaze Firing
Firing clay is typically a two-step process. The first step, called bisque firing, involves firing the clay to a lower temperature to harden it. This step transforms the fragile greenware into a sturdier, porous material that is easier to handle and apply glaze onto. The second step, glaze firing, is done after glaze has been applied to the bisque-fired pieces. This final firing vitrifies the clay and melts the glaze, creating a finished surface and durable structure for the pottery.

Loading the Kiln
Proper loading of the kiln is vital for a successful firing process. Pottery pieces should be placed with even spacing between them to allow heat to circulate evenly. Avoid letting pieces touch each other during the firing process, as this could cause them to fuse together or lead to uneven results. Taking time to load the kiln carefully ensures better-quality outcomes and minimizes potential issues.
How to Fire Clay in A Kiln Bisque Firing Process
Bisque firing is a critical step in pottery making, as it transforms clay into a durable, semi-porous material that can be safely handled and decorated. This firing phase prepares the pottery for glazing and further finishing.
Step 1: Setting the Kiln Temperature
The standard bisque firing temperatures generally range from Cone 06 to Cone 04, which is approximately 1,820–1,945°F (993–1,063°C). Setting the correct temperature is essential to ensure the clay hardens effectively while retaining enough porosity to absorb glaze later. Check your specific clay’s recommended firing range before proceeding to avoid overfiring or underfiring.
Step 2: Slow Heating Process
Begin the firing process with a low temperature to allow any residual moisture in the clay to evaporate safely. This prevents steam from forming inside the clay body, which could lead to cracking or explosions. Gradually increase the heat in stages, a process often referred to as “ramping up.” Patience is key here—quick heating could lead to irreversible damage to your pottery. Thermocouples and kiln controllers can help to regulate the heating process with precision.
Step 3: Cooling Down the Kiln
After the firing cycle, allow the kiln to cool down entirely before opening it. Sudden exposure to cooler air can cause thermal shock, which may crack or weaken the pottery. Depending on your kiln setup, cooling may take several hours or even a day. Only open the kiln when it safely returns to room temperature to ensure the best results.

Glazing and Glaze Firing
Step 1: Choosing the Right Glaze
Selecting the appropriate glaze is essential for achieving your pottery’s desired finish and durability. Glazes come in various types, including glossy, matte, and satin finishes, each offering unique visual and tactile qualities. Additionally, it’s important to consider the firing range of your glazes—low-fire, mid-fire, or high-fire—so they are compatible with your clay body and kiln capabilities. Low-fire glazes are known for their vibrant colors and brighter finishes, while mid-fire and high-fire glazes often produce more earthy, subtle tones and greater durability.
Step 2: Applying Glaze
Glaze application methods play a crucial role in the final appearance of your pieces. Standard techniques include brushing, dipping, pouring, and spraying. Brushing allows for precision and control, making it ideal for intricate designs, while dipping and pouring tend to provide uniform coverage for larger pieces. Spraying, on the other hand, can create gradients or detailed finishes. Regardless of the method, ensure an even application and avoid excessive thickness, as this can cause runs or defects during firing. Allow the glaze to dry thoroughly before proceeding to the glaze firing step.
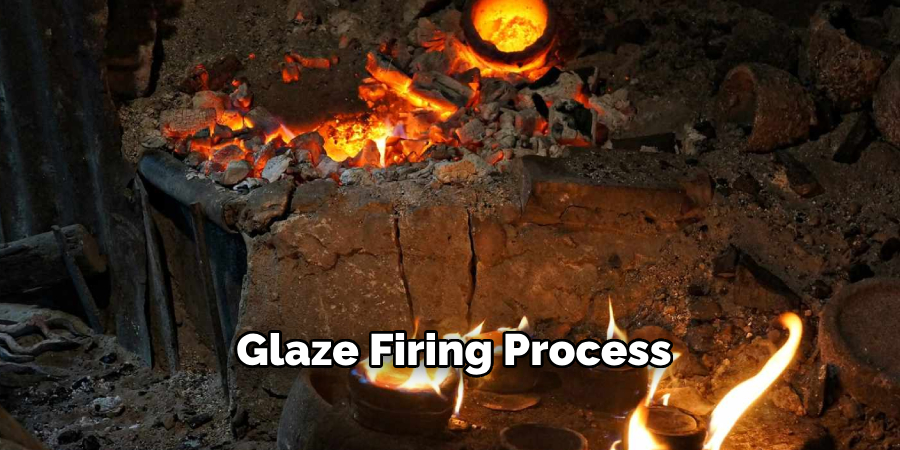
Step 3: Glaze Firing Process
In the glaze firing stage, your piece transforms into its final, finished form. Load the kiln carefully to avoid damaging the glazed surfaces, ensuring no pieces touch. Set the kiln to the appropriate cone level—Cone 6 for mid-fire glazes or Cone 10 for high-fire glazes, as specified by the glaze manufacturer. A slow, controlled cooling process prevents glaze defects such as crazing or cracking. Once the kiln has fully cooled, you can admire the beautiful glassy surface created through the glaze firing process.
Troubleshooting Common Firing Issues
Even with careful preparation, firing ceramics can sometimes result in issues that require troubleshooting. Below are some common problems, their causes, and solutions:
Cracking and Warping
- Causes: Cracking and warping often occur due to rapid heating or inadequate drying before firing. The moisture remaining in the clay expands too quickly, leading to structural failures.
- Solution: To prevent these issues, ensure the pieces are dehydrated by extending drying times, especially for thicker pieces. Use a slow firing schedule, particularly during the early stages when water and organic materials are being burned off.
Glaze Defects
- Blistering or Bubbling: These defects are typically caused by trapped gases escaping from the clay or glaze during firing.
- Solution: To minimize these issues, apply glaze in even, appropriate thicknesses to avoid overly thick layers. Additionally, follow a firing schedule that allows sufficient time for gases to escape during the process.
Kiln Not Reaching Temperature
- Causes: For electric kilns, worn-out elements often result in failure to reach the desired temperature. For gas kilns, insufficient fuel supply is a common issue.
- Solution: Regularly inspect and replace kiln elements in electric models and ensure proper maintenance of fuel supply lines in gas kilns to maintain consistent performance.
By addressing these common issues, you can improve the success and quality of your firings.
Kiln Safety Tips
Proper safety measures are essential when working with a kiln to ensure both personal well-being and the longevity of your equipment. Below are some key safety tips to follow:
Proper Ventilation
Always ensure your workspace has adequate ventilation. Kilns release fumes and gases during firing, some of which can be harmful if inhaled over time. Install an exhaust system or place the kiln in a well-ventilated area to minimize exposure.
Using Protective Gear
Protect yourself by wearing heat-resistant gloves when handling hot kiln shelves or tools. Always use kiln-specific tools to avoid burns and to manage equipment safely. Safety goggles are also recommended to protect your eyes from heat and potential debris.

Fire Safety Precautions
Never place flammable materials near your kiln. Maintain a clear, clutter-free area around it and always monitor your kiln during operation. Use a kiln sitter or a digital controller to prevent overheating and unforeseen accidents. Keeping a fire extinguisher nearby is a crucial precaution.
By following these kiln safety tips, you can create a safer workspace and enjoy more efficient and worry-free firings. Always prioritize safety alongside proper kiln maintenance for the best results.
Conclusion
Firing clay in a kiln is a multi-step process requiring skill and care. Each stage plays a crucial role in achieving a successful result, from preparing the clay to the first bisque firing, followed by glazing and the final glaze firing. Patience and precision in adhering to accurate firing schedules ensure the durability and quality of your pieces. Remember, monitoring the kiln closely and maintaining a detailed firing log are essential practices for consistent results. By following these guidelines, you’ll master the art of “how to fire clay in a kiln” and achieve beautiful, professional-quality ceramics.
Toby Rede is a professional potter focused on creating functional and artistic ceramics. His work blends natural textures with modern forms, often inspired by sustainable gardening and outdoor environments. Toby’s pottery emphasizes both utility and beauty, reflecting his philosophy of intentional craftsmanship. On the blog, he shares insights on integrating handmade objects into everyday life.
Education
Associate Degree in Ceramic Technology, Alfred University
Professional Focus
Pottery creation with a focus on functionality and artistic expression
Techniques exploring texture, glazing, and sustainable materials
Professional Accomplishments
Work featured in regional art shows and garden exhibitions
Collaborations with local craft fairs and home decor shops