

Are you tired of buying expensive ceramics and pottery pieces? Why not try making your own earthenware clay projects? Firing earthenware clay is a straightforward process that can be done in the comfort of your own home.
Firing earthenware clay is a transformative process, turning malleable earth into hardened ceramic through heat. This time-honored method solidifies the shape and form of your creation and allows for the expression of intricate designs and the permanence of the artisan’s intent.
Whether you are a beginner potter or a seasoned ceramicist, understanding the nuances of firing earthenware is essential for achieving the desired results. In this section, we will explore the key steps involved in how to fire earthenware clay, including preparation, the firing cycle, and important safety considerations to help you master the art of ceramic firing.
What Will You Need?
Before you begin the process of firing earthenware clay, it is crucial to gather all the necessary materials and tools. This will ensure a smooth and successful firing experience.
- Earthenware Clay: The most crucial element for firing earthenware is, of course, the clay itself. Make sure to choose a high-quality earthenware clay suitable for your desired project and within your budget. Some popular types of earthenware clay include terra cotta, red or white stoneware, and porcelain.
- Kiln: A kiln is a furnace that fires ceramic pieces at high temperatures. They come in various sizes and types, including electric, gas, and wood-fired kilns. Make sure to select a kiln that can accommodate the size and shape of your clay piece.
- Glaze or Underglaze (optional): While not necessary, adding a glaze or underglaze to your earthenware piece can enhance its appearance and add a protective layer. Make sure to select a non-toxic glaze that is compatible with your chosen clay and firing temperature.
- Firing Tools: You will need various tools for handling the hot pieces during the firing process, including tongs, gloves, and a heat-resistant surface for placing the kiln shelves.
- Safety Gear: Firing earthenware clay involves exposure to high temperatures and potential hazards such as fumes and dust. Wear appropriate safety gear, including eye protection, a mask, and heat-resistant clothing.
Once you have gathered all the necessary materials and tools, you are ready to begin the process of firing earthenware clay.
10 Easy Steps on How to Fire Earthenware Clay
Step 1. Wedging the Clay:
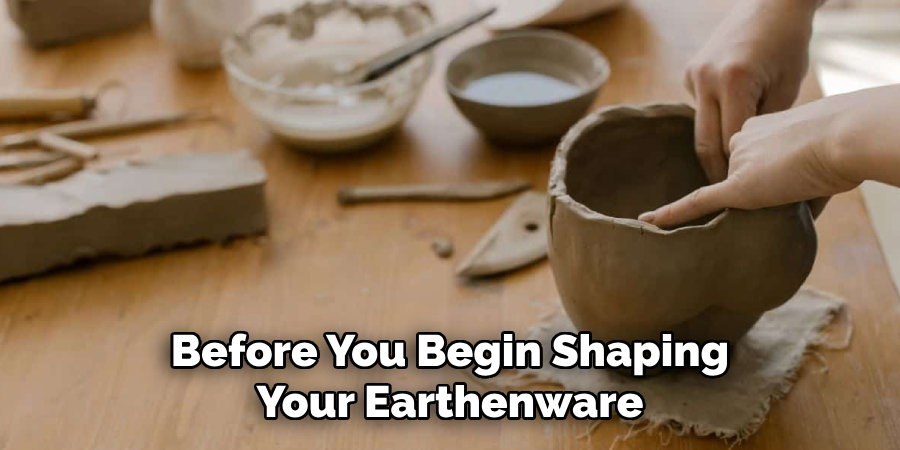
Before you begin shaping your earthenware, preparing the clay by wedging is crucial. This process involves kneading the clay to remove air bubbles and ensure a uniform consistency. Properly wedged clay reduces the likelihood of cracks or explosions during firing.
Step 2. Shaping Your Creation:
Once your clay is wedged, it’s time to shape your piece into its final form. You can use various techniques, such as hand-building, throwing on a potter’s wheel, or using molds. During this stage, pay attention to the thickness of the walls of your creation, as inconsistent thickness can lead to cracking when the piece is fired. Allow your finished item to dry until it reaches a leather-hard state, which is ideal for carving or adding details.
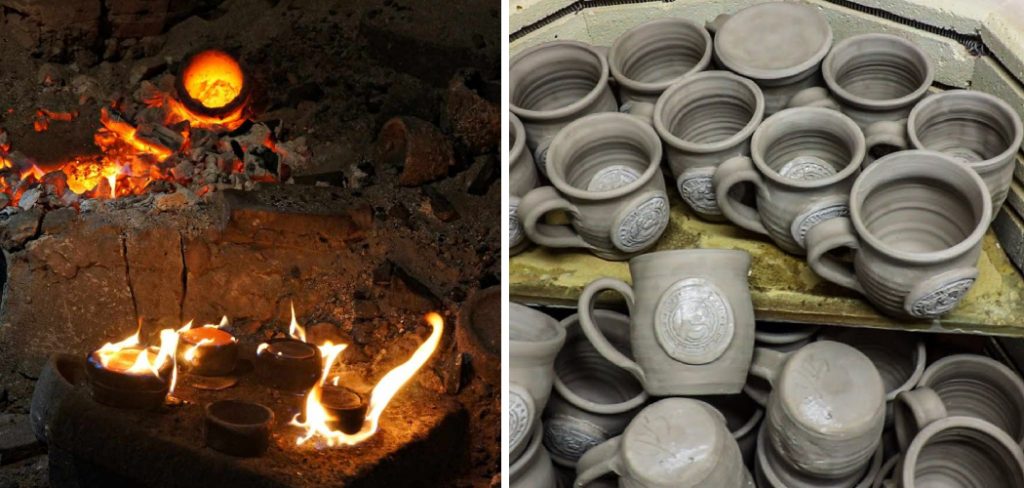
Step 3. Bisque Firing:
After thoroughly drying your creation, it must undergo the first firing, known as a bisque firing. This initial firing is conducted at a lower temperature to harden the clay and make it porous enough to absorb glazes. For earthenware, this typically ranges from 1,830°F to 1,940°F (1,000°C to 1,060°C).
Carefully load your dried pieces into the kiln, ensuring they do not touch each other to allow for even heat circulation. With a slow heating rate, the bisque fire will take approximately 8 to 10 hours to avoid thermal shock to the pieces. After reaching the maximum temperature, the kiln should cool down naturally, which can take up to 24 hours. Handle the bisque-fired details carefully, as they are still fragile.
Step 4. Glazing Your Bisqueware:
With the bisque firing complete, your earthenware is now ready to be glazed. Begin by thoroughly cleaning each piece to remove dust that could interfere with the glaze application. Dip, brush, or pour glaze onto the bisque ware according to your design preferences.
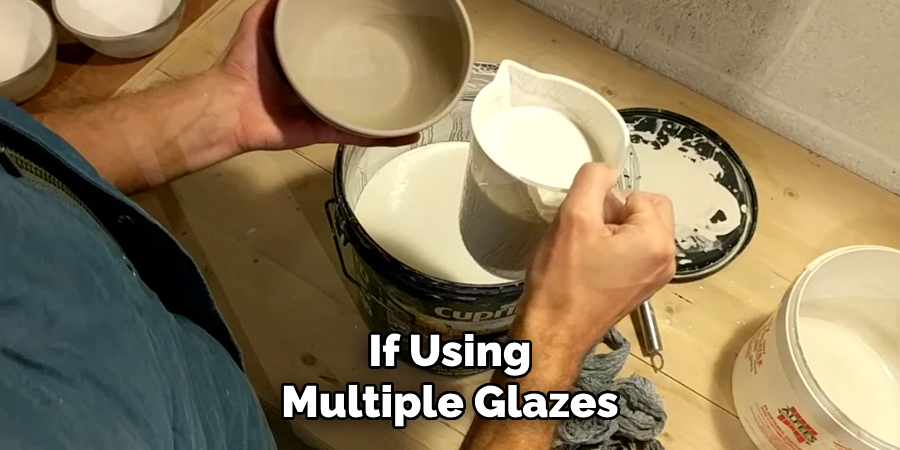
Be mindful of the glaze manufacturer’s instructions, as each ice has optimal thickness and drying times. If using multiple glazes, allow sufficient drying between layers. After glazing, carefully inspect your pieces for any runs or drips that may cause the report to stick to the kiln shelf during the final firing.
Step 5. Wax Resist:
Applying wax resistance is an effective technique if you want to create areas that will remain unglazed. The wax is painted onto the bisque ware where you do not want the glaze to adhere. When the polish dries, you can apply glaze usually; the glazed areas will retain the ice, while the waxed areas will repel it.
Ensure the wax is completely dry before glazing the rest of your piece. This step is optional and is used to add contrasting matte and gloss finishes and to prevent glazing the bottom of the piece, which can stick to the kiln shelf during firing.
Step 6. Final Firing:
It’s time for the final firing once the glazing is complete and the earthenware fully dries. This is where the chemical process between the clay and the glaze occurs, creating a vitrified and durable final product. Load your glazed bisque ware into the kiln, taking care not to let the pieces touch.
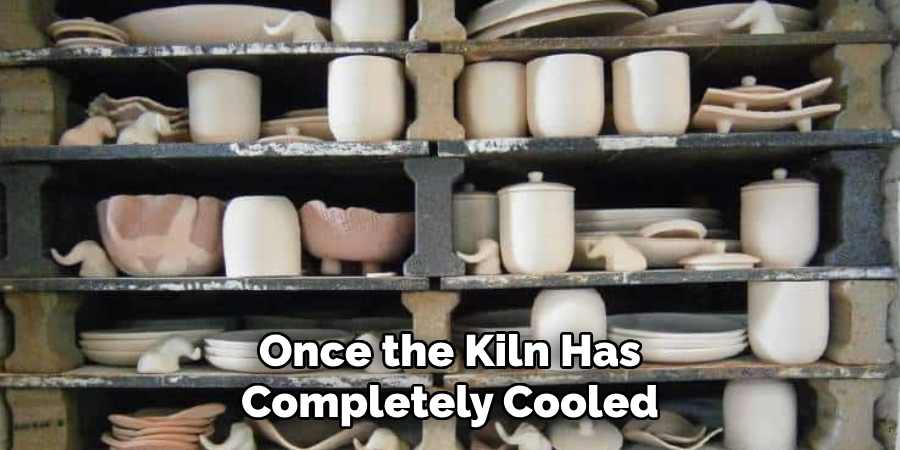
The firing temperature for the final earthenware should generally be between 1,812°F and 2,192°F (990 °C and 1,200 °C). The exact temperature will depend on the clay and glaze you use. Gradually increase the kiln temperature to prevent any damage to the pieces. The entire process can take anywhere from 12 to 24 hours, including the time needed for the kiln to cool down. Once the kiln has completely cooled, your pieces can be safely removed.
Step 7. Inspection and Finishing Touches:
After the final firing, inspecting your earthenware pieces for flaws or defects is crucial. Check for an even glaze coverage and ensure there are no cracks or crazing. If any rough spots are present, they can often be smoothed with fine sandpaper.
It’s also an opportunity to apply any additional decorative elements, such as gold or silver luster, which involves a third, low-temperature firing. Finally, clean your finished pieces with a damp cloth to ensure they are ready for use or display.
Step 8. Caring for Your Finished Earthenware:
Proper care and maintenance of your earthenware will extend its longevity and preserve its beauty. Always hand wash your pieces with gentle soap and avoid using abrasive materials that can scratch the glaze. Earthenware is more porous than other types of ceramic, which means it can be sensitive to temperature changes.
To prevent cracking, avoid exposing your stoneware to sudden shifts in temperature, such as moving it from a hot surface to a cold one. If your pieces are intended for culinary use, make sure they have been glazed with a food-safe glaze and fired to the appropriate temperature to vitrify the clay, making it safe for food contact.
Step 9. Storing Your Earthenware:
When not in use, store your earthenware in a safe place where it’s not likely to get chipped or cracked. Avoid stacking pieces directly on top of one another, as this might cause damage to the glaze or the clay body.

Use felt pads, cloth, or bubble wrap to separate items and reduce the risk of scratching. Keep your earthenware in an environment with stable humidity and temperature to prevent stress on the material. Proper storage will ensure your earthenware remains a cherished and lasting addition to your collection or living space.
Step 10. Enjoying Your Handcrafted Earthenware:
Now that you’ve followed all the necessary steps to create and care for your earthenware, it’s time to enjoy the fruits of your labor. Whether using your pieces for practical purposes or as decorative objects, they represent your creativity and dedication to the craft.
Display them proudly in your home, use them to serve your favorite dishes, or gift them to friends and family who will appreciate the unique beauty of handcrafted ceramic art. Remember that each item you’ve made carries a piece of your personal artistic journey and serves as an inspiration for future projects.
By following the steps outlined in this guide, you can confidently create beautiful and functional earthenware pieces that will bring joy and add a personal touch to your daily life.
6 Additional Tips and Tricks
- Slow Down the Cooling Process: After reaching the peak temperature in the kiln, allow your earthenware to cool down slowly. Rapid cooling can cause thermal shock, which may lead to cracking. Keeping the kiln closed until it reaches room temperature can help prevent this.
- Even Kiln Loading: To ensure an even temperature is reached throughout the kiln, be meticulous about loading your wares. Place larger, denser pieces near the bottom and ensure ample space between items for heat circulation.
- Use Witness Cones: While digital kiln controllers are precise, having witness cones inside the kiln during the firing can indicate that the correct temperatures have been reached at all levels and locations inside the kiln.
- Preheat the Kiln: If moisture is left in the clay, preheating the kiln at a lower temperature before ramping up can help evaporate any remaining water content slowly, reducing the risk of steam causing cracks or explosions.
- Regular Maintenance Checks: Regularly check the elements, thermocouples, and the general condition of your kiln. Wear and tear can lead to temperature differences and may affect the outcomes of the firing process. Keeping the kiln in prime condition ensures consistent results.
- Experiment with Glazes: Firing earthenware clay opens up a new world of experimentation with glazes. Explore different types of glazes, layering techniques, and temperature ranges to achieve unique and stunning results on your pottery.

With the proper techniques and knowledge, firing earthenware clay can be a rewarding and enjoyable.
6 Things You Should Avoid
Here are six things to avoid when firing earthenware clay:
- Avoid Rapid Heating: Just as with cooling, avoid heating the kiln too rapidly. Uneven or quick temperature changes can stress the clay, leading to warping or cracking.
- Do Not Overload the Kiln: Stuffing the kiln too full can prevent heat from circulating evenly, which can cause temperature variations and uneven firing of pieces.
- Refrain from Using Damaged Wares: Place only intact pieces in the kiln for firing. Cracked or damaged parts can break apart, potentially damaging other wares or the kiln itself.
- Never Skip the Bisque Fire: Firing un-bisque clay at glaze firing temperatures can trap moisture and air, leading to explosions within the kiln. Always bisque fire first to remove all water from the clay body.
- Avoid Mixing Clay Bodies: Different clay bodies have varying firing temperatures and rates of expansion and contraction. Mixing them in the same firing can lead to defects in your finished pieces.
- Wait to Open the Kiln Too Late: Patience is vital. Opening the kiln while it’s too hot can ruin your pieces and pose a safety hazard. Always wait for the kiln to reach room temperature.
With these tips, tricks, and proper care and attention, you can successfully fire earthenware clay and create beautiful pottery pieces.
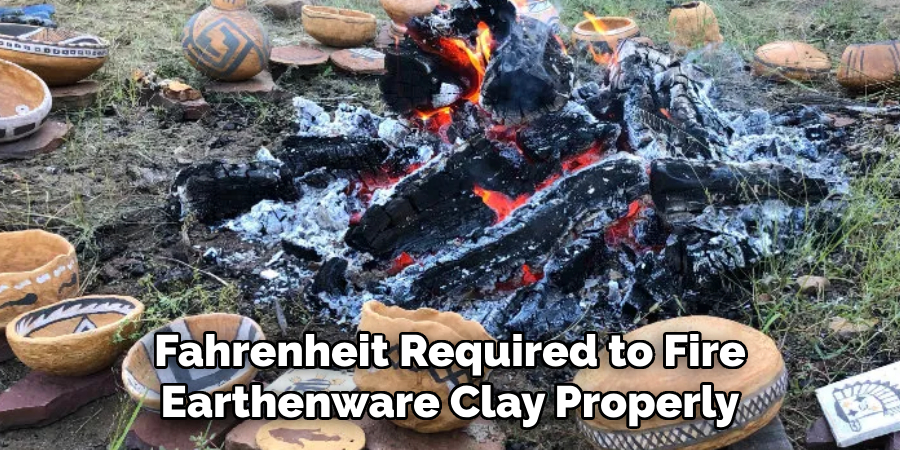
Can You Fire Earthenware Clay in an Oven?
While it might seem like a convenient solution, firing earthenware clay in a conventional home oven is neither recommended nor effective. Home ovens typically only reach temperatures around 500 degrees Fahrenheit, far below the over 1000 degrees Fahrenheit required to fire earthenware clay properly. Earthenware needs to achieve these high temperatures to undergo the vitrification process, which makes it durable and suitable for use.
Moreover, the heating elements in home ovens are not designed to maintain the consistent and even temperatures required for successful clay firings. For these reasons, using a kiln specifically designed for firing clay is essential to achieve the desired physical transformations and maintain the safety and integrity of the ware and the firing environment.
Overall, while it may seem tempting to take shortcuts, correctly firing earthenware clay in a kiln is crucial for achieving the desired results and ensuring the longevity of your pottery pieces.
What Are the Disadvantages of Earthenware?
While earthenware has a rustic charm and is a popular choice for artistic and domestic ceramics, it has several disadvantages that should be considered. For one, earthenware is more porous than other ceramics, like stoneware or porcelain, making it less suitable for holding liquids or for applications requiring non-porous surfaces. This porosity also means earthenware can be more prone to staining and absorbing odors.
Another drawback is its lower durability. Earthenware is less robust than other ceramics and is more susceptible to chipping, cracking, and breaking. It also doesn’t fare well in extreme temperatures, making it unsuitable for outdoor use in freezing conditions or in high-temperature applications like stovetop cooking.
Lastly, earthenware is generally less heat-resistant than other ceramics due to its lower vitrification point. This means it can withstand a different level of heat in an oven or microwave, limiting its functionality in everyday kitchen use. Despite these disadvantages, many appreciate earthenware for its unique aesthetic qualities and traditional appeal.
Is Earthenware Better Than Ceramic?
Whether earthenware is better than ceramic is not straightforward, as it depends on the intended use and personal preferences. Crockery, being one of the oldest forms of pottery, has a rich history and offers a traditional and earthy aesthetic that is highly prized in certain styles of dinnerware and decorative objects. Its lower firing temperature allows for a wide range of vibrant glaze colors that can’t be achieved with high-fire ceramics.
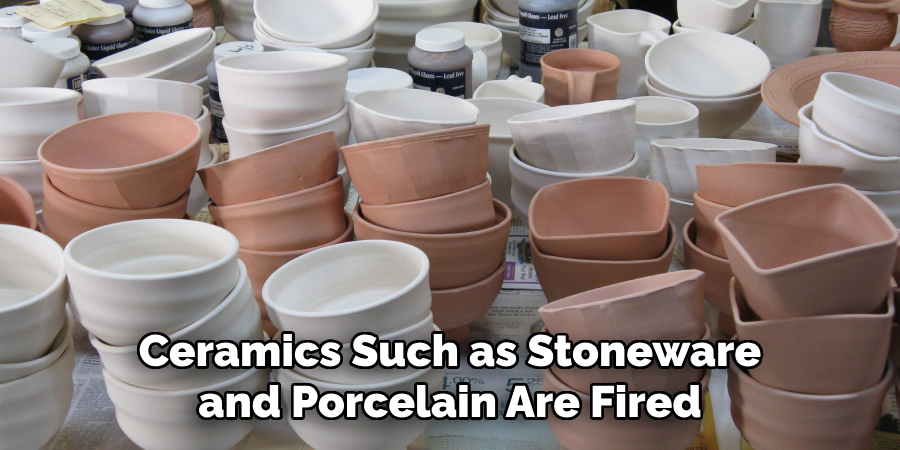
On the other hand, ceramics such as stoneware and porcelain are fired at much higher temperatures, making them non-porous, more durable, and more resistant to thermal shock. This means they are better suited for everyday utilitarian uses, where strength and resistance to chipping and cracking are essential. Additionally, their non-porous nature makes them ideal for cookware and liquid containers.
The choice between earthenware and other ceramics is a trade-off between aesthetic qualities and functional properties. Earthenware excels in decorative appeal and color variety, while other ceramic types offer practical advantages in durability and versatility. Deciding which is ‘better’ ultimately comes down to the specific requirements and aesthetic values of the user.
Conclusion
In conclusion, firing earthenware clay is a delicate process requiring attention to detail, patience, and an understanding of the material’s needs. By avoiding rapid heating or cooling, properly loading the kiln, inspecting wares for damage before firing, conducting a bisque fire, avoiding mixing clay bodies, and resisting the urge to open the kiln too early, one can ensure successful firings and the creation of beautiful, durable earthenware pieces.
Always bear in mind that while home ovens are not a substitute for kilns, investing in the proper equipment and adhering to these essential practices will lead to rewarding results in your ceramic endeavors.
Hopefully, the article on how to fire earthenware clay has been informative and helpful. Now it’s time to roll up your sleeves, get creative, and start firing! Happy potting!
Toby Rede is a professional potter focused on creating functional and artistic ceramics. His work blends natural textures with modern forms, often inspired by sustainable gardening and outdoor environments. Toby’s pottery emphasizes both utility and beauty, reflecting his philosophy of intentional craftsmanship. On the blog, he shares insights on integrating handmade objects into everyday life.
Education
- Associate Degree in Ceramic Technology, Alfred University
Professional Focus
- Pottery creation with a focus on functionality and artistic expression
- Techniques exploring texture, glazing, and sustainable materials
Professional Accomplishments
- Work featured in regional art shows and garden exhibitions
- Collaborations with local craft fairs and home decor shops