The art of ceramics constantly evolves, and incorporating real driftwood into glazed ceramic pieces stands at the frontier of this creative progression. This guide unravels the mystique of how to glaze driftwood on ceramic, presenting a method where the raw beauty of nature meets the refined touch of artisanal glazing.
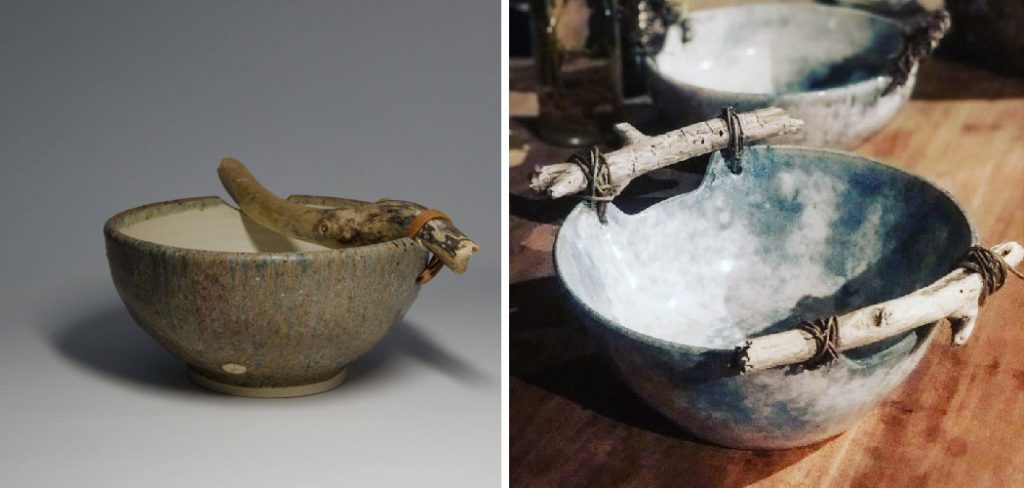
The result is a unique symphony of textures and forms, infusing each piece with a charm that only the collaboration of earth and sea can summon. Delightfully accessible to newcomers and deeply engaging for seasoned potters, this technique invites exploring the boundaries of creativity.
Understanding Driftwood and Ceramics
Driftwood, the water-worn remnants of trees and branches that journey through seas, rivers, or lakes, carries an inherent rugged beauty sculpted by natural forces. Its defining properties include a lightweight structure, a distinct woody texture, and a varied composition influenced by its aquatic exposure. Driftwood often presents challenges in ceramics due to its unpredictable reactions to high temperatures, such as cracking or warping. Additionally, as driftwood dries, it may release organic compounds or harbor hidden pests, making thorough preparation essential.
In pairing with ceramics, the selection of clay bodies is critical. Earthenware, stoneware, and porcelain each have unique thermal expansion coefficients, which must be compatible with the driftwood to prevent stress and breakage. When combined with driftwood, it is advisable to employ clay bodies that can withstand lower firing temperatures to accommodate the wood’s thermal sensitivity.
Safety considerations in using driftwood feature prominently because these materials are natural. They may carry microbes or necessitate chemical treatment; thus, wearing protection like gloves and a mask is prudent during processing. Careful attention to these factors ensures that driftwood can be integrated into ceramic artwork successfully, offering an organic contrast to the glazed finishes and contributing to the sustainability of art by repurposing found natural objects.
How to Glaze Driftwood on Ceramic
Merging Nature and Clay
1. Preparing the Driftwood
The preparation phase is quintessential when embarking on the journey of integrating driftwood into ceramic art. Begin by selecting driftwood pieces with interesting textures and shapes while ensuring they are structurally sound without excessive brittleness. Start by thoroughly rinsing the wood under clean water to eliminate marine salts, sand, and other debris. For deeper cleaning, soak the wood in a diluted bleach solution for several hours and rinse it well afterward to remove any residual chemicals.
The drying process is next and it is crucial. Slowly air-dry the cleaned driftwood in a well-ventilated area to organically wick away moisture. This can take several days or weeks, depending on the size and density of the wood. The objective is to achieve complete dryness to prevent expansion or contraction post-glazing, which could compromise the bond with the ceramic. If available, you can also use a dehumidifier to accelerate the process.

Some potters pre-treat the wood with heat-resistant adhesives or fireproof solutions to create a lasting bond. Such treatments help adhere the wood to the ceramic and can also serve as an additional barrier, protecting the driftwood during firing. Make sure to apply the treatment evenly, focusing on the areas in direct contact with the ceramic body. Allow ample time for the adhesive to cure as instructed by the manufacturer before proceeding to the next step.
Remember, patience is key. The time invested in properly preparing the driftwood is a prophylactic step towards your art’s longevity and beauty, ensuring that when it comes time to marry the elements of wood and clay, they do so in a harmonious and enduring union.
2. Creating the Ceramic Canvas
When it comes to marrying the organic intricacies of driftwood with the malleable virtues of ceramics, the artist must approach the creation of their ceramic canvas with vision and versatility. One approach is hand-building the ceramic form around the driftwood, letting the wood’s curves and contours dictate the clay’s shape. This method enhances the melding of materials by allowing the driftwood to become an integral part of the structure.
An alternative strategy is creating a dedicated pocket or recess within the ceramic piece, specifically designed to cradle the driftwood. This technique requires careful measurement and molding to ensure a snug and supportive fit for the wood. It offers the advantage of interchangeability and the potential for repositioning the driftwood if desired.
For those who favor pre-formed ceramic pieces, attaching the driftwood after the primary structure has been fired is possible. In this case, design the piece with the eventual connection in mind, providing flat or indented areas that can serve as points of attachment for the driftwood.
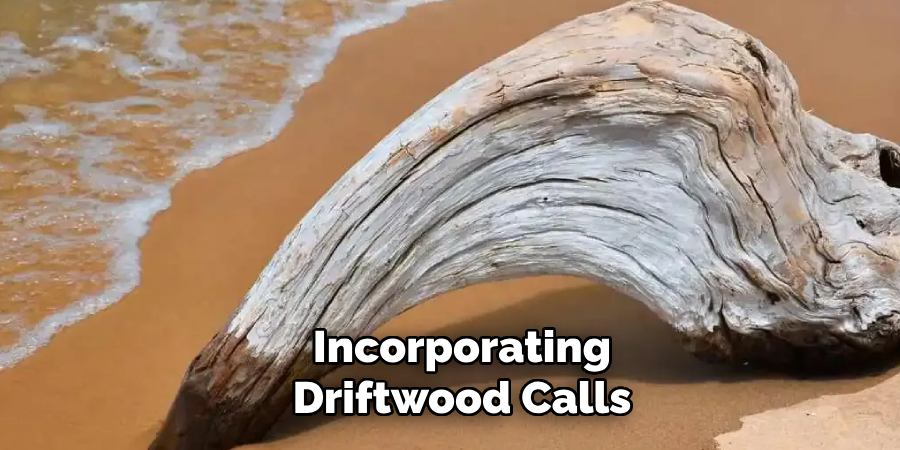
Incorporating driftwood calls for thoughtful design, acknowledging the wood’s inherent shape and texture. Crafting your ceramic element to echo the driftwood’s natural lines will make for a compelling and cohesive piece. To prepare for the fusion, approach the bisque firing of your ceramic part with foresight, considering the temperatures the driftwood can endure and ensuring the ceramic portion is sufficiently fired to provide a robust foundation for the wood addition.
3. Bonding Driftwood and Ceramic
Creating a lasting bond between driftwood and ceramic is an art in itself, requiring the use of strong, heat-resistant adhesives to endure the firing process. Epoxy resins are widely favored for their sturdy, long-lasting bond and versatility in adhering to porous surfaces. Although typically heat resistant, selecting an epoxy specifically formulated to withstand the temperatures of ceramic firing to prevent bond degradation is essential.
Ceramic glues offer another viable option, especially silicone-based ones, providing flexibility that can accommodate slight variations in the expansion and contraction of driftwood and ceramic during temperature changes. These glues resist heat well but may require a longer curing time than epoxies, so planning is critical.
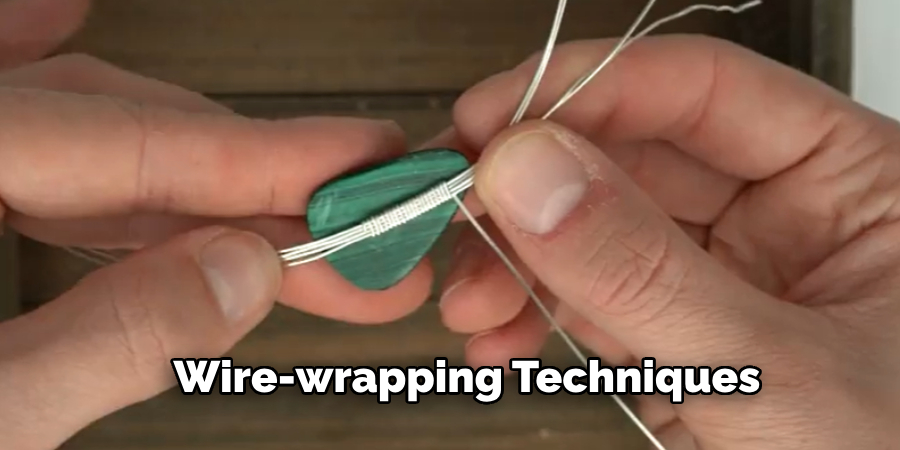
Wire-wrapping techniques, while more unconventional, can also secure driftwood in place without the need for adhesives. The artist can fasten the wood to the ceramic form using high-temperature wire, such as nichrome. This method allows for unique aesthetic details and can be adjusted post-firing, offering a dynamic approach to assembly.
Regardless of the chosen method, additional steps may be necessary for optimal results. Filling gaps with heat-resistant fillers can provide a smoother transition between materials and enhance structural integrity. Masking certain areas before glazing helps protect the driftwood and maintains the visual clarity of design elements.
In summary, the importance of selecting the right bonding method cannot be overstated, as it ensures the artwork can withstand the rigors of firing and results in a unified and enduring piece.
Exploring Glazing Techniques
In the delicate dance of combining driftwood and ceramic, applying glaze is a critical step that can significantly enhance the artwork’s visual impact and tactile experience. For the ceramic part, common techniques such as brushing, dipping, and spraying are employed, each with its own set of advantages. Brushing allows for controlled, deliberate application, perfect for detailed work. Meanwhile, dipping provides a quick and even application for pieces with simple silhouettes, and spraying can yield a uniform glaze coat on complex shapes.
Given its porous nature, the driftwood component requires a more nuanced approach. Before glazing, sealing the wood can help reduce its porosity, thus controlling the absorption of the glaze. Depending on the artistic vision, glazes can be selectively applied to the ceramic, with careful wood masking, or embraced as a textural element on the wood itself for a more rugged, natural look.
Layering different glazes opens endless possibilities for achieving depth and unique textures. As the various layers interact during the firing process, they can create surprising and intricate visual effects. One could explore opalescent top coats for luminosity or matte finishes to contrast the wood’s textures.
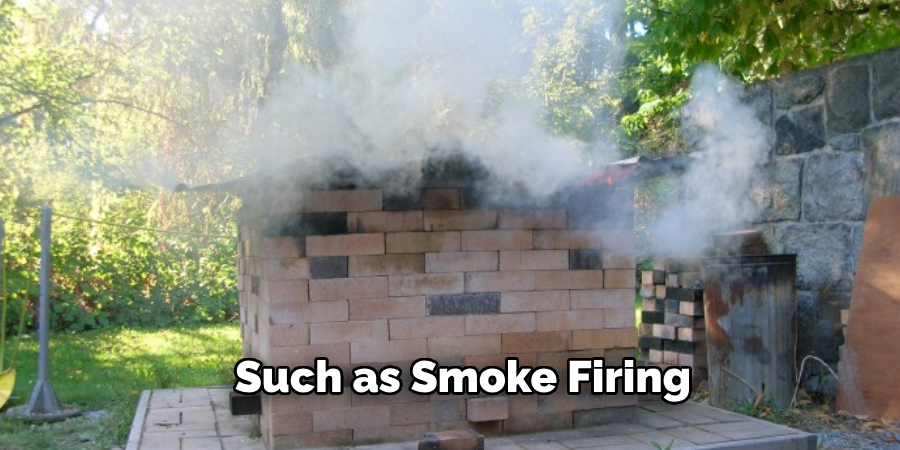
For advanced potters, techniques such as smoke firing can be used, where the artwork is subjected to a post-firing smoky environment to impart a rich, organic patina that can complement the tones in the driftwood. This technique requires experience, as it manipulates the smoke to achieve the desired effect without overpowering the piece’s aesthetics.
Remember, successful glazing is as much about the process as it is about experimentation and experience. Each approach can reveal a unique facet of the dialogue between wood and clay, profoundly influencing the character of the final artwork.
Achieving Desired Effects
When it comes to unifying driftwood and ceramics, the finesse lies in achieving the desired artistic effects to enhance the artwork’s overall appeal. Selecting contrasting glazes can effectively delineate the distinct entities of wood and clay. For example, using a bright, glossy glaze on the ceramic can make the driftwood’s natural color and grain pop, especially if the wood retains its raw, unglazed texture.
Highlighting the natural textures of driftwood is another intentional effect. Transparent or semi-transparent glazes accentuate these textures, making the underlying wood patterns visible. For a more dramatic texture highlight, consider using a glaze that breaks or pools in the crevices of the wood, deepening the shadows and celebrating every organic line.
Showcasing the wood grain patterns can be achieved by applying glazes that tend to crackle or craze, providing a subtle yet intricate surface that can echo the grain lines. Alternatively, a thin wash of darker glaze wiped back can settle into the patterns and create a striking contrast against a lighter backdrop.
Specific glaze types that interact with wood to create captivating visual dialogues include ash glazes, which can melt and pool around textures, and rutile glazes, known for their warm, earthy streaks that can harmonize with the wood’s tones. Celadon glazes are also popular choices for their transparency and ability to enhance surface variation while adding a touch of subtle color.
For those venturing into advanced ceramics, raku firing can lead to awe-inspiring surfaces with crackled glazes and smoky patterns that resonate well with aged driftwood. Salt firing is another specialized technique that results in a distinctive orange peel texture and can add a natural, stone-like quality to the ceramic, echoing the elemental nature of the wood.
Each glaze and firing method mentioned adds a unique dimension to the artwork, inviting viewers to appreciate the symbiosis of wood and ceramic. Experimenting with these methods can unlock myriad effects, ensuring every piece emerges as an individual testament to the maker’s vision and the inherent beauty of combining these two organic materials.
That’s it! You’ve now learned how to glaze driftwood on ceramic, from selecting the right bonding method to exploring glazing techniques and achieving desired effects. We hope this guide has inspired you to create your own one-of-a-kind driftwood and ceramic artwork. Remember, the possibilities are endless, so don’t be afraid to experiment and let your creativity flow! So gather some driftwood, fire up that kiln, and let your imagination run wild.
Firing Considerations and Challenges
When mixing media like driftwood and ceramics, one of the crucial aspects is understanding the firing range compatible with both the clay body and the chosen glazes. The sweet spot in temperature ensures proper maturation of the glaze without causing damage to the wood. Treading within this firing range is a delicate balancing act because wood can crack under intense heat or due to rapid temperature changes.
During the firing process, the behavior of glazes can add complexity. Fluid glazes may move or run at high temperatures, potentially distorting design intentions or adhering to the kiln shelf. Conversely, unexpected color changes can arise if glazes interact with variables such as the atmosphere within the kiln or the wood’s compounds.
Managing these challenges is possible with carefully planned firing schedules that allow for a gradual increase and decrease in temperature, thus guarding against thermal shock. Placement within the kiln is also strategic; ensuring there’s enough space around pieces can prevent unwanted contact due to glaze flow. Furthermore, pyrometric cones can assist in monitoring the kiln’s temperature, minimizing guesswork.
Safety precautions are paramount, especially with organic materials involved. Ensuring a well-ventilated firing area and employing the correct protective gear can mitigate potential risks associated with combustion byproducts. Each firing is a learning experience, shaping the mastery over the interplay of fire, clay, and wood.
Finishing Touches and Protecting Your Artwork
After the transformative process of firing, it is vital to render the final touches that will safeguard and accentuate the inherent charm of the fused elements in driftwood and ceramic art. Post-firing care often involves a meticulous cleaning to remove any ash or residue from the firing, ensuring the piece is pristine before applying any finishes.
A tailored approach to selecting sealants or protective coatings is essential, as it must enhance the artwork’s resilience without detracting from the natural allure of the driftwood. For instance, a matte varnish can protect the wood while maintaining its raw aesthetic. In contrast, a satin or gloss finish might be preferred to enrich colors and add depth. It’s important to choose non-yellowing and UV-resistant varnishes to shield the wood from environmental factors that can cause fading over time.
When displaying the artwork, avoid areas of high humidity or direct sunlight, which can cause warping or discoloration. Regularly dust the piece for long-term maintenance and occasionally check for signs of wear. If the artwork is intended for functional use, especially if it comes into contact with food, ensure food-safe sealants and glazes. These products should meet health safety standards to prevent any harmful substances from leaching.
Artists must be cognizant of the balance between aesthetic value and practicality. While durability is pivotal, it should not come at the expense of the artwork’s presentation. Misusing robust, non-compatible sealants could compromise the wood’s texture and color. Deliberate and informed choices will ensure your driftwood and ceramic artwork remains a timeless treasure, both in beauty and in structural integrity.
Frequently Asked Questions
How Do I Determine the Right Firing Temperature for My Driftwood Ceramic Piece?
The optimal firing temperature depends on the clay body and the glazes you use. It’s crucial to refer to the manufacturer’s recommended temperature ranges and consider the wood’s reaction to heat. Trial and error, alongside using pyrometric cones, can help you home in on the exact temperature that works best for your art.
Can Driftwood Be Incorporated Into Functional Ceramic Ware?
Driftwood can be integrated into functional ceramic pieces, but the wood portion should not come into direct contact with food or liquids and should be carefully sealed to protect it from moisture and wear.
What Type of Sealant Should I Use for Driftwood in Ceramics?
Choose a sealant that harmonizes with the natural look of the wood, provides the desired finish (matte, satin, gloss), and serves the piece’s intended use. For pieces exposed to sunlight or wear, UV-resistant and non-yellowing varnishes are best.
How Do I Clean My Driftwood Ceramic Artwork without Damaging It?
Dust the piece regularly with a soft brush or cloth. If necessary, use a slightly damp cloth on the ceramic parts, being cautious not to saturate the driftwood. Avoid chemical cleaners that could harm the finish or integrity of the materials.
Will the Driftwood Burn Away During Firing?
The driftwood should not be present during the firing of the ceramic. It is typically attached after the firing process, so there is no risk of burning. If you incorporate wood already subjected to high heat (such as charred wood), ensure it is sealed and attached securely.
Is It Safe to Fire Ceramics with Driftwood Elements in A Home Kiln?
The driftwood element should only be added after firing the ceramic component. Ensure all firing is done in a well-ventilated space, using proper safety equipment and adhering to the safety guidelines for kiln operation.
Conclusion
In summary, the fusion of driftwood and ceramic through glazing is an art that combines the raw beauty of nature with the refined touch of human craftsmanship. Understanding how to glaze driftwood on ceramic requires patience, experimentation, and respect for the materials involved. Mastering the firing process, applying appropriate finishes, and addressing the pieces’ protective needs is critical in ensuring the longevity and aesthetic appeal of the artwork. As we have seen, the potential for creativity is as vast as the sea, with each artist bringing their unique vision to life through this harmonious blend. I encourage every reader, whether a seasoned artist or a curious beginner, to embrace this technique. Let the driftwood guide your imagination, and the ceramic be your canvas as you explore the incredible artistry of this serendipitous melding of elements.
With a keen eye for detail and a deep understanding of the firing process, I bring ceramics to life as a skilled kiln operator. My expertise ensures that each piece reaches its full potential, achieving the perfect balance of strength and beauty. I take pride in overseeing the critical final stage of pottery creation, transforming raw clay into stunning, durable art. 🎨
From monitoring temperatures to perfecting firing schedules, I ensure that every piece is fired to perfection. My role is not just about operating the kiln; it’s about understanding the unique needs of each creation and bringing out its best qualities.
Join me on this journey of precision and passion, where every firing tells a story. Whether it’s a delicate vase or a robust sculpture, I am dedicated to making sure that every piece that comes out of the kiln is a masterpiece. 🏺✨
Toby Rede is a professional potter focused on creating functional and artistic ceramics. His work blends natural textures with modern forms, often inspired by sustainable gardening and outdoor environments. Toby’s pottery emphasizes both utility and beauty, reflecting his philosophy of intentional craftsmanship. On the blog, he shares insights on integrating handmade objects into everyday life.
Education
- Master of Fine Arts in Ceramics, California College of the Arts
Professional Focus
- Creating practical pottery for everyday use.
- Using unique styles and techniques to convey narratives in ceramics.
Professional Accomplishments
- Showcased work in local and national art galleries, gaining recognition for craftsmanship.
- Received accolades for innovative designs in pottery competitions.