

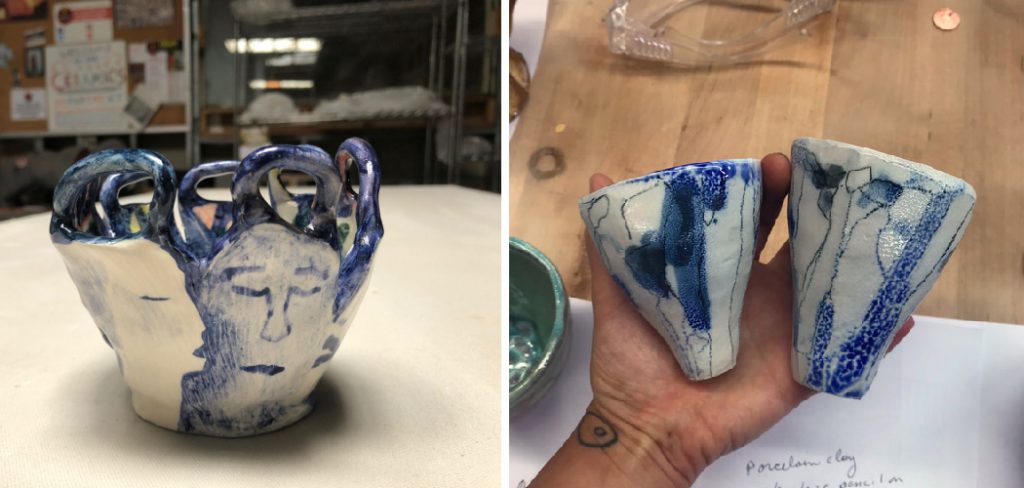
Dive into the rich, fiery world of garnet glazes, where every stroke leads to an eruption of deep, vibrant color and entrancing variation. Whether you opt for the boldness of opaque glazes or the layered intrigue of transparent options, garnet glazes unfailingly contribute an artistic profundity to pottery pieces.
Embracing textured finishes can also endow your work with a tactile dimension that begs for touch. Ideal for artisans of all skill levels, this guide illuminates the steps on how to glaze garnet on pottery, ensuring that both novices and seasoned crafters can introduce this scintillating touch to their ceramic repertoire.
Unveiling the Garnet Blaze
Garnet glazes are ceramic coatings known for their rich, crimson hues akin to the precious garnet gemstone. They consist of a blend of silica, fluxes, and metallic oxides that, upon firing, melt to form a glassy surface that fuses to pottery. These glazes embody a breadth of key characteristics, including deep saturation of color and a range of finishes from glossy to matte.
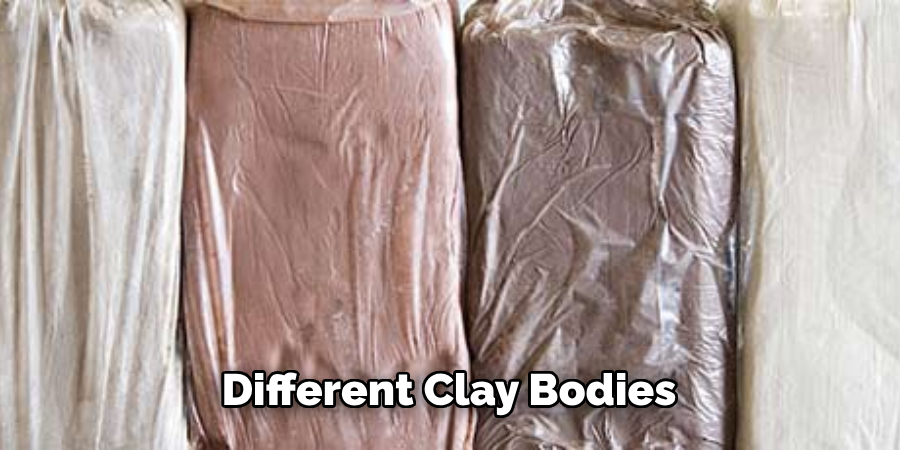
To achieve their signature look, garnet glazes typically require firing temperatures ranging from Cone 5 (about 2167°F or 1186°C) to Cone 10 (about 2345°F or 1285°C), which solidify their vibrant tones and desired textural outcome. Harmonizing with various clay bodies is essential—stoneware and porcelain are ideal candidates due to their high firing tolerances, while earthenware may necessitate a specific formulation to prevent issues such as glaze fit and color response.
Among the types of garnet glazes, artisans may choose opaque for a strong, solid color statement. Conversely, transparent garnet glazes allow the clay’s natural characteristics to shine through, providing depth and intricate visual layers. Textured garnet glazes add dimension, offering surfaces that play with light and shadow to intensify the sensory experience.
However, safety is paramount when handling these materials. As garnet glazes can contain harmful substances if ingested or inhaled, it’s crucial to work in a well-ventilated area and wear protective gear, such as gloves and a dust mask, particularly during the mixing and application phases. Proper hygiene and cleanup procedures should be practiced to minimize risk and ensure a safe and rewarding glazing experience.
How to Glaze Garnet on Pottery: Capturing the Fire
1. Preparing Your Ceramic Canvas
Before the vibrant burst of garnet glaze can set your ceramic piece ablaze with color, it is imperative to prepare your canvas meticulously. This process involves ensuring that your pottery is clean and completely dry, as dust, oils, and moisture can impair the glaze’s ability to adhere and meld to the surface properly.
Starting with bisque-fired ware, brush off any dust with a soft, clean brush. For more stubborn debris, use a slightly damp sponge to wipe the piece, but allow ample time for the ware to dry thoroughly before applying any glaze. Unfired greenware pieces require delicacy; brushing with a soft, dry brush is usually sufficient, as any moisture can weaken the fragile ceramic.
Different clay bodies will respond uniquely to the glazing process. Porcelain and stoneware, with their non-porous nature after bisque firing, are relatively straightforward, whereas earthenware can pose challenges due to its more porous nature, which might absorb the glaze unevenly. To combat these challenges, ensure a consistent thickness in your clay body and employ sponges or damp cloths to attain an even moisture content across the piece before glazing.
When it comes to applying the glaze, having the right tools can make all the difference. Soft brushes offer precision and a gentle touch, ideal for detailed work. Sponges are perfect for an even coat, while containers of various sizes allow for dipping techniques or storing mixed glazes. Remember, the key to a successful garnet glaze application is a clean and receptive ceramic surface, paving the way for your piece to truly sparkle with a garnet glow.
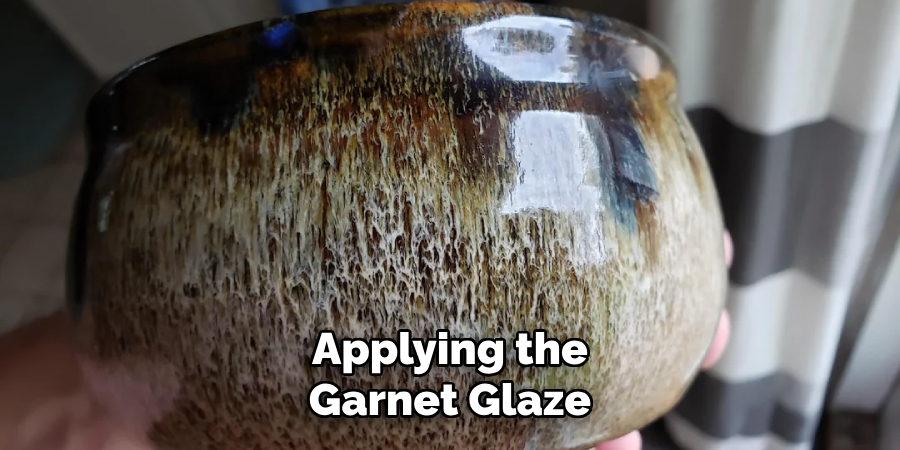
2. Unleashing the Garnet Flow: Applying the Glaze
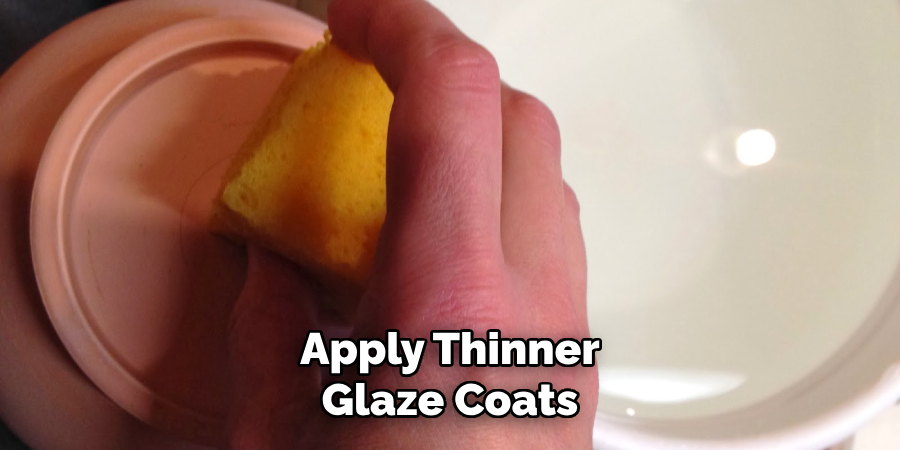
Garnet glaze application is an art in itself, dictating the final appearance of your ceramic creation. When aiming for a vibrant, deeply colored glaze, applying multiple smooth coats is essential. Use a broad, soft brush to lay down the first layer, allowing it to dry completely before adding subsequent coats. Thinner consistency glazes will require more layers to achieve an opaque appearance, while thicker ones offer intense coloration with fewer applications.
Different types of glazes call upon distinct application techniques. While brushing is perfect for creating smooth, consistent coverage, it also facilitates the incorporation of highlights or layered colors. Dipping, however, provides uniformity and is superb for covering large or intricate areas quickly.
To dip, pour your mixed glaze into a vessel deep enough to submerge your pottery and gently lower the piece into the glaze, holding it steady for a few seconds. For contrast and depth, layer glazes by applying a base coat, allowing it to dry, and then brushing a second glaze onto select areas. Layering can enrich your work with an interplay of color and shade, perfect for achieving the fiery depth garnet glaze is known for.
Specific effects, like intentional drips or textured accents, require a steady hand and a bit of experimentation. Apply a heavier coat to areas where you wish to encourage drips, guiding the glaze with your brush. For texture, sponges or textured fabrics can be dabbed onto the wet glaze surface to lift away some glaze and create a pattern.
Be mindful of potential issues such as runs and pooling, especially in crevices or at the piece’s base. To prevent this, apply thinner coats near the edges and details. To achieve even coverage without heavy buildup, maintain a consistent brush direction and pressure.
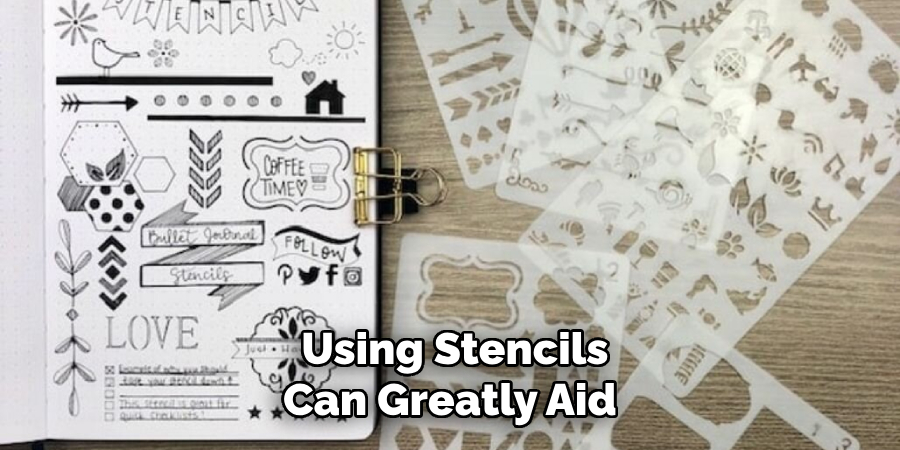
Advanced techniques like masking with wax resist or using stencils can greatly aid experienced potters seeking precise control over their garnet glaze designs. These methods block glaze from specific areas, creating crisp lines and patterns and offering another level of artistic expression on your ceramic canvas.
3. Drying and Preparing for the Kiln
Proper drying is critical to its success after the intricate and creative process of applying the garnet glaze. Uneven or rushed drying can lead to cracks, flaking, or a compromised glaze surface, ultimately detracting from the visual allure of your piece. It is recommended to allow a minimum drying time of 24 hours in a dust-free, well-ventilated room. Thickly applied glazes or humid environmental conditions may require extended drying times to ensure the moisture has completely evaporated from the glaze.
Besides, some proactive steps before firing can secure the quality of your beautifully glazed artwork. Ensuring that kiln shelves are clean and positioned horizontally promotes even heat distribution. Spacers or stilts can elevate your ceramics, enhancing airflow and preventing the pieces from sticking to the shelves, a precaution that is particularly important for glazes with high fluidity.
The careful loading of the kiln is paramount; pieces should not touch each other, as the glaze can cause them to fuse together at peak temperatures. The diligence paid during the drying and kiln preparation stages will pay off when your ceramic works emerge, boasting their vibrant garnet gleam, free of imperfections caused by moisture or firing mishaps.
4. Firing Your Garnet Masterpiece
To achieve the full potential of your garnet glaze, firing should be conducted within the ideal temperature range specific to the glaze formulation—often between cone 5 (2167°F/1186°C) and cone 10 (2345°F/1285°C).
It is essential to attentively follow the firing schedule, which includes a gradual increase in temperature to prevent thermal shock and controlled cooling to enhance the depth and richness of the glaze. Precise control during the cooling phase may also be necessary to develop the desired crystalline effects or glossy surface, thus maximizing the stunning garnet hue’s dramatic effect on your ceramic piece.
Unveiling Your Fiery Creation: Unpacking and Inspecting
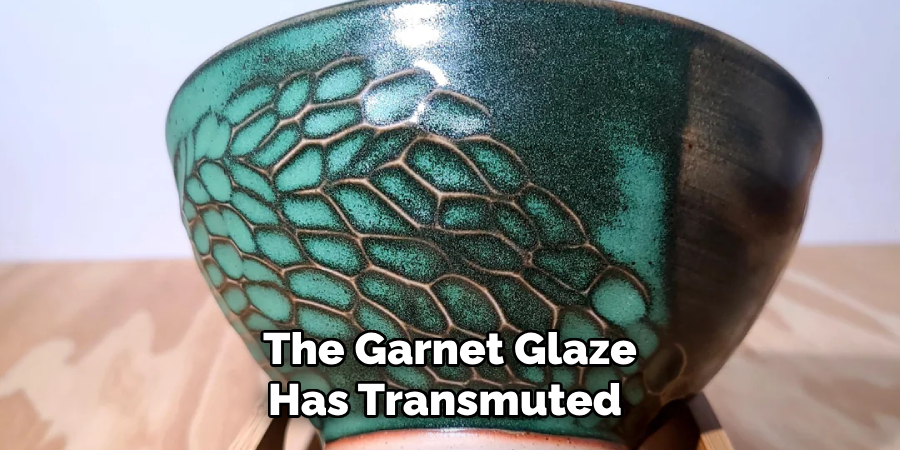
The moment of unveiling your ceramic piece from the kiln ignites anticipation and wonder, akin to a jeweler beholding the finest garnet extracted from the earth’s clasp. As you unpack each item, the air thrums with the excitement of discovery—the garnet glaze has transmuted under the alchemy of heat, revealing unique variations in color and texture.
No two pieces share the same expression; the glaze dances differently across every surface, with maroon tides ebbing into crimson pools and russet flecks crystallizing amidst a sea of reds. Slight deviations from your original vision are not flaws but serendipitous artistry—testaments to the glaze’s dynamism.
Remember to don heat-resistant gloves while cradling these fiery treasures; the contents, though visually cooled, often retain heat. Handling your pieces carefully, not only for safety but to preserve the intricate finish your diligence has wrought, is paramount. This unveiling marks both an ending and a celebratory beginning—each ceramic creation is a lasting hallmark of your craft.
That’s it! You’ve now learned how to glaze garnet on pottery, from preparing your workpiece to drying, firing, and unveiling. With each piece, you’ll develop skill, technique, and understanding of the complex world of glazes and their application. And best of all—you’ll have a collection of stunning garnet-glazed ceramics to show for it. Now go forth and let your creativity run wild with this fiery glaze!
Taming the Fire: Troubleshooting Common Issues
Navigating the fiery path of ceramics, some common hurdles may be imposed on the journey to perfection. Pinholing, a small but pesky issue, often occurs when gases are trapped within the glaze bubble and burst during firing, leaving tiny craters on the surface. To prevent this, ensure your glaze application is dust-free, and your firing schedule allows adequate time for gas escape before the surface seals.
Crazing, characterized by a network of fine cracks in the glaze, speaks to the glaze and clay body’s mismatched expansion and contraction rates. Combat this by experimenting with a clay body that better suits your garnet glaze’s thermal expansion or by adjusting the glaze formula to align with your clay’s characteristics.
Crawling, where the glaze retracts, creating bare patches, is another conundrum often caused by a dusty surface, overly thick application, or high surface tension of the glaze. To dodge crawling, meticulously clean your bisque ware, apply thinner glaze coats, and consider adding a glaze adherent to the recipe.
Running is the downward flow of the glaze during firing, leading to drips or pools at the base. This often stems from over-application or a firing temperature exceeding the glaze’s melting point. Prevent running by restraining your use of glaze near the bottom and confirming your kiln temperature does not surpass the glaze’s optimal range.
Advanced troubleshooting can also involve using dilatometry to measure the coefficient of expansion or employing glaze calculation software to finetune formulas. Moreover, artistically inclined adjustments might include the bespoke layering of glazes, anticipating their interactive flow to fashion deliberately designed runs or drips, harnessed as ornamental features on your pièce de résistance.
Beyond the Basic Blaze: Exploring Additional Effects
Once the foundational practices are mastered, a ceramist may venture beyond the rudimentary use of garnet glaze to embody art’s limitless possibilities. Layering different garnet glazes can result in a visual depth that’s far richer than a singular application. Each layer interacts variably with heat, yielding a complexity reminiscent of a gemstone’s multifaceted surface.
When combined with contrasting glazes, garnet can produce dynamic effects; imagine a canvas where molten lava meets a serene sea, the interplay of colors creating a visual dance that’s both captivating and unpredictable.
Intricate designs can be achieved by using stencils and masking techniques, where specific parts of the ceramic ware are shielded from the glaze, forming patterns and motifs that speak of precision and artistic intention. Pair this with texturing tools like sponges, combs, or even leaves, and you introduce a tactile dimension that beckons touch as much as the eye.
For artists eager to inject exclusivity into their creations, the combined use of brushing, dipping, and pouring opens up a tapestry of application methods. Such diversity in technique can result in unique glaze trails and thickness, contributing to a piece that’s not just crafted but also narrated through its glaze.
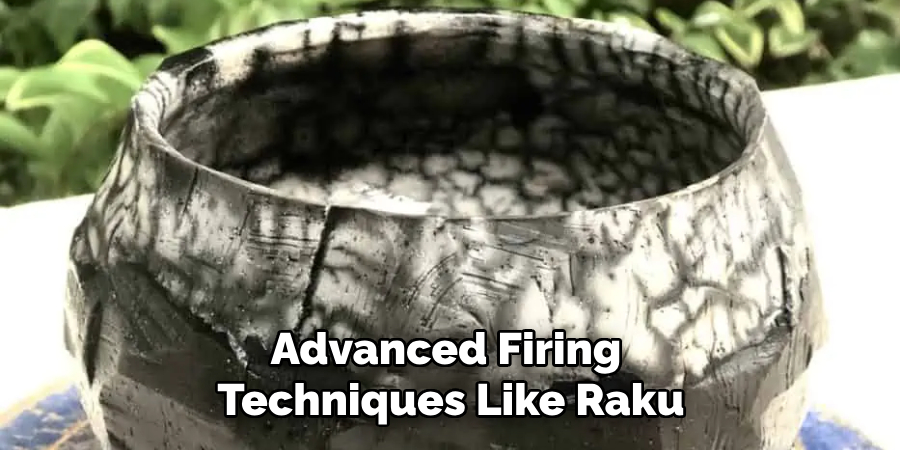
Advanced firing techniques like raku or smoke firing present experienced potters with the opportunity to further enhance their work’s fervor. Raku, with its post-firing reduction leaving unpredictable lusters and crackles, invites the elements of air and fire into your creative process, asserting a primal signature on the final piece. Smoke firing, while subtler, bestows upon garnet glazes an essence of the earth, an embrace of organic warmth where the flames’ whispers are etched onto the surface in whispers of carbon.
These sophisticated methods breathe life into ceramics glazed with garnet, transforming them into relics of fire’s fleeting poetry, a testament to the ceramist’s journey as a creator and a conjurer of fire’s evanescent beauty.
Caring for Your Garnet Gem
Proper maintenance ensures your garnet glazed ceramics’ enduring beauty and safety—especially pertinent if they serve culinary purposes. Hand washing is the most gentle method to clean these pieces. Use warm, soapy water and a soft sponge, avoiding abrasive materials that can mar the glaze’s intricate surface. If the glaze is certified food-safe and has been correctly fired, using your piece for serving or dining can be a delightful experience; however, avoid prolonged contact with acidic foods, which can etch the glaze over time.
While some sturdier glazes can withstand the dishwasher, the harsh environment inside can dull the garnet glaze’s luster or even cause micro-cracks that compromise the piece’s integrity. Therefore, abstain from machine washing to preserve the glaze’s vibrancy. Direct sunlight can also induce color fading, so when not in use, store your ceramic treasures away from windows or in a shaded display.

Long-term love for your garnet glazed ware means treating it like the art it is. Avoid thermal shock by keeping it away from ovens and microwaves, and take care when moving it between different temperatures. With mindful handling and cleaning, each piece will remain a testament to the fiery process it was born from, cherished for years to come.
Conclusion: Embrace the Fiery Journey
In the vibrant dance of pottery glazing, garnet emerges as a color that brings the fiery depths of the earth to the surface of ceramic art. The journey of learning how to glaze garnet on pottery is one of alchemical wonder, where heat, technique, and vision coalesce into breathtaking pieces, each unique in its narrative.
As we’ve explored, the interplay between glaze and heat yields gem-like complexity, and using stencils, texturing tools, and advanced firing techniques like raku and smoke firing adds to the tapestry of the art. Ceramists are encouraged to embrace the garnet glaze’s unpredictable nature, experiment with its limitless possibilities, and delight in the creative process. Remember, each step—each texture, layer, and heat choice—imbues your work with a story only you can tell. Cherish the journey’s heat and heart, and let garnet’s fiery essence inspire your artistic exploration.
Toby Rede is a professional potter focused on creating functional and artistic ceramics. His work blends natural textures with modern forms, often inspired by sustainable gardening and outdoor environments. Toby’s pottery emphasizes both utility and beauty, reflecting his philosophy of intentional craftsmanship. On the blog, he shares insights on integrating handmade objects into everyday life.
Education
Associate Degree in Ceramic Technology, Alfred University
Professional Focus
Pottery creation with a focus on functionality and artistic expression
Techniques exploring texture, glazing, and sustainable materials
Professional Accomplishments
Work featured in regional art shows and garden exhibitions
Collaborations with local craft fairs and home decor shops