

Glazing pottery is a transformative process that not only seals and protects your ceramic pieces but also adds depth, vibrancy, and life to their finished appearance. The choice of glaze color is crucial in defining the piece’s aesthetic, and opting for a ruby red glaze can result in dramatic, eye-catching creations that stand out in any collection.
Achieving a consistent and rich ruby red finish requires attention to detail, patience, and a thorough understanding of glaze application techniques.
In the following sections, we will explore the steps involved in how to glaze ruby red on pottery, from preparing your workspace and materials to the final firing that unveils the vivid hues of your artistry.
Whether you are a beginner or an experienced ceramist, these guidelines will help ensure that your pottery pieces achieve the lustrous and enchanting ruby-red finish that captivates the gaze of all beholders.
What are the Uses of Ruby Red Glaze?
Before we delve into the process of glazing pottery, let’s take a moment to appreciate the unique qualities and uses of ruby red glazes.
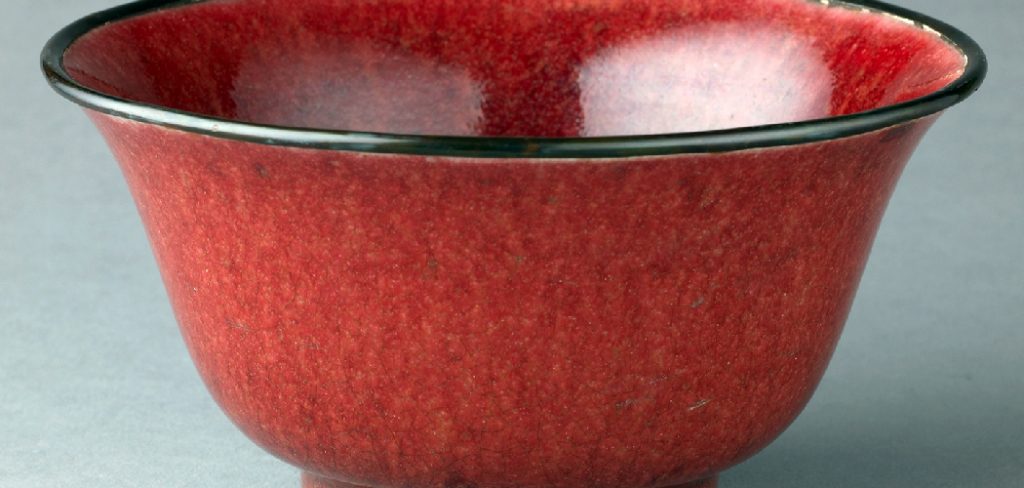
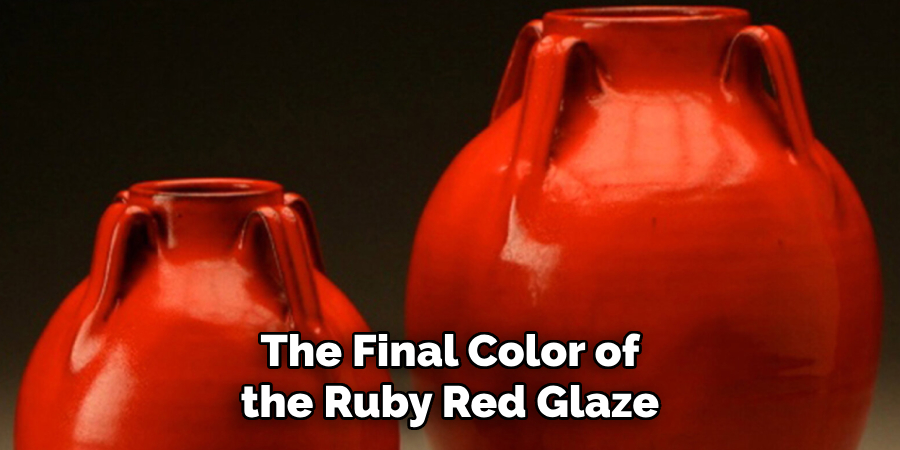
Ruby red glazes are typically made up of a combination of copper and iron oxides, and their main characteristic is their intense reddish color that ranges from deep burgundy to bright cherry tones. Due to their high copper content, they can produce fascinating color variations and crystalline effects when applied in thicker layers or layered over other glazes.
Ruby red glazes are versatile and can be used on different clay bodies, including stoneware, earthenware, porcelain, and more. They are commonly found in traditional pottery styles such as Chinese celadon and Japanese Oribe. They can also be used in contemporary designs to create striking contrasts or add a touch of warmth and elegance.
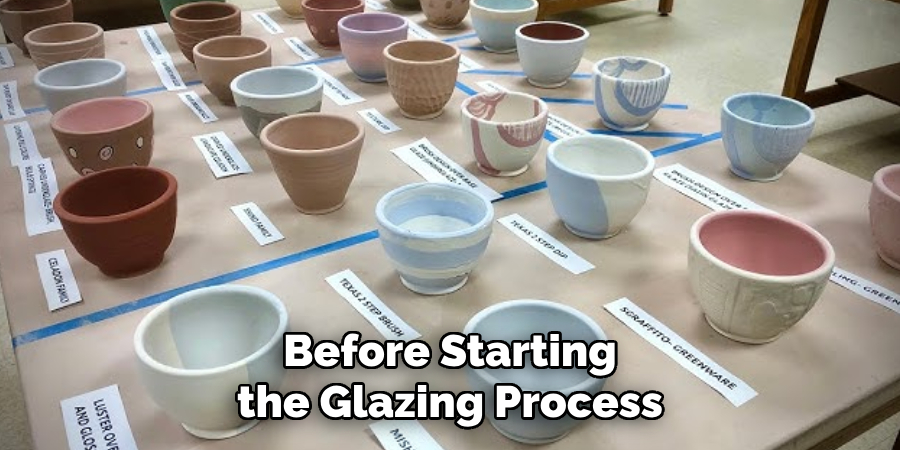
What Will You Need?
Before diving into the glazing process, ensure you have all the necessary materials. These include:
- Bisque-fired pottery pieces
- Ruby red cone six glaze (or any other desired shade of red)
- Glaze brush or sponge
- Small bowl for mixing and testing glaze consistency
- Tongs or gloves for handling hot pottery
- Protective gear (apron, gloves, goggles)
- Glaze application tools (spray gun, slip trailer, syringe)
- Kiln
- Stilts or kiln furniture for supporting pottery during firing
Once you have all your materials gathered, it’s time to prepare your workspace.
10 Easy Steps on How to Glaze Ruby Red on Pottery
Step 1. Prepare Your Workspace:
Before starting the glazing process, ensure that your workspace is clean, well-ventilated, and free from distractions. Cover your work surface with newspapers or cloth to catch any spills. Organize your tools and materials to be easily accessible, wear protective gear to avoid staining your clothes, and protect yourself from glaze particles.
Step 2. Mix the Glaze Properly:
Begin by preparing your ruby red glaze. In the small bowl, mix the ice according to the manufacturer’s instructions. The consistency should resemble that of heavy cream. If it’s too thick, add a small amount of water; if it is too thin, leave it to settle or add more glaze powder.
Stir the glaze thoroughly to ensure that the colorants and minerals are evenly distributed, which is crucial for achieving a consistent color on your pottery pieces. Always test the glaze on a test tile before applying it to your main piece to check for color and flow.
Step 3. Apply the Glaze to the Pottery:
Using a brush, sponge, or glaze application tool, apply the ruby red glaze onto the bisque-fired pottery. Ensure that you apply an even coat, paying particular attention to the details and texture of your piece. The thickness of the glaze will affect the final color intensity and can also influence the occurrence of any textural variations in the finish.
Apply glaze to hard-to-reach areas first to avoid smudging. Allow each layer to dry slightly before adding another coat if a thicker glaze layer is desired. Clean up any drips or excess glaze to maintain a sleek finish.
Step 4. Clean the Bottom of the Pottery:
Once the glazing is complete, carefully inspect the bottom of your pottery pieces and wipe away any excess glaze with a damp sponge. This step is critical because any glaze on the bottom of a piece can stick to the kiln shelf during the firing process, potentially damaging both the pottery and the kiln. Ensure that the foot ring or bottom edges are utterly glaze-free to ensure a clean and successful firing.
Step 5. Let the Glaze Dry Completely:
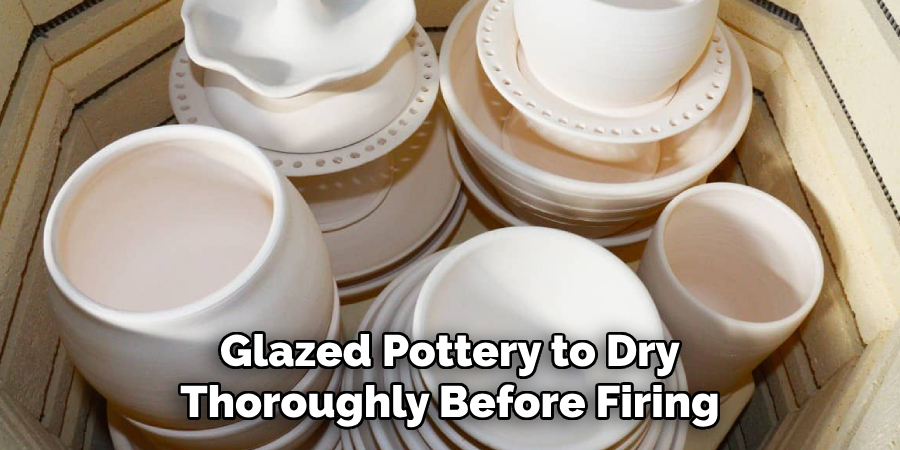
Allow the glazed pottery to dry thoroughly before firing. The drying time can vary depending on the thickness of the glaze applied and the humidity of the environment. A completely dry glaze is essential; otherwise, moisture in the glaze can cause problems in the firing process, such as blistering or popping.
Check the glaze by gently touching a small area with your finger. If it’s no longer tacky and feels bone-dry to the touch, it’s ready for the kiln. If you’re unsure, it’s better to err on the side of caution and allow more drying time.
Step 6. Load the Kiln Carefully:
Careful kiln loading is instrumental to the success of your glazing. Start by placing kiln stilts or furniture on the kiln shelf to ensure that each piece has proper air circulation and support. Position your pottery pieces on the stilts, ensuring they do not touch each other to prevent the glaze from fusing elements.
The placement should also consider the heat distribution within the kiln; pieces should be placed so they are exposed to an even temperature throughout. Double-check that the pieces are stable and unlikely to tip over during firing, which could result in damage to the pottery and the kiln interior.
Step 7. Program the Kiln for the Correct Firing Cycle:
Once the kiln is loaded, it’s time to program it for the firing cycle. The specific parameters will vary based on the clay and glaze manufacturers’ recommendations, but generally, for ruby red glazes fired to cone 6, a ramp/hold program is effective. Start with a slow initial ramp to allow any remaining moisture to evaporate, then increase the rate of temperature climb to the desired cone value.
Hold the temperature at peak to allow the glaze to mature fully and develop its vibrant color. Lastly, ensure a controlled cooling cycle, as rapid cooling can lead to thermal shock and cracking of the glaze. Always refer to your kiln’s manual and the glaze’s specifications for the precise firing schedule.
Step 8. Monitor the Firing Process:
While the kiln does its work, monitoring the firing process closely is crucial. Check the kiln’s temperature readings periodically to ensure it’s following the programmed firing schedule. If your kiln is equipped with a pyrometer or a kiln-sitter, these tools will aid in monitoring the accuracy of the firing.
Should any abnormal fluctuations in temperature occur, be prepared to intervene as necessary to mitigate potential issues. It’s also essential to look for any signs of smoke or unusual smells during firing, indicating a problem within the kiln.
Step 9. Allow the Kiln to Cool:
After the firing process, patience becomes pivotal, as allowing the kiln to cool is just as essential as the heating period. Only attempt to open the kiln once it has reached room temperature; doing so can cause the pottery to experience thermal shock, which can result in cracks or warping.
Depending on the size of the kiln and the heat reached during firing, cooling can take several hours to a full day. Resist the urge to rush this process, as proper cooling ensures the strength and stability of the glaze and the clay body beneath.
Step 10. Unload the Kiln:

Once the kiln has wholly cooled and reached room temperature, you can carefully unload your pottery. Open the kiln lid slowly to dissipate any lingering heat gradually. Carefully remove each piece, inspecting the outcome of the glaze. Look for an even sheen and uniform color distribution, ensuring no cracks or faults.
Be sure to handle the pieces carefully, as they can still be fragile at this stage. If any parts have adhered to the kiln shelves or stilts, gently chisel them away, being cautious not to damage the pottery or kiln furniture. This step concludes the glazing process, and your pottery is now ready for its final stage—a beautiful display or practical use!
Once all your pottery pieces are unloaded and have had time to settle post-firing, take a moment to evaluate your work. Reflect on the glaze’s color and texture, and note any disparities from your expectations. This practice is not merely for admiring the final product but also for gaining insights and identifying potential areas of improvement.
6 Additional Tips and Tricks
- Test on Test Tiles: Before applying ruby red glaze on your final piece, create test tiles. Apply the glaze at different thicknesses and fire them to see the outcomes. This will help you understand how the glaze behaves and how many coats are needed for the desired effect.
- Control the Kiln Atmosphere: Ruby red glazes often require a reduced atmosphere to develop their rich color. If your kiln has this capability, experiment with the levels of reduction and timing to achieve the best hue.
- Mind the Application Technique: Some glazes, including reds, are sensitive to the application method. Consider using a hake brush for even strokes or a spray gun for a consistent coat, avoiding drips and uneven layers.
- Layer Glazes Carefully: Pair the ruby red with a clear glaze to deepen the color and enhance the shine. Apply the clear glaze carefully so as not to disturb the underlying red.
- Take Notes: Document the entire process, including the specific gravity of the glaze, the number of coats applied, the kiln temperature, hold times, and the final result. This logbook will be an invaluable reference for future firings and can help replicate successes or troubleshoot issues.
- Consider the Clay Body: The color of your clay body can also affect the final color of the ruby red glaze. Experiment with different clay bodies to see how they interact with the glaze and choose one that complements the hue you want to achieve.
With these additional tips and tricks, you can glaze ruby red on your pottery pieces confidently. Remember to experiment, take notes, and have fun with the process.
6 Things You Should Avoid
- Avoid Rushing the Drying Process: Let the glazed pieces dry naturally. Hastening the drying process with fans or heat can lead to cracks or flakes in the glaze layer.
- Stay Clear of Incompatible Glazes: Not all glazes can be layered together—test for compatibility to prevent unpleased reactions that could spoil the intended ruby red finish.
- Don’t Overfire Your Kiln: Stick to the recommended temperature ranges. Overfiring can cause the color to burn out, resulting in undesired results.
- Beware of Contamination: Keep your workspace and tools clean. Cross-contamination from other glazes can alter the appearance and consistency of the ruby red glaze.
- Avoid Uneven Application: Maintain consistent strokes and thickness when applying the glaze. The uneven application will result in a patchy final look, with some areas potentially losing the vibrant red quality.
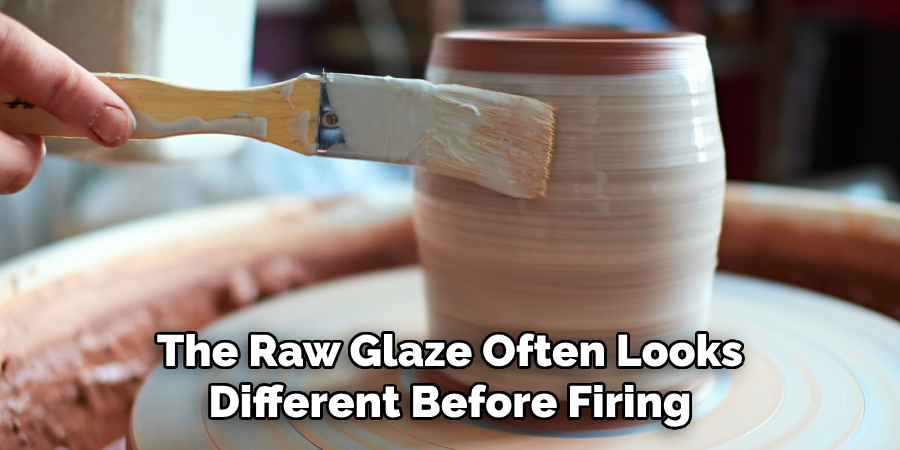
- Skip Quick Judgments on Color: The raw glaze often looks different before firing. Do not adjust the glaze solely based on its unfired color; wait to see the final product after the kiln has cooled.
By avoiding these common mistakes, you can ensure beautiful and consistent results when glazing ruby red on your pottery pieces.
What Glaze is Best for Pottery?
Selecting the best glaze for your pottery depends heavily on the desired aesthetic, the functional purpose of the piece, and the firing process available to you. For functional ware, such as dishes and mugs, a lead-free, food-safe glaze is paramount to ensure the safety of the end-users. If you’re looking for a glossy finish, a high-glass glaze will give you a shiny and smooth surface, whereas a matte glaze provides a more subdued and tactile feel.
The firing temperature is also a determining factor: low-fire glazes tend to be easier to work with and offer a wide range of colors, but they’re less durable than high-fire glazes, which are better suited for items requiring high durability.
Additionally, if you’re working with intricate textures or want to highlight surface decoration, consider using a translucent or lightly tinted glaze, as these can accentuate details beautifully without overpowering the underlying design.
How Can You Shine Up Your Ruby Red Glaze?
To give your ruby red glaze an extra boost of shine, consider using a transparent overglaze. This will deepen the color and add a glossy finish to your piece. Alternatively, you can use a soft cloth or a dry brush to buff the surface of the glazed pottery after it has been fired; this can help bring out the sheen of the glaze. Another option is to use a wax resist before applying the clear glaze, leaving areas of exposed red for added depth and contrast.

Experiment with different techniques and methods to find the best way to shine up your ruby red glaze that suits your piece and style. Always test on a smaller sample or test tile before using any new technique on your final piece.
You can create stunning pottery pieces with a beautiful ruby-red glaze with the proper knowledge, tools, and experimentation. Continue to learn and improve your skills through practice and research, and have fun exploring the endless possibilities of glazing.
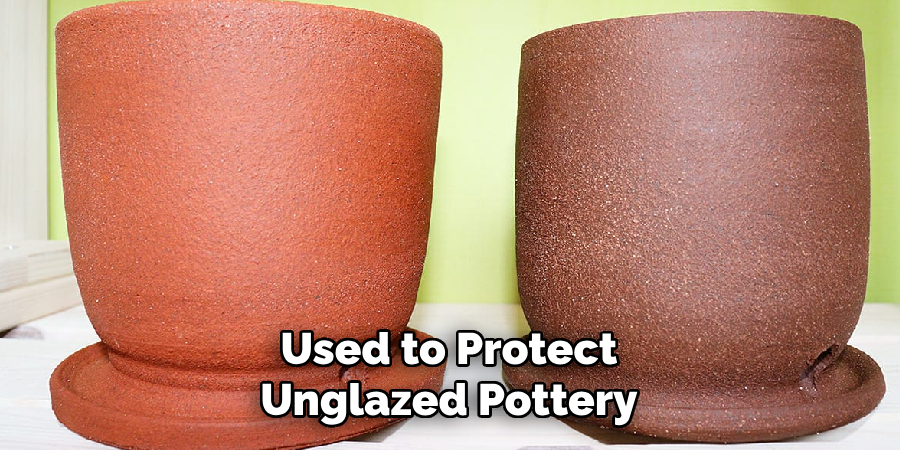
How Do You Seal Pottery Without Glaze?
Sealing pottery without glaze is possible but requires a different approach and set of materials. Here are three standard methods for sealing unglazed pottery:
- Using Wax: Applying wax to the surface of your pottery can create a shiny and protective layer. You can apply beeswax or paraffin wax with a soft cloth or dipping your piece into melted wax.
- Using Varnish: A clear varnish or sealant can also be used to protect unglazed pottery. Apply it with a brush or spray gun, ensuring an even smooth coat.
- Bisque Firing: Another option is to fire your pottery in a bisque firing without any glaze. This will create a natural, matte finish that can be left as is or sealed with wax or varnish for added protection.
Remember to test different methods and materials on smaller pieces before applying them to your final work. Each technique may have a different effect on the appearance and durability of your pottery, so choose the one that best fits your desired outcome.
Conclusion
To achieve a captivating ruby red glaze on pottery, it’s essential to merge artistry with science. Meticulous preparation, thorough testing, and a touch of creativity will guide you towards that perfect shade of red you desire. Remember, the journey to the ideal finish is as critical as the end product; each step – from choosing the suitable glaze formulation and applying it diligently to firing under controlled conditions – is pivotal in unveiling the true potential of ruby red.
Whether you’re a seasoned ceramicist or a beginner, embracing the process with patience and persistence ensures that every piece you create is not just a work of art but also an artifact of your learning and passion for the craft.
Hopefully, the article on how to glaze ruby red on pottery has provided valuable insights and tips to help you achieve vibrant and stunning results. Keep experimenting, learning, and creating beautiful pieces with ruby red glaze on pottery!
Toby Rede is a professional potter focused on creating functional and artistic ceramics. His work blends natural textures with modern forms, often inspired by sustainable gardening and outdoor environments. Toby’s pottery emphasizes both utility and beauty, reflecting his philosophy of intentional craftsmanship. On the blog, he shares insights on integrating handmade objects into everyday life.
Education
- Associate Degree in Ceramic Technology, Alfred University
Professional Focus
- Pottery creation with a focus on functionality and artistic expression
- Techniques exploring texture, glazing, and sustainable materials
Professional Accomplishments
- Work featured in regional art shows and garden exhibitions
- Collaborations with local craft fairs and home decor shops