

Welcome to my ceramic studio! For years the mysteries of ceramic glaze making have fascinated me to no end. As a young potter, I felt frustrated by the lack of control over how my pieces would turn out after firing – one wrong move and hours of work could be ruined by a wonky glaze reaction. Determined to take the reins, I dove headfirst into intensive glaze chemistry research. Through countless test batches, failures, and successes, I’ve developed intuitive glaze formulas that fire consistently and beautifully each time.
In this post on how to make ceramic glaze, I’ll share my tried and true glaze making process, including material sourcing, mixing techniques, and firing tips, to help take the anxiety out of glazing for potters of all experience levels. By the end, you’ll feel confident crafting your own unique glaze palettes to perfectly complement your ceramic creations. Let’s get started!
What is Ceramic Glaze?
In the simplest terms, ceramic glaze is a glass-like coating applied to ceramic pieces for both aesthetic and functional purposes. The glaze creates a waterproof barrier that protects the pottery from liquids and chemicals while adding color, texture, and shine to the surface.
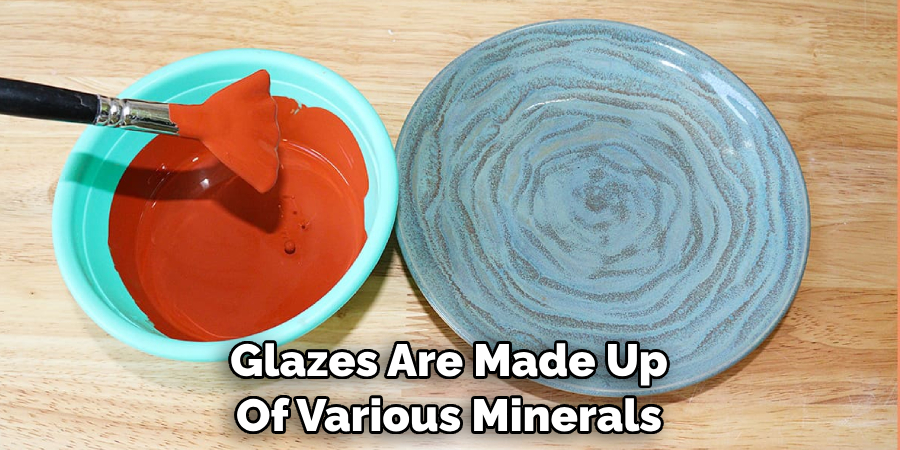
Glazes are composed of various minerals such as silica, feldspar, kaolin, and metal oxides, which melt and fuse together during the firing process to form a smooth coating. The chemical composition of these raw materials determines the final color, texture, and maturation temperature of the glaze.
Materials Needed for Glaze Making
Before we dive into the glazing process, let’s go over the essential materials you’ll need to make your own ceramic glaze.
Raw Materials:
As mentioned, glazes are made up of various minerals and oxides. These can be purchased from ceramic suppliers or sourced from raw materials such as clay, sand, rocks, and plants.
Ball Mill:
This equipment is used to mix the dry raw materials into a fine powder before adding water. It ensures thorough blending and eliminates an uneven distribution of materials in the glaze batch.
Sieve:
A sieve is used to remove any impurities or clumps from the dry raw materials before mixing them with water. This step ensures a smooth and consistent glaze texture.
Scale:
To achieve accurate glaze formulas, a scale is necessary to measure out the correct ratios of each material.
I recommend using a digital scale for precise measurements.
Jars or Buckets:
Once mixed, glaze batches need to be stored in airtight containers to prevent evaporation and contamination. Glass jars or food-grade buckets work well for this purpose.
Glazing Tools:
Brushes, sprayers, and sponges are all useful tools for applying glaze to ceramic pieces. Make sure to have a variety of sizes and shapes for different techniques.
10 Simple Step-by-step Guidelines on How to Make Ceramic Glaze
Step 1: Prepare Your Workspace
Before beginning the glaze-making process, make sure you have a clean and organized workspace. Glaze materials can be messy, so it’s essential to have enough room for mixing and storing materials. You’ll also want to have all your tools and materials within easy reach. But most importantly, make sure to wear protective gear like a dust mask and gloves to avoid inhaling harmful glaze particles.

Step 2: Choose Your Glaze Recipe
There are endless possibilities when it comes to glaze recipes. You can find formulas in books or online, or even create your own by experimenting with different combinations of materials. For beginners, I recommend starting with a simple base recipe and adjusting it to your liking. It’s essential to record your formulas in a glaze notebook for future reference.
Step 3: Weigh Out Your Materials
Using a scale, measure out the required amount of each material according to your chosen recipe. It’s crucial to be precise with measurements as even small variations can affect the outcome of your glaze. You can use measuring spoons for smaller quantities and graduate cylinders for larger amounts.
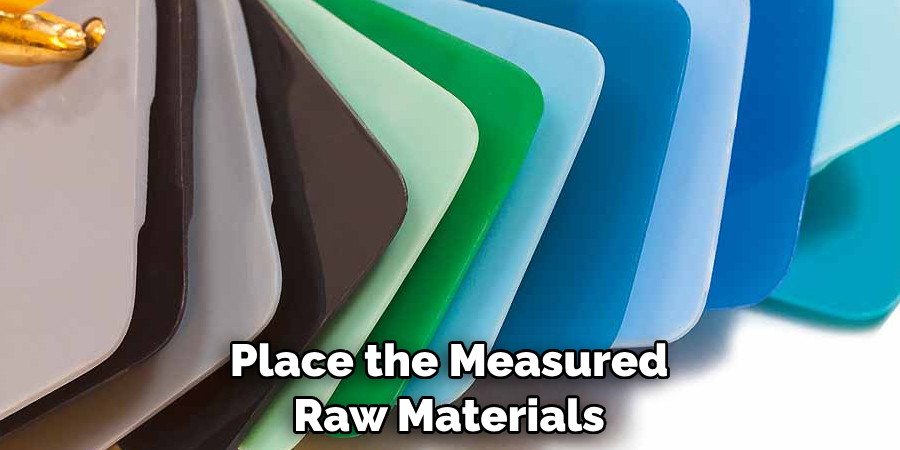
Step 4: Mill Your Materials
Place the measured raw materials into the ball mill, along with small ceramic balls or cylinders, and let it run for several hours. This process ensures that the materials are thoroughly mixed and ground into a fine powder. If you don’t have a ball mill, you can also mix the materials by hand using a mortar and pestle or a sieve.
Step 5: Sieve Your Materials
After milling, pass the mixture through a fine-mesh sieve to remove any impurities or clumps. This step is crucial for achieving a smooth and consistent glaze texture. But be sure to wear a dust mask when sieving, as the glaze particles can be harmful if inhaled. The sieved powder can then be stored in a jar or bucket until ready to use.
Step 6: Add Water
To turn the dry glaze mixture into a liquid, add water gradually while stirring constantly. The amount of water needed will vary depending on your recipe and desired consistency. It’s best to add small amounts at a time and test the thickness by dipping a brush or sponge into the glaze. You’ll want a smooth, creamy texture that easily coats the tool. Kit’s important to mix the glaze well after each addition of water to ensure all the materials are fully incorporated.
Step 7: Mix Thoroughly
Once all the water is added, mix the glaze thoroughly to ensure an even distribution of materials. A hand mixer or immersion blender can be useful for this step, but be sure to clean and dry them before using them in different glazes. The consistency of the glaze should be similar to that of heavy cream. You can adjust the thickness by adding more water or glaze powder.
Step 8: Test Your Glaze
Before applying the glaze to your ceramic pieces, it’s essential to test it on a sample tile or test piece. This step allows you to see how the glaze will look and behave once fired. You can also make any necessary adjustments to the thickness or color at this stage. The test piece should be bisque-fired first to ensure an accurate representation of the final product.
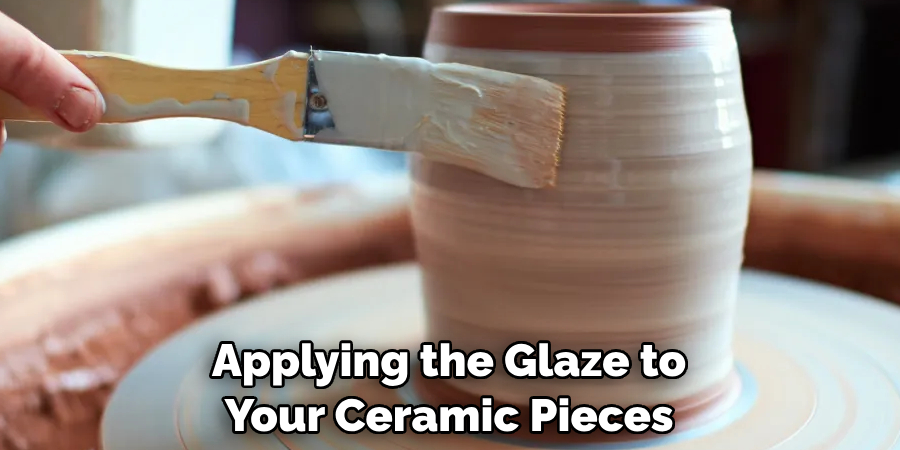
Step 9: Apply Your Glaze
Now that your glaze is mixed and tested, it’s time to start applying it to your ceramic pieces. There are various methods for glazing, including dipping, brushing, pouring, and spraying. Each technique requires different tools and skills, so experiment to see which works best for you. Make sure to apply the glaze evenly and avoid thick or thin areas.
Step 10: Fire Your Glazed Pieces
The final step is to fire your glazed pieces in a kiln. Follow the recommended firing temperature and duration for your chosen glaze. The firing process will melt the glaze particles, bonding them to the ceramic piece and creating a beautiful glossy finish. Remember to wear protective gear when loading and unloading the kiln to avoid inhaling any fumes or dust.
Following these simple steps on how to make ceramic glaze, you can make your own ceramic glaze and achieve unique and beautiful results. Don’t be afraid to experiment with different materials and techniques to find the perfect combination for your art. Happy glazing! Overall, creating ceramic glaze is a fun and rewarding process that allows you to add your personal touch to your pottery pieces. With some practice and experimentation, you’ll soon become a pro at making your own glaze. So go ahead and get creative!
Additional Tips and Tricks for Glazing
- Always Wear Protective Gear When Working With Glaze Material
- Keep Your Workspace Clean and Organized for Efficient Glaze Making
- Experiment with Different Materials and Techniques to Create Unique Glazes
- Record Your Formulas in a Glaze Notebook for Future Reference
- Have a Variety of Tools Available for Different Application Methods
- Test Your Glaze on Sample Tiles Before Applying to Finished Pieces
- Don’t Be Afraid to Make Adjustments to Your Glaze Thickness and Color
- Follow Proper Safety Precautions When Firing Your Pieces in a Kiln. so take your time and have fun with it!
With these tips, you’ll be well on your way to becoming a glaze-making master. Keep learning and experimenting, and soon you’ll have a collection of beautiful and unique glazed ceramics to show off. Happy glazing!
Conclusion
As we reach the end of this blog post on how to make ceramic glaze, I hope that you have gained a deeper understanding and appreciation for the art of making ceramic glaze. From selecting the right ingredients to experimenting with different firing techniques, creating your own unique glaze can be a fulfilling and rewarding experience. Don’t be afraid to get messy and let your creativity flow – who knows what masterpieces you might create!
Remember, practice makes perfect, so don’t give up if your first few attempts don’t turn out exactly as planned. And most importantly, have fun with it! Whether you are just starting out in the world of ceramics or honing your skills as an experienced artist, there is always room to learn and improve.
So why not gather some friends or join a local pottery class and embark on this journey together? The possibilities are endless when it comes to working with ceramic glaze, so let your imagination run wild and see where it takes you. Thanks for reading and happy glazing!
Toby Rede is a professional potter focused on creating functional and artistic ceramics. His work blends natural textures with modern forms, often inspired by sustainable gardening and outdoor environments. Toby’s pottery emphasizes both utility and beauty, reflecting his philosophy of intentional craftsmanship. On the blog, he shares insights on integrating handmade objects into everyday life.
Education
- Associate Degree in Ceramic Technology, Alfred University
Professional Focus
- Pottery creation with a focus on functionality and artistic expression
- Techniques exploring texture, glazing, and sustainable materials
Professional Accomplishments
- Work featured in regional art shows and garden exhibitions
- Collaborations with local craft fairs and home decor shops