

Making a Vinayaka idol with clay is a beautiful and creative way to celebrate festivals like Ganesh Chaturthi. This eco-friendly approach not only reflects devotion but also emphasizes the importance of sustainability. By using simple materials and techniques, anyone can craft a unique and personalized clay idol at home. This guide will walk you through the process step by step of how to make vinayaka with clay, ensuring a rewarding and joyous experience.

The Tradition of Crafting Vinayaka
The tradition of crafting Vinayaka idols holds deep cultural and spiritual significance. It symbolizes devotion and the heartfelt connection between devotees and Lord Ganesha. Historically, artisans and families have embraced this practice as a way to express their faith and artistry, often passing down techniques and styles through generations. The clay used to create these idols reflects a connection to nature, as it is believed Lord Ganesha himself was shaped from the earth. This practice also fosters a sense of community, with people gathering to celebrate the arrival of Vinayaka and engaging in collective creativity. Over the years, this tradition has become a blend of devotion, artistry, and a commitment to eco-conscious living.
Materials and Tools Needed
To create a beautiful and eco-friendly Vinayaka idol, you will need the following materials and tools:
Materials
- Natural Clay: Obtain non-toxic, eco-friendly clay for the idol.
- Water: Keep a small bowl of water handy to adjust the consistency of the clay.
- Natural Paints (optional): For decorating the idol after it is shaped and dried.
- Decorative Items: Optional items such as small garlands, beads, or eco-friendly glitter for final touches.
Tools
- Modeling Tools: Sculpting tools like wooden sticks or toothpicks for detailing.
- Flat Surface or Board: For rolling and shaping the clay easily.
- Cloth or Plastic Sheet: To spread on your work surface and prevent clay from sticking.
- Brushes: Small brushes for adding fine details with paint (if using stains or natural colors).
Having all these materials and tools ready will ensure a smooth crafting process and help bring your vision for the Vinayaka idol to life.
10 Methods How to Make Vinayaka with Clay
1. Basic Hand-Building
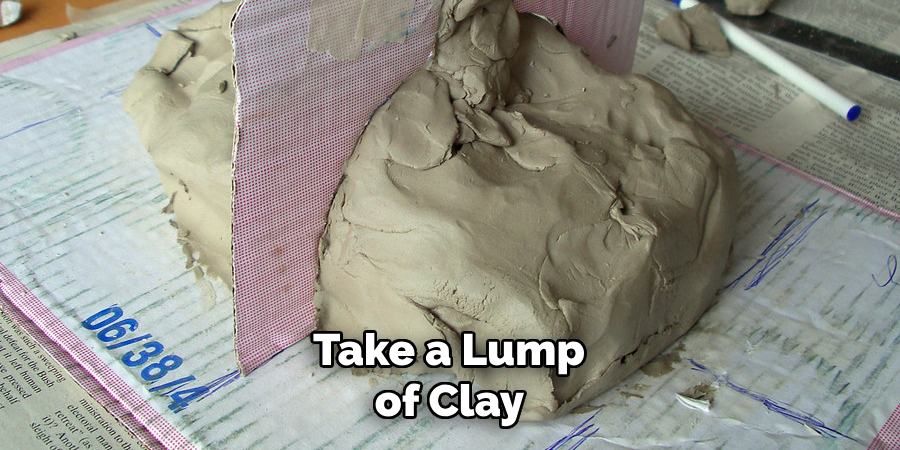
Start with the fundamental hand-building technique. Take a lump of clay and divide it into portions for the body, head, trunk, arms, and legs. Shape the body into a rounded form and attach the head using slip (a mixture of clay and water) to bond the pieces. Roll out smaller pieces for the trunk and arms, attaching them securely to the body. Add details like ears, hands, and feet. Use a wooden tool or your fingers to smooth connections and refine shapes. This simple approach is perfect for beginners.
2. Coiling Technique for Structure
The coiling technique is ideal for building a larger or hollow Vinayaka sculpture. Roll long, even coils of clay and stack them in concentric circles to form the body and head. Blend the coils together by smoothing the surface with your fingers or a rib tool. Add the trunk, ears, and arms using additional coils. This method provides a sturdy structure and allows for a detailed finish. Once complete, let the piece dry slowly to prevent cracking before firing or painting.
3. Using a Mold
For those seeking precision and uniformity, using a Ganesha mold can simplify the process. Press soft clay into a pre-designed silicone or plaster mold. Ensure the clay fills every detail of the mold. Carefully remove the clay form once it sets slightly. Molds are particularly useful for creating multiple idols or achieving intricate designs. You can customize the molded form by adding additional elements like decorative jewelry or a lotus base.
4. Sculpting from a Solid Block
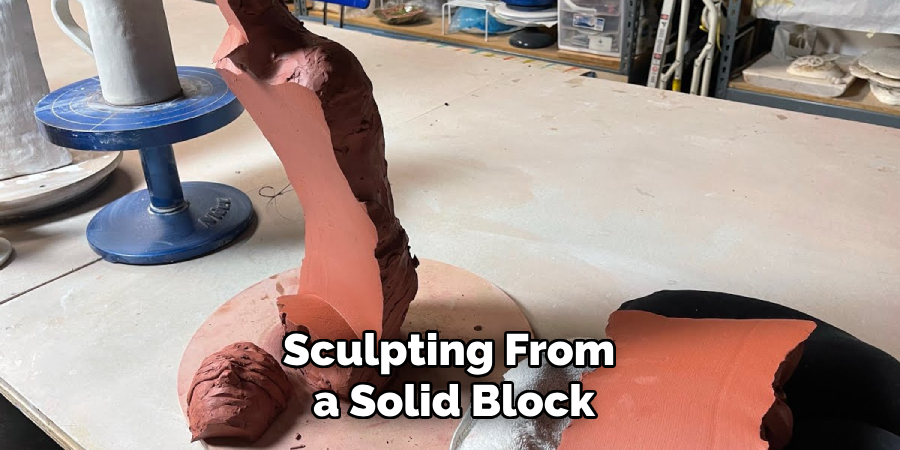
Sculpting from a solid block of clay requires more skill but allows for intricate detail. Start with a large lump of clay and shape the basic form of Vinayaka using your hands. Use sculpting tools to carve out finer details, such as facial features, ornaments, and the folds of garments. Work slowly to ensure balance and proportion. This method is ideal for experienced artists who want to create a highly detailed and unique Ganesha idol.
5. Layering Clay for Decoration
Add dimension and detail by layering clay pieces onto the base structure. Roll out thin sheets of clay and cut decorative elements like jewelry, crowns, or garlands. Attach these pieces to the main figure using slip, ensuring they adhere firmly. You can also create intricate patterns on the ornaments using carving tools or stamps. Layering allows for a rich, ornate appearance that enhances the overall aesthetic of the sculpture.
6. Creating Textures
Adding texture to your Vinayaka idol brings it to life. Use simple household items like combs, toothpicks, or cloth to imprint patterns on the clay. For example, create the texture of Ganesha’s skin using a fine sponge or add intricate designs to his garments using lace. You can also use specialized pottery tools for detailed work. Textures not only enhance the visual appeal but also make the idol more tactile and engaging.
7. Assembling Modular Pieces
For a more manageable approach, create individual parts of the Vinayaka separately and assemble them later. Sculpt the head, trunk, arms, legs, and torso individually. Let these pieces dry slightly until they are leather-hard, making them easier to handle. Assemble the parts using slip and secure them by blending the joints seamlessly. This method allows for precise detailing on each component before combining them into the final sculpture.
8. Incorporating Natural Elements
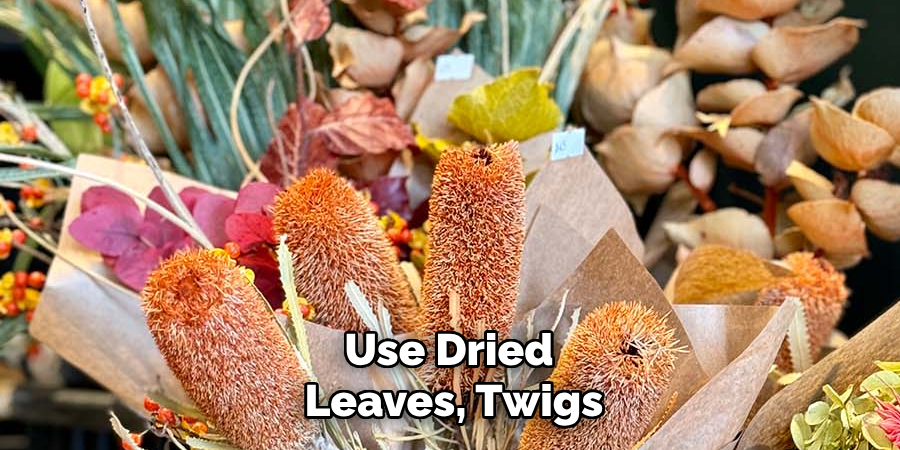
Enhance your clay Vinayaka by incorporating natural materials. Use dried leaves, twigs, or seeds to create decorative elements. For instance, a dried lotus pod can serve as a base, or small seeds can be embedded into the clay for added texture. These natural elements not only add uniqueness but also align with eco-friendly practices. Ensure any natural additions are securely attached and complement the overall design.
9. Painting and Finishing
Once the clay Vinayaka is completely dry or fired (if applicable), painting and finishing can transform the sculpture. Use acrylic or water-based paints for vibrant colors. Start with a base coat and layer details like facial features, ornaments, and clothing patterns. Metallic paints or gold accents can highlight jewelry and crowns. Seal the paint with a clear varnish for durability and a polished look. Finishing touches like adding a small tilak or a painted backdrop can complete the idol beautifully.
10. Personalized Themes
Infuse your creativity into the Vinayaka by choosing a unique theme. For example, you can depict Ganesha playing a musical instrument, meditating, or sitting on a lotus. Use additional clay or materials to create props and backdrops that suit the theme. Personalized themes allow you to craft a one-of-a-kind idol that resonates with your artistic vision and spiritual connection. This approach also makes your sculpture stand out during festive displays or pujas.
Maintenance and Upkeep
Proper maintenance and care of your clay Vinayaka idol ensure its longevity and preserve its aesthetic appeal. If your idol is unfired or made from air-dry clay, avoid exposing it to excessive moisture or humidity, as this can weaken the structure or cause it to crack. Keep the idol in a dry, cool space, away from direct sunlight to prevent fading or deterioration of painted surfaces. Regularly dust the sculpture using a soft, dry brush or cloth to maintain its pristine appearance.

If your idol incorporates natural elements, check periodically for wear or damage and replace parts as needed. Applying a protective varnish or sealant can further safeguard painted idols, keeping colors vibrant and resistant to environmental factors. With careful upkeep, your Vinayaka idol will continue to inspire and grace your space for years to come.
Common Mistakes to Avoid
When crafting a clay Vinayaka idol, avoiding common mistakes can ensure a smoother process and a more polished final result. Here are some pitfalls to watch out for:
- Skipping Preparation
Jumping straight into sculpting without properly preparing the clay can lead to cracks or uneven textures. Always knead the clay thoroughly to remove air pockets and ensure it’s pliable.
- Using Excess Water
Adding too much water while sculpting can weaken the clay structure, making it prone to collapse or cracking. Use water sparingly, just enough to keep the clay workable.
- Ignoring Proportions
Creating disproportionate features, such as oversized arms or an uneven trunk, can detract from the idol’s aesthetic. Regularly step back during the process to assess symmetry and balance.
- Weak Joints
Failing to securely attach parts like arms, ears, or ornaments can result in pieces breaking off during or after drying. Always use slip and blend the joints thoroughly for strength.
- Rushing the Drying Process
Drying the idol too quickly, especially under direct heat or sunlight, can cause the clay to crack. Allow the piece to dry slowly in a well-ventilated, shaded area.
Conclusion
Crafting a clay Vinayaka idol is a rewarding and meditative process that combines artistry, devotion, and skill. By following the steps outlined above, you can create a personalized and meaningful representation of Lord Ganesha that reflects your creativity and spiritual connection. Whether you sculpt for a festival, an offering, or personal fulfillment, each piece becomes a unique expression of your dedication and craftsmanship. So, there you have it – a quick and easy guide on how to make vinayaka with clay.
Toby Rede is a professional potter focused on creating functional and artistic ceramics. His work blends natural textures with modern forms, often inspired by sustainable gardening and outdoor environments. Toby’s pottery emphasizes both utility and beauty, reflecting his philosophy of intentional craftsmanship. On the blog, he shares insights on integrating handmade objects into everyday life.
Education
Associate Degree in Ceramic Technology, Alfred University
Professional Focus
Pottery creation with a focus on functionality and artistic expression
Techniques exploring texture, glazing, and sustainable materials
Professional Accomplishments
Work featured in regional art shows and garden exhibitions
Collaborations with local craft fairs and home decor shops