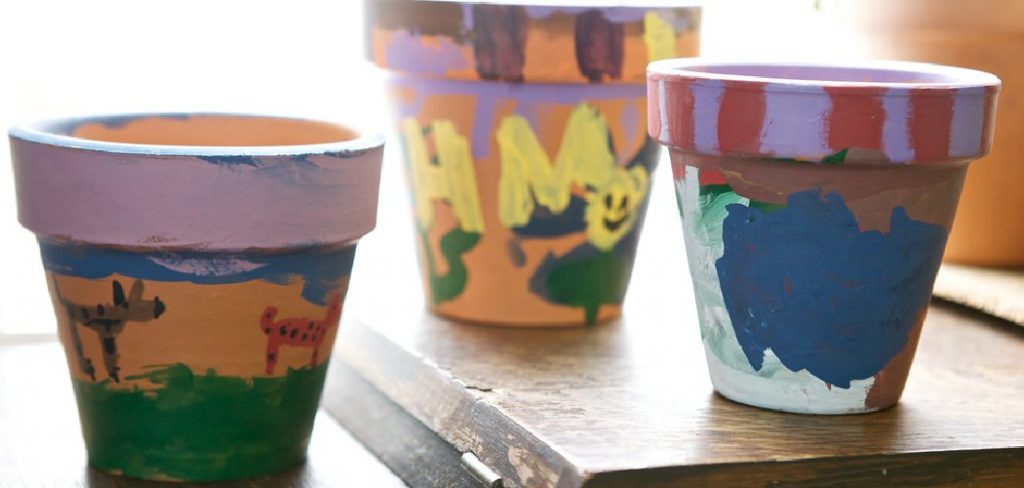
Are you looking for a fun and creative way to spruce up your indoor or outdoor space? How to paint a ceramic pot is an easy and affordable DIY project that allows you to add your personal touch to your home decor.

Whether you’re a seasoned artist or a beginner looking to explore a new hobby, painting ceramics offers endless possibilities for customization and design. This guide will walk you through the essential steps and techniques to transform an ordinary ceramic pot into a unique masterpiece. From selecting the right materials and paints to mastering various painting methods, you’ll gain the confidence to create beautifully decorated pots that reflect your style and artistic flair.
Let’s embark on this vibrant journey of turning blank ceramic canvases into charming works of art!
What Will You Need?
Before you get started, gather all the necessary supplies to ensure a smooth painting experience. Here’s a list of items you’ll need:
- Ceramic pot(s)
- Acrylic paints
- Paintbrushes in various sizes and shapes
- A palette or paper plate for mixing colors
- Water basin for cleaning brushes
- Paper towels or cloth for blotting brushes
- Optional: primer, sealer, stencils, painter’s tape, sponge applicators.
Once you have all your materials ready, find a spacious and well-ventilated area. Lay down some newspaper or a drop cloth to protect your work surface from spills or splatters. Now, let’s dive into the fun part—painting!
10 Easy Steps on How to Paint a Ceramic Pot
Step 1: Choose Your Design

The first step in painting your ceramic pot is selecting a design that resonates with your taste and complements its intended environment. Consider the pot’s function—whether it will host a vibrant bouquet indoors or sit gracefully on a sunlit patio. Your design could range from simple patterns like stripes and polka dots to intricate floral motifs or abstract art.
If you’re not sure where to start, browsing through design inspiration galleries online or flipping through art magazines can spark creativity. Sketching your design on paper can also help you visualize the final outcome and make any necessary adjustments before applying paint.
Step 2: Prepare the Pot
Before applying any paint, preparing your ceramic pot properly to ensure the best results is essential. Start by cleaning the pot’s surface with a damp cloth to remove any dirt, dust, or grease that might interfere with the paint’s adhesion. If your pot has been previously coated with a glaze, you may need to lightly sand the surface with fine-grit sandpaper to create a texture that the paint can grip.
Wiping the pot down with a damp cloth after sanding will remove any residual dust. If you plan to use bold colors or intricate designs, applying a primer to the pot can help the paint appear more vibrant and adhere better. Allow the primer to dry completely before moving on to the next step. Preparing the pot properly is crucial, as it sets the foundation for a smooth and durable finish that will beautifully showcase your artistic efforts.
Step 3: Apply the Base Coat

It’s time to apply a base coat with your pot prepared and primed. Choose a color that complements your chosen design and will serve as the foundation for your artwork. Using a larger brush, apply an even layer of acrylic paint to cover the entire surface of the pot.
Work in smooth, even strokes to avoid visible brush marks and achieve a clean finish. Depending on the paint color and brand, you may need to apply two or more coats to ensure complete coverage; just let each layer dry completely before applying the next. The base coat sets the stage for your design and helps other colors stand out, so take time to achieve an even and consistent application.
Step 4: Outline Your Design
With the base coat in place, it’s time to outline your design on the pot. If you’re confident in freehand painting, you can directly start drawing your design using a pencil or a light paint wash. Consider using stencils or painter’s tape to guide your outlines for more intricate or geometric patterns. These tools can help you maintain clean and precise lines, especially for detailed work.
If you’re using a stencil, carefully position it on the pot and ensure it’s secure to prevent paint bleed. Gently trace the shapes or patterns onto the surface. For painter’s tape, measure and cut it to create your desired pattern, pressing it firmly along the edges. Outlining your design helps provide a clear guide for the subsequent steps and ensures your painted features align perfectly with your artistic vision.
Step 5: Start Filling In Your Design
With your outline in place, it’s time to start filling in your design with color. Use smaller brushes to paint within the outlines, ensuring each section is filled with the shade you’ve chosen for that part of the design. It’s essential to work carefully and methodically to avoid crossing the lines of your outlines. If you’re incorporating multiple colors, consider waiting for each section to dry before moving on to the next to prevent any undesired blending.

Layering paint for depth or gradient effects can add an extra dimension to your artwork, so feel free to experiment with different brushing techniques or sponge applications. Whether your style is bold or subtle, take your time and enjoy the process of bringing your ceramic pot to life with vibrant hues and intricate details.
Step 6: Add Details and Highlights
Once your main design is filled in, it’s time to add details and highlights to make your ceramic pot stand out. Using fine-tipped brushes, add elements like thin lines, dots, or small shapes to enhance the intricacies of your design. Highlights can be achieved by using lighter shades of your chosen colors to accentuate certain areas, creating a sense of depth and dimension. If your design involves natural elements like flowers or leaves, add highlights where the light naturally falls to bring them to life.
Step 7: Seal Your Artwork
After completing the painting and adding all the desired details, it’s essential to seal your artwork to protect it from chipping and fading. Choose a clear acrylic sealer or varnish appropriate for ceramics, ensuring it is water-resistant and UV-protective if your pot is placed outdoors.
Using a brush or spray method, apply an even coat of sealer over the entire painted surface. Follow the manufacturer’s instructions regarding drying times and the number of coats required for optimal protection. Allow the pot to dry thoroughly before handling or placing it in its intended location.
Step 8: Display Your Finished Pot
With your ceramic pot beautifully painted and sealed, it’s time to find the perfect spot to display your creation. Positioning is critical to showcasing its colors and design prominently whether you choose to place it indoors or in a garden setting. Consider areas where natural or artificial light can enhance the vibrancy of your artwork, highlighting its intricate details and lively hues.
Grouping it with other plants or decorative elements can create a cohesive and eye-catching arrangement. Furthermore, occasionally rotating the pot will ensure that sunlight and visual focus are evenly distributed across the piece.
Step 9: Maintain Your Ceramic Pot
Proper maintenance is essential for preserving the beauty and longevity of your painted ceramic pot. Regularly dust the pot with a soft cloth to free it from dirt and debris. If necessary, lightly wipe the surface with a damp cloth to remove any marks, ensuring not to scrub too hard, which might damage the paint. Avoid harsh chemicals or abrasive cleaners, as these can degrade the finish and lead to fading or chipping.

If the pot is kept outdoors, consider bringing it inside during harsh weather conditions to protect it from extreme temperatures and moisture. Periodically check for signs of wear, and if areas of the paint start to show deterioration, you can touch up the art by carefully applying more paint and resealing the affected sections.
Step 10: Share Your Creations
Feel free to share your creations with others after successfully painting and maintaining your ceramic pot. You can showcase your work on social media platforms, craft blogs, or art forums to connect with fellow enthusiasts and gain inspiration. Sharing your process and tips can encourage others to explore their artistic skills and start their own projects. You might even inspire someone to try a new technique or design. Community feedback can provide valuable insights and foster growth as an artist.
By following these steps, you can transform a simple ceramic pot into a stunning piece of functional art.
Conclusion
How to paint a ceramic pot offers a delightful way to express creativity while creating functional art.
Following the outlined steps, from preparation to final touches, you can transform an ordinary pot into a captivating centerpiece. Whether you choose bold colors and patterns or soft, subtle designs, the key is to embrace your unique style and enjoy the artistic process. Proper sealing and maintenance allow your painted ceramic pots to endure the elements and retain their beauty over time.
As you share your art with others, you’ll find a welcoming community eager to share tips, techniques, and encouragement. In painting, each pot becomes a canvas for imagination, offering endless possibilities for artistic exploration.
With a keen eye for detail and a deep understanding of the firing process, I bring ceramics to life as a skilled kiln operator. My expertise ensures that each piece reaches its full potential, achieving the perfect balance of strength and beauty. I take pride in overseeing the critical final stage of pottery creation, transforming raw clay into stunning, durable art. 🎨
From monitoring temperatures to perfecting firing schedules, I ensure that every piece is fired to perfection. My role is not just about operating the kiln; it’s about understanding the unique needs of each creation and bringing out its best qualities.
Join me on this journey of precision and passion, where every firing tells a story. Whether it’s a delicate vase or a robust sculpture, I am dedicated to making sure that every piece that comes out of the kiln is a masterpiece. 🏺✨
Toby Rede is a professional potter focused on creating functional and artistic ceramics. His work blends natural textures with modern forms, often inspired by sustainable gardening and outdoor environments. Toby’s pottery emphasizes both utility and beauty, reflecting his philosophy of intentional craftsmanship. On the blog, he shares insights on integrating handmade objects into everyday life.
Education
- Master of Fine Arts in Ceramics, California College of the Arts
Professional Focus
- Creating practical pottery for everyday use.
- Using unique styles and techniques to convey narratives in ceramics.
Professional Accomplishments
- Showcased work in local and national art galleries, gaining recognition for craftsmanship.
- Received accolades for innovative designs in pottery competitions.