Printing on ceramic is a creative and dynamic process that brings ordinary objects to life with intricate designs or personalized motifs. Whether you’re a hobbyist looking to create custom gifts or a professional seeking to explore new artistic avenues, learning the basics of ceramic printing can be incredibly rewarding. This guide will walk you through how to print on ceramic, essential materials, and tips for achieving vibrant and long-lasting prints on ceramic surfaces. With a little practice, you can transform plain ceramic pieces into stunning works of art.

Why Print on Ceramic?
Printing on ceramic offers a unique blend of durability and aesthetic appeal that few other materials can match. Ceramics are inherently robust, capable of withstanding high temperatures and resistant to wear and tear, making them an ideal medium for both functional and decorative items. The process allows for high levels of detail and precision, enabling the creation of intricate patterns, vibrant colors, and personalized designs that can stand out in any setting. Moreover, printing on ceramic extends the lifespan of artworks and decorations, as the baked-in designs are less prone to fading or damage over time. Whether used for crafting personalized gifts, enhancing home décor, or creating customized tableware, ceramic printing provides an unmatched platform for creativity and permanence.
Tools and Materials Needed
Embarking on the journey of ceramic printing requires gathering the right tools and materials to ensure success. Ceramic blanks are the starting point; these can range from tiles and mugs to plates and pots. You’ll also need ceramic-friendly paints or inks, specially formulated to withstand the high temperatures of firing. A paintbrush or sponge can help apply the paint, although for more intricate designs, stencils or transfer paper might be necessary.
A kiln is essential for firing ceramics, setting the paint and making it permanent. Additionally, having gloves and aprons will protect your hands and clothing during the process. Lastly, some basic cleaning supplies, such as a damp cloth, will help maintain a tidy workspace. With these tools and materials on hand, you’ll be ready to dive into the exciting world of ceramic printing.
10 Methods How to Print on Ceramic
1. Direct Screen Printing on Ceramic
Screen printing on ceramic is a versatile and widely-used method in professional settings, ideal for detailed designs or logos. In this technique, a mesh screen is created, and ink is pressed through the screen onto the ceramic surface. This process allows for detailed designs and precise color application. After printing, the ceramic piece is fired in a kiln, making the design permanent. This method requires some setup, including creating the screen and having a kiln, so it’s typically done in studios or by those with experience in ceramic arts.
2. Decal Printing
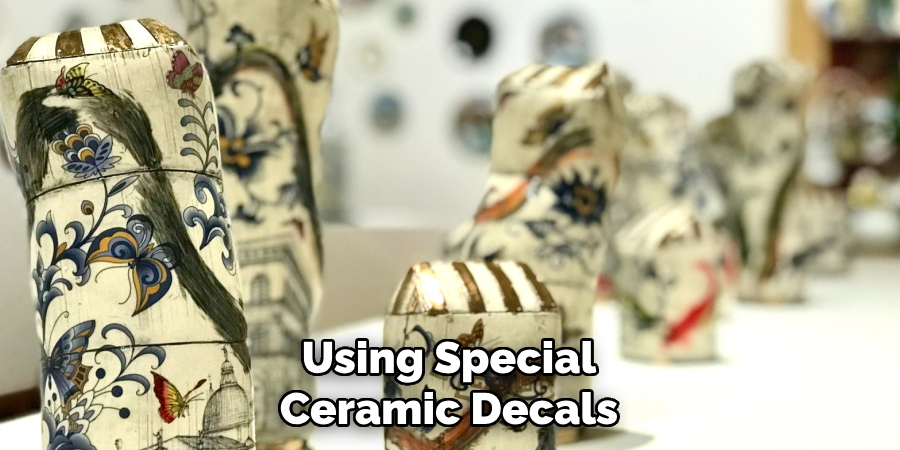
Decal printing is popular for transferring printed images or patterns onto ceramics. Using special ceramic decals (printed from a laser printer with ceramic toner or a sublimation printer), you can transfer your design onto the ceramic surface. Once printed, the decal is placed on the ceramic and rubbed to remove air bubbles. After drying, it’s fired in a kiln to make the design permanent. Decal printing is especially useful for achieving highly detailed images or multicolored designs, making it ideal for custom mugs, plates, or tiles.

3. Sublimation Printing on Ceramic
Sublimation printing is an advanced method that involves heat and pressure to transfer dye onto a specially coated ceramic surface. You start by printing your design onto a sublimation paper using sublimation ink. Next, you place the paper on the ceramic item and apply heat and pressure using a heat press. The heat turns the ink into gas, which then binds to the coating on the ceramic, producing vibrant and durable designs. This method requires a heat press and sublimation printer, but it’s ideal for creating high-quality, full-color images on mugs or tiles.
4. Photo Transfer with Gel Medium
A popular DIY method for creating unique, vintage-inspired designs on ceramic, photo transfer involves a gel medium to adhere printed photos or designs onto a ceramic surface. Begin by printing your image (using a laser printer) and applying a layer of gel medium on the ceramic. Place the paper with the image face-down and let it dry for several hours. Once dry, dampen the paper and gently rub it off, leaving the transferred image behind. This method is cost-effective and provides an artistic, aged look, ideal for personalized gifts or decorative plates.
5. Laser Engraving on Ceramic
Laser engraving is a high-precision method that uses a laser to etch designs directly onto the ceramic. The laser removes a fine layer of the ceramic surface, creating an engraved effect that can be subtle or bold, depending on the design and settings. This technique requires a laser engraver, which makes it more suitable for studios or specialized workshops. The engraved designs are durable, adding a tactile, professional quality that’s ideal for logos, text, or line art on items like coasters, tiles, or plaques.
6. Hand Painting and Stenciling
For those who prefer a hands-on, artistic approach, hand painting and stenciling offer a flexible way to add personal designs to ceramic pieces. After selecting ceramic-safe paints, you can freehand designs or use stencils to create patterns on plates, mugs, or tiles. This method allows for unlimited creativity in color, style, and detail. After painting, ceramics typically need to be baked or fired to set the paint permanently. Hand painting is accessible to beginners and offers a customizable way to decorate ceramics.
7. Hydrographics (Water Transfer Printing)
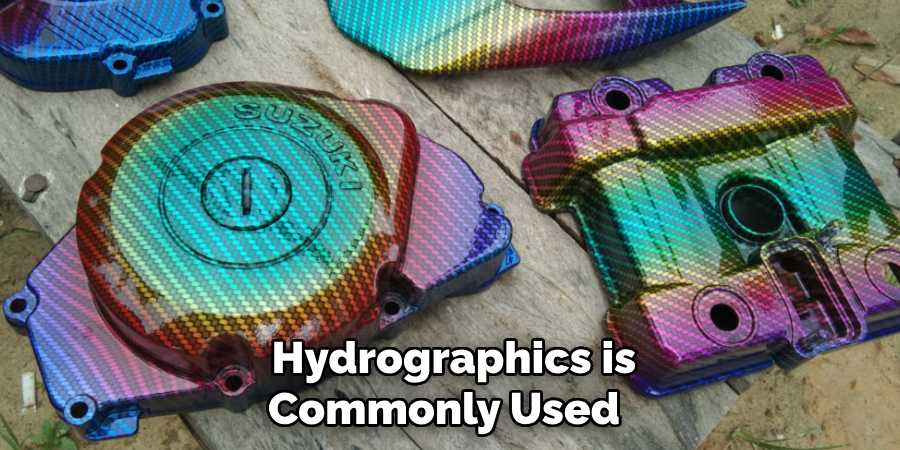
Hydrographics, or water transfer printing, is a unique method for transferring complex designs or images onto curved surfaces, which is challenging with other printing methods. In this technique, you print a design onto a special water-soluble film, which is then placed on water. When the ceramic item is dipped into the water, the film dissolves, leaving the design to adhere to the surface. After drying, a clear coat is applied to protect the design. Hydrographics is commonly used for creating intricate patterns on items like vases or plates and offers a high-quality finish.

8. Thermal Transfer Printing
Thermal transfer printing involves printing a design onto a thermal transfer paper, which is then applied to the ceramic with heat and pressure. Unlike sublimation, thermal transfer can be done on uncoated ceramics, making it more versatile. The design is printed with special thermal inks that react with the ceramic surface when heated, creating a durable, colorful print. This method works well for creating vibrant images and patterns on a variety of ceramic items and is particularly useful for high-quality, commercial prints.
9. Screen Printed Decals with a Kiln
A combination of screen printing and decal transfer, this method is perfect for those who want the quality of screen printing but the ease of decal application. The design is screen-printed onto decal paper, which is then applied to the ceramic. After transferring the decal, the item is fired in a kiln to set the design permanently. This method combines the detail and precision of screen printing with the flexibility of decals, making it a popular choice for both professionals and advanced hobbyists.
10. Sharpie and Bake Method
For a quick and easy DIY method, the Sharpie and bake technique is perfect. With this approach, you draw directly onto the ceramic with oil-based Sharpie markers, then bake the item in the oven to set the design. The heat causes the ink to bond to the ceramic, making it somewhat resistant to wear. While this method isn’t as durable as others, it’s ideal for quick projects and can be made more resilient by applying a sealant afterward. The Sharpie and bake method is popular for creating fun, simple designs on items like mugs and plates, though it’s best for decorative use as the designs may fade over time with washing.

Things to Consider When Choosing a Ceramic Printing Method
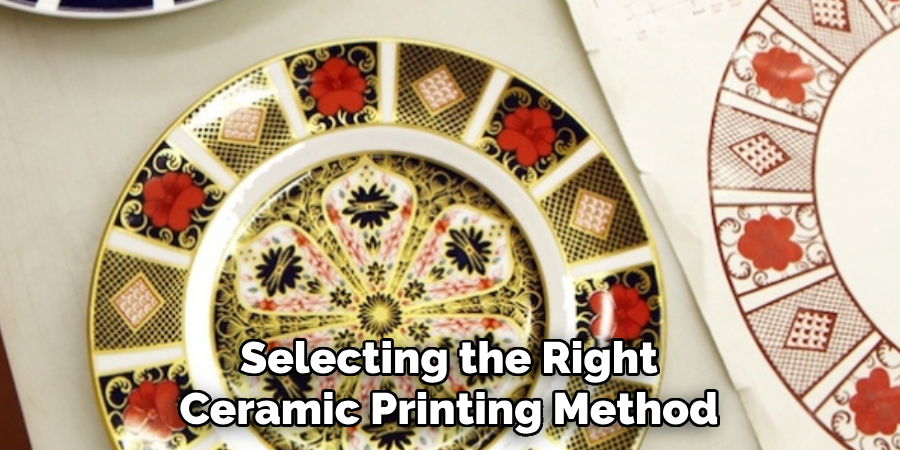
Selecting the right ceramic printing method depends on various factors including the desired outcome, complexity of the design, and available resources. It’s essential to consider the durability required for the final product, especially if it will be used frequently or come into contact with food or liquid. Some techniques, like laser engraving and sublimation, offer high durability and vibrant finishes, but may require specialized equipment and skills.

Simpler methods, such as the Sharpie and bake technique, provide accessibility for DIY projects but may not offer the same longevity. Additionally, budget constraints, room for mistakes, and the learning curve associated with each method can influence your decision. Careful evaluation of these factors will help ensure that the chosen method aligns with your goals and resources.
Conclusion
Each method has its own strengths, suited to different levels of expertise and types of ceramic projects. From professional screen printing and sublimation to DIY Sharpie baking, there’s a method for nearly every artistic vision and skill level. Choosing the right technique depends on factors like the complexity of your design, durability requirements, and available equipment. Thanks for reading, and we hope this has given you some inspiration on how to print on ceramic!
With a keen eye for detail and a deep understanding of the firing process, I bring ceramics to life as a skilled kiln operator. My expertise ensures that each piece reaches its full potential, achieving the perfect balance of strength and beauty. I take pride in overseeing the critical final stage of pottery creation, transforming raw clay into stunning, durable art. 🎨
From monitoring temperatures to perfecting firing schedules, I ensure that every piece is fired to perfection. My role is not just about operating the kiln; it’s about understanding the unique needs of each creation and bringing out its best qualities.
Join me on this journey of precision and passion, where every firing tells a story. Whether it’s a delicate vase or a robust sculpture, I am dedicated to making sure that every piece that comes out of the kiln is a masterpiece. 🏺✨
Toby Rede is a professional potter focused on creating functional and artistic ceramics. His work blends natural textures with modern forms, often inspired by sustainable gardening and outdoor environments. Toby’s pottery emphasizes both utility and beauty, reflecting his philosophy of intentional craftsmanship. On the blog, he shares insights on integrating handmade objects into everyday life.
Education
- Master of Fine Arts in Ceramics, California College of the Arts
Professional Focus
- Creating practical pottery for everyday use.
- Using unique styles and techniques to convey narratives in ceramics.
Professional Accomplishments
- Showcased work in local and national art galleries, gaining recognition for craftsmanship.
- Received accolades for innovative designs in pottery competitions.