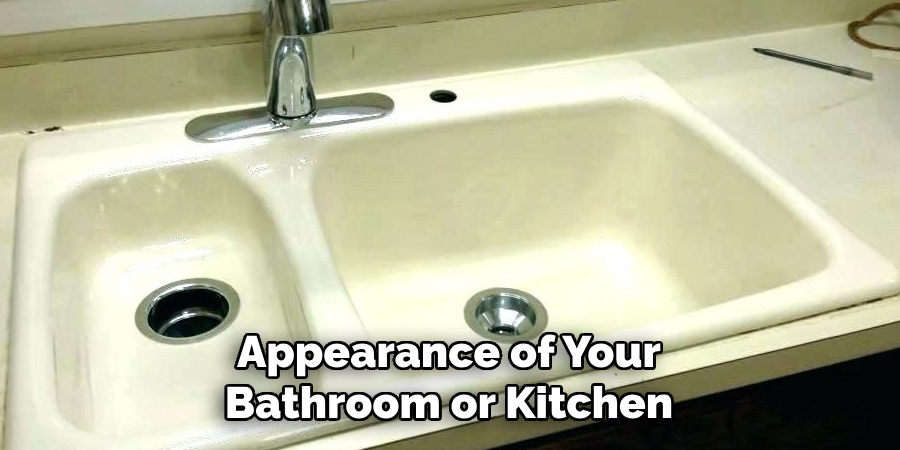
Reglazing a sink is a cost-effective way to restore its original shine and give it a fresh, new look without the need for a full replacement. Over time, sinks can become scratched, stained, or dull due to regular use, detracting from the appearance of your bathroom or kitchen.
By following a few simple steps of how to reglaze a sink, you can reglaze your sink and rejuvenate its surface, saving both money and time while achieving professional-looking results.
When to Consider Reglazing Instead of Replacing
Reglazing is an excellent option if your sink is structurally sound but has cosmetic issues like scratches, stains, or discoloration. It’s especially suitable for sinks with minor wear and tear that don’t justify the cost or effort of a full replacement.
If you have an older, high-quality sink that fits the aesthetic of your space, reglazing can help preserve its charm while refreshing its appearance. On the other hand, if your sink has extensive cracks, severe damage, or plumbing issues, replacement might be the better choice. By assessing the condition of your sink, you can decide whether reglazing offers a practical and budget-friendly solution.
Gathering Tools and Materials
Before you start the reglazing process, it’s essential to gather all the necessary tools and materials to ensure a smooth and successful project. Here’s what you’ll need:
- Protective Gear: Safety goggles, gloves, and a mask to protect yourself from fumes and debris.
- Cleaning Supplies: A non-abrasive cleaner, scrub brush, and lint-free cloth to thoroughly clean the sink before starting.
- Sandpaper: Medium-grit and fine-grit sandpaper to remove the sink’s glossy finish and create a surface the glaze will adhere to.
- Masking Tape and Plastic Sheeting: To protect the surrounding areas from overspray and drips.
- Epoxy Putty or Filler: For repairing small scratches and chips in the sink surface.
- Reglazing Kit: This includes the epoxy or enamel paint specifically designed for reglazing sinks, along with a brush or spray applicator for even application.
- Drop Cloth: To protect the floor or countertop from spills and mess.
Having all your tools and materials prepared ahead of time will help streamline the process and ensure that your sink reglazing project goes as smoothly as possible.
10 Methods How to Reglaze a Sink
1. Cleaning and Preparing the Sink Surface
Before reglazing, the sink must be thoroughly cleaned to remove any dirt, grime, or soap residue. Use a heavy-duty cleaner or degreaser to scrub the surface, ensuring all stains and mineral deposits are eliminated. Rinse well and dry completely. Any leftover residue can affect adhesion and result in an uneven finish.
2. Removing Old Caulk and Fixtures
To achieve the best results, remove any existing caulk around the edges of the sink using a caulk remover or utility knife. Detach faucet handles, drains, and other fixtures if possible. This step ensures that all areas of the sink are accessible and that reglazing is even across the entire surface.
3. Repairing Chips and Cracks
If your sink has small chips or cracks, use a two-part epoxy filler to patch them. Apply the filler with a putty knife and smooth it out to blend with the sink surface. Allow it to dry completely before sanding it down to create a level surface. Proper repair ensures a seamless finish after reglazing.
4. Sanding the Surface for Better Adhesion
To help the reglazing material bond effectively, lightly sand the entire sink surface with fine-grit sandpaper (400–600 grit). This roughens the surface, allowing the new glaze to adhere better. After sanding, wipe away dust and debris with a damp cloth to ensure a clean work area.
5. Applying an Etching Solution
An etching solution is a chemical treatment that helps create a rougher texture for improved adhesion. Apply the etching solution with a sponge or brush and let it sit for the recommended time. Afterward, rinse thoroughly and dry the sink. This step is crucial for achieving a professional-looking reglaze.
6. Masking Off Surrounding Areas
To protect countertops, walls, and other fixtures from overspray or drips, use painter’s tape and plastic sheeting to mask off surrounding areas. Covering these surfaces prevents unwanted reglazing material from sticking to unintended spots.
7. Applying a Primer Coat
A high-quality bonding primer is essential for helping the glaze adhere properly. Spray or brush on a thin, even coat and allow it to dry completely before proceeding. Some primers require multiple coats for optimal results. Ensure proper ventilation when using primers, as they often contain strong chemicals.
8. Spraying or Brushing the Glaze
Reglazing is typically done using a spray-on epoxy or acrylic-based glaze. Hold the spray can or spray gun at a consistent distance and apply thin, even coats, allowing each layer to dry before adding the next. If using a brush, use long, smooth strokes to prevent brush marks. Applying multiple light coats ensures a smooth, durable finish.
9. Allowing Proper Curing Time
After applying the final glaze coat, allow the sink to cure for at least 24–48 hours before reinstalling fixtures and using the sink. Some reglazing products may require up to a week for full curing. Avoid touching or using the sink during this period to prevent imperfections in the finish.
10. Maintaining the Reglazed Surface
To keep your newly reglazed sink looking fresh, use non-abrasive cleaners and soft sponges when cleaning. Avoid harsh chemicals, scrubbing pads, or bleach, as they can wear down the new glaze. Regular maintenance will help extend the life of the reglazed finish and keep your sink looking pristine.
Things to Consider When Reglazing a Sink
Before embarking on a sink reglazing project, there are several important factors to keep in mind to ensure a successful outcome. These considerations will help you assess whether reglazing is the right choice for your situation and how to achieve the best possible results:
- Condition of the Sink: Examine your sink for significant damage, such as deep cracks, extensive rust, or severe wear. Reglazing works best on sinks with surface-level imperfections rather than major structural issues that may require replacement.
- Type of Material: Not all sink materials are suitable for reglazing. Porcelain, ceramic, and cast iron sinks are ideal for this process, while other materials like stainless steel or plastic may not take the glaze effectively.
- Location and Ventilation: Reglazing involves the use of strong chemicals that produce fumes. Ensure you work in a well-ventilated area and use protective gear to minimize exposure to harmful substances. Open windows, use fans, or work outdoors if possible.
- Time Commitment: Reglazing is a time-intensive process that requires patience, particularly during the curing phase. Be prepared to leave the sink unused for several days to allow the glaze to set and fully harden.
- Durability Expectations: While reglazing can restore your sink’s appearance, it is not as durable as a brand-new sink. Over time, the new surface may develop wear and tear, especially with heavy use. Proper maintenance will help extend its lifespan.
Common Mistakes to Avoid
To ensure the success of your sink reglazing project, it’s essential to steer clear of common mistakes that can compromise the quality of the finish or the longevity of the glaze. Here are some frequent errors to avoid:
- Skipping Surface Preparation: One of the most vital steps in the reglazing process is thorough surface preparation. Failing to clean, sand, or repair the sink properly can lead to poor adhesion, resulting in peeling or bubbling of the glaze. Always take the time to prep the sink meticulously.
- Using the Wrong Materials: Not all products are suitable for sink reglazing. Ensure you’re using a high-quality reglazing kit designed specifically for the material of your sink. Experimenting with incompatible products can lead to uneven finishes or reduced durability.
- Working in Poor Ventilation: Reglazing involves strong chemicals that produce harmful fumes. Neglecting proper ventilation can put your health at risk. Always work in a well-ventilated area, use protective gear such as a mask, and follow all safety instructions provided on the product label.
- Applying Too Thick a Coat: Overloading the sink with thick reglaze layers can cause drips, runs, or cracking as the glaze cures. Instead, apply multiple thin, even coats, allowing each layer to dry as instructed before adding the next one.
- Rushing the Curing Process: Patience is key during the curing phase. Using the sink too soon after reglazing can lead to smudges, dents, or other imperfections in the finish. Respect the manufacturer’s recommended curing time for the best results.

Conclusion
Reglazing your sink can be a cost-effective and rewarding way to breathe new life into your kitchen or bathroom without the expense of a full replacement. By following the proper steps, from thorough preparation to careful application and maintenance, you can achieve professional-looking results that will last for years.
While the process requires patience and attention to detail, the end result is a refreshed sink that complements your space beautifully. Remember, the key to success lies in using the right tools, following the manufacturer’s instructions, and dedicating the time necessary for proper curing and care. Thanks for reading our blog post on how to reglaze a sink! We hope you found it helpful and informative.
With a keen eye for detail and a deep understanding of the firing process, I bring ceramics to life as a skilled kiln operator. My expertise ensures that each piece reaches its full potential, achieving the perfect balance of strength and beauty. I take pride in overseeing the critical final stage of pottery creation, transforming raw clay into stunning, durable art. 🎨
From monitoring temperatures to perfecting firing schedules, I ensure that every piece is fired to perfection. My role is not just about operating the kiln; it’s about understanding the unique needs of each creation and bringing out its best qualities.
Join me on this journey of precision and passion, where every firing tells a story. Whether it’s a delicate vase or a robust sculpture, I am dedicated to making sure that every piece that comes out of the kiln is a masterpiece. 🏺✨
Toby Rede is a professional potter focused on creating functional and artistic ceramics. His work blends natural textures with modern forms, often inspired by sustainable gardening and outdoor environments. Toby’s pottery emphasizes both utility and beauty, reflecting his philosophy of intentional craftsmanship. On the blog, he shares insights on integrating handmade objects into everyday life.
Education
- Master of Fine Arts in Ceramics, California College of the Arts
Professional Focus
- Creating practical pottery for everyday use.
- Using unique styles and techniques to convey narratives in ceramics.
Professional Accomplishments
- Showcased work in local and national art galleries, gaining recognition for craftsmanship.
- Received accolades for innovative designs in pottery competitions.