

Earthenware clay, one of the oldest materials used for pottery, is known for its versatility and natural charm. Its rich, earthy tones and forgiving nature make it a favorite for beginners and artisan potters. In this guide, we delve into the essentials of how to use earthenware clay, covering everything from the initial preparation to the final touches of glazing.
Whether you’re shaping a rustic vase, crafting a decorative plate, or creating a set of personalized mugs, understanding the properties and the process of working with earthenware clay will enable you to unleash your creativity in ceramics.
So, if you’re ready to get your hands dirty and explore the tactile world of clay, let’s begin molding your journey into the art of earthenware pottery.
Is Earthenware Clay Safe?
Before we dive into the technicalities of using earthenware clay, addressing any concerns about its safety is essential. The short answer is yes; earthenware clay is generally safe to use for pottery.
However, as with any material, precautions should be taken while handling earthenware clay. It’s recommended always to wear a dust mask while working with dry clay to avoid inhaling any particles. In addition, it’s essential to wash your hands thoroughly after handling earthenware clay and before eating or drinking.
It’s also important to note that earthenware clay contains more impurities than other clays, which can result in more shrinkage and cracking during the drying and firing process. However, with proper handling and techniques, these issues can be minimized.
What Will You Need?
Before jumping into the process of using earthenware clay, gathering all the necessary tools and materials is essential. Here is a list of items you will need:

- Earthenware Clay: This can be purchased from a local pottery supply store or online. Different types of earthenware clay are available, such as terra cotta, red earthenware, and white earthenware. Choose the one that suits your project.
- Water: For shaping and smoothing the clay.
- Clay Tools: These include a wire cutter for slicing clay, a needle tool for carving and detailing, a rib for smoothing surfaces, and other specialized tools depending on your project needs.
- Work Surface: A flat, smooth surface is essential for working with clay. It can be a wooden board, a canvas-covered table, or a non-porous surface.
- Rolling Pin: This will help you flatten and roll out the clay evenly.
- Sponge: Used for moistening the clay and cleaning up excess water.
- Baking Sheet or Kiln Shelf: For drying and firing your clay pieces.
- Glaze and Glazing Tools: Optional but essential to add color and shine to your finished piece.
Once you have all the necessary tools and materials, it’s time to prepare your earthenware clay for use.
10 Easy Steps on How to Use Earthenware Clay
Step 1. Kneading the Clay:
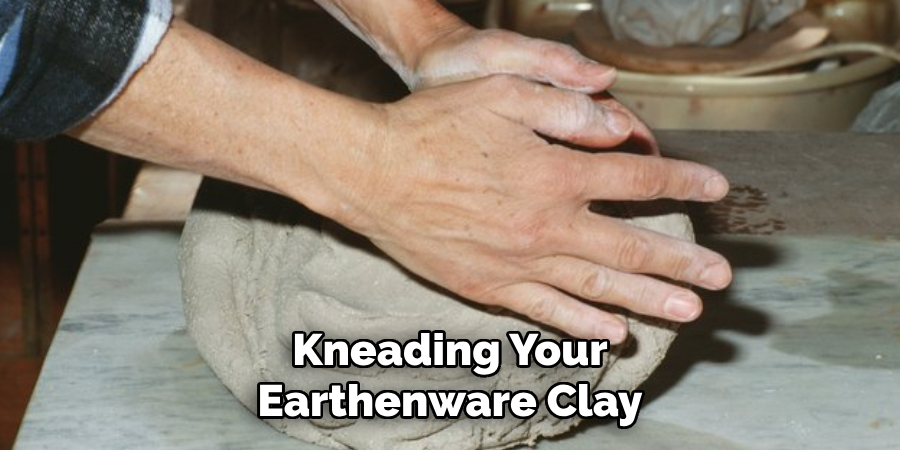
Begin by kneading your earthenware clay, which is often known as wedging. This process helps to remove air pockets and creates an even consistency throughout the clay. Place the clay on your work surface and use the heels of your hands to push and fold the clay into itself, rotating it occasionally. Continue this process until the clay feels uniform and pliable.
Step 2. Shaping Your Form:
After the clay is well-kneaded, begin shaping your form. You can create a basic shape by hand or use a rolling pin to flatten the clay into a slab for more intricate designs. Pay attention to the thickness to ensure even drying and firing later on.
If throwing on a wheel, center the clay and gradually shape it into your desired form with steady hands and gentle pressure. Remember to keep the clay moist to prevent cracking, using a sponge or your wet fingers to smooth the texture as you go.
Step 3. Adding Details and Textures:
Once you have your basic shape, you can add details and textures to your creation. Utilize various clay tools to carve designs, create patterns, or add unique textures to the surface. Experiment with different techniques like stippling, sgraffito, or inlaying to bring your piece to life. Be mindful of the depth and consistency of your markings to promote uniform drying and avoid cracks during the firing process.
Step 4. Drying Your Piece:
After completing your design, letting your earthenware piece dry slowly and evenly is important. Cover it with a light cloth to protect it from dust and to avoid rapid drying, which can cause warping or cracking.
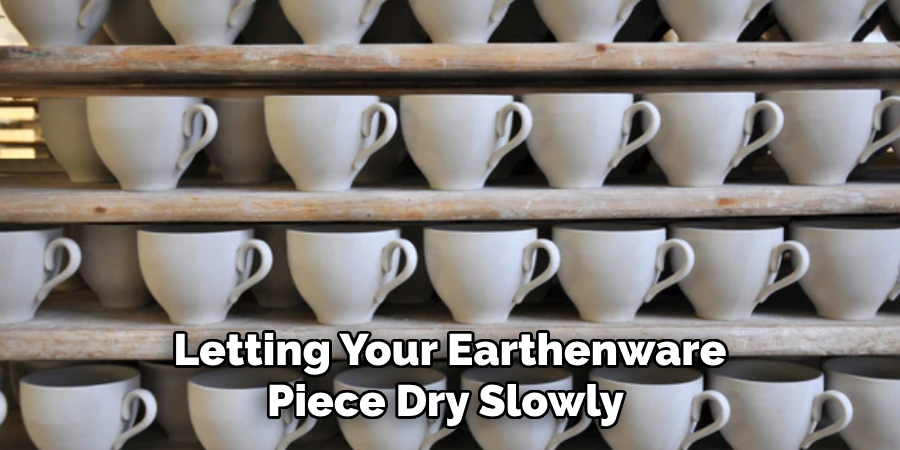
Place the piece on a baking sheet or kiln shelf and let it air dry until it’s bone dry, usually taking several days. To test if it’s ready for the next stage, touch it with the back of your hand; it should feel room temperature and not cool, indicating all moisture has evaporated.
Step 5. Bisque Firing:
Before you can glaze your earthenware piece, it needs to undergo bisque firing. This involves firing the clay in a kiln at a lower temperature to harden the clay and prepare it for glazing. Place your dried piece in the kiln, ensuring it is not touching other elements to allow for even heat circulation.
Fire according to the manufacturer’s recommended schedule for earthenware, typically around 1830°F (998°C) to 1940°F (1060°C). After the firing, allow the kiln and pieces to cool completely before removing them. The result should be a durable, porous surface ideal for glazing.
Step 6. Applying Glaze:
Now that your piece has been bisque-fired, it will be glazed. Begin by thoroughly cleaning the surface of your earthenware to remove any dust or particles. You can then apply glaze using a brush, dipping, or pouring techniques to achieve the desired effect.
To ensure an even coat, apply the glaze in multiple thin layers, allowing each layer to dry before applying the next. Be cautious around the bottom of the piece, as glaze can stick to the kiln shelf during firing. You can use wax resist to prevent glazing in specific areas if needed. Once you’ve finished glazing, let the piece dry completely before moving on to the final firing.
Step 7. Glaze Firing:
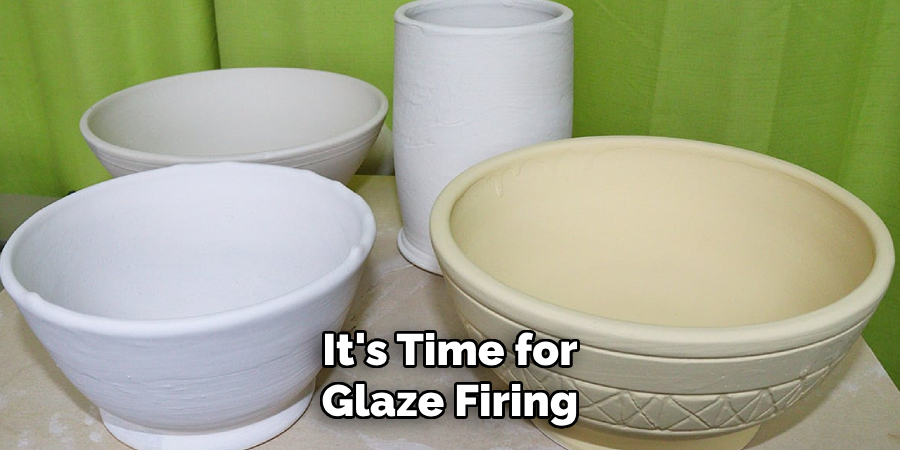
After the glaze has dried, it’s time for glaze firing, which is the second round in the ceramics process. This step is crucial as it vitrifies the glaze, creating a glass-like surface on your earthenware piece. Glaze firing is typically done at higher temperatures than bisque firing. Carefully load your piece into the kiln, ensuring it does not touch any other objects to allow for proper heat distribution.
The recommended firing range for earthenware glaze is typically between 1828°F (998°C) and 1940°F (1060°C). After the firing cycle is complete, let the kiln cool gradually to prevent any thermal shock to the pieces, which could lead to cracking or crazing of the glaze. Once the kiln is at room temperature, you can safely remove your finished earthenware, boasting a beautiful and durable glazed surface.
Step 8. Inspecting the Finished Piece:
Scrutinize your earthenware after the glaze firing. Look for cracks, crazing, or glaze defects that may have occurred during the firing process. Check the uniformity of the glaze and ensure that the colors have appropriately matured. If your piece has sharp edges from drips or rough spots, these can be gently sanded down with fine-grit sandpaper.
Remember to wipe the part down afterward to remove any dust created by the sanding. This post-firing inspection is crucial to ensure the quality and durability of your finished work.
Step 9. Adding Finishing Touches:
After the final inspection, it’s time to add any finishing touches to your earthenware piece. This may include attaching hardware for functional parts such as mug handles or containers’ lids. If you’re working with decorative items, you may apply lusters, decals, or gold leaf to add elegance.
Apply these finishes carefully according to the manufacturer’s instructions, and if necessary, perform an additional firing to set these materials properly. Remember that some decorative finishes are not food-safe, so use them accordingly on pieces that will not be used for serving or consuming food.
Step 10. Caring for Your Earthenware:
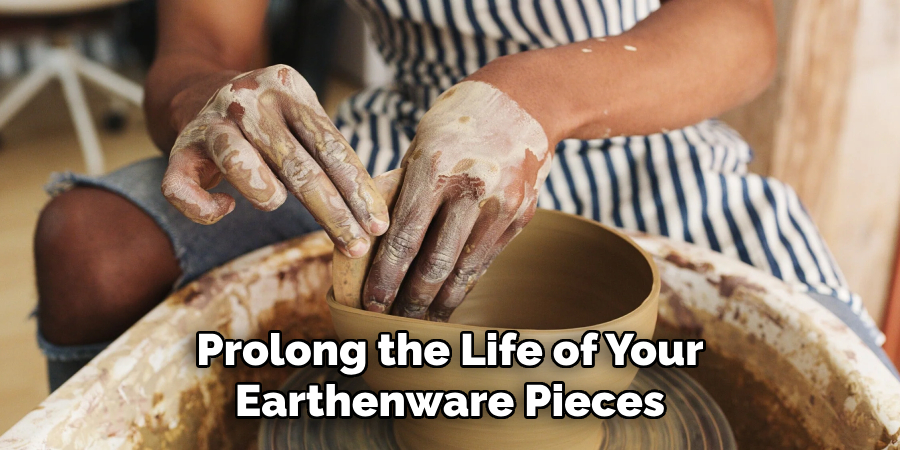
Proper care will prolong the life of your earthenware pieces. Always hand-wash your ceramics with mild soap and avoid abrasive scrubbers that can damage the glaze. For components that are microwave or dishwasher-safe, follow the specific guidelines provided by the manufacturer.
Avoid sudden temperature changes, such as moving a sample directly from the refrigerator to a hot oven, as this can cause thermal shock. Proper care ensures that your handcrafted earthenware retains its beauty and functionality for many years.
By following these steps, you can create beautiful, unique earthenware pieces that reflect your personal style and creativity.
5 Additional Tips and Tricks
Tip 1: Wedging Your Clay:
Before you begin shaping your earthenware, it’s crucial to wedge your clay properly. This process, similar to kneading dough, helps to remove air bubbles and create a homogenous consistency. Take the time to wedge thoroughly to prevent potential weaknesses or explosions in the kiln.
Tip 2: Keeping Clay Workable:
Keep a spray bottle with water handy to keep earthenware clay from drying out during your work session. Lightly mist the clay as needed to keep it pliable and prevent cracking.
Tip 3: Experiment with Textures:
Earthenware is a versatile medium, perfect for experimenting with different textures. You can use various tools such as stamps, sponges, or found objects to create unique patterns and textures in your clay before firing. This adds depth and interest to your finished pieces.
Tip 4: Recycling Clay:
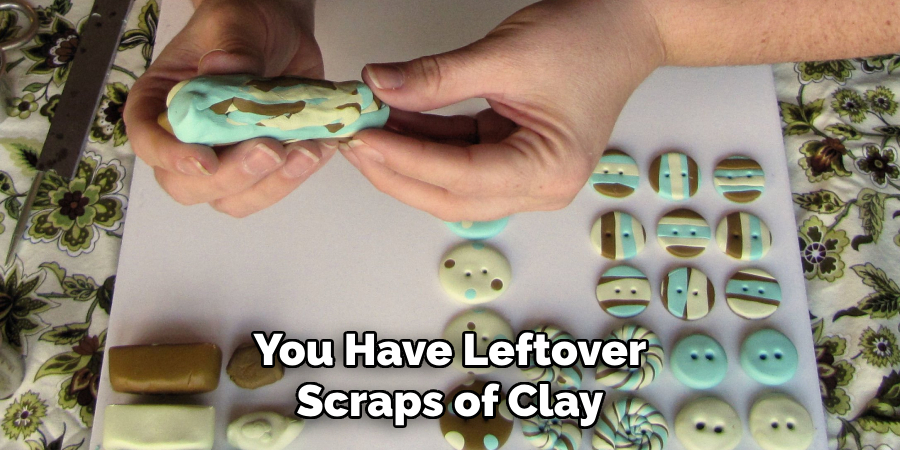
If you have leftover scraps of clay, don’t throw them away. You can recycle this clay by letting it dry completely and then rehydrating it with water to create a new batch of workable clay.
Tip 5: Use Underglazes for Vibrant Colors:
While glazing is a popular technique for adding color to earthenware, underglazes offer a wider range of vibrant colors that can be applied before or after the glaze firing. These colors can also be mixed to create custom shades, making them a fun and versatile option for your pieces.
These additional tips and tricks will help you continue to explore the endless possibilities of working with earthenware clay.
6 Things You Should Avoid When Using Earthenware Clay
Avoid 1: Exposing Clay to Extreme Temperatures:
Avoid exposing earthenware clay to extreme temperatures in its wet form and as a completed piece. Drastic temperature changes can lead to cracking and warping, compromising the structural integrity of your work.
Avoid 2: Neglecting the Importance of Compressing:
Be aware of compressing the walls and bottom of your thrown or hand-built pieces. Failure to do so can result in S-cracks or weakening of the structure, particularly in the areas that bear weight.
Avoid 3: Applying Glaze Too Thickly:
Avoid applying glaze too thickly. Excessively thick glaze can run off during firing, sticking to the kiln shelf or altering the shape of your piece. Aim for even and controlled layers of glaze application.
Avoid 4: Skipping the Kiln Wash:
Never skip applying kiln wash to your kiln shelves. The kiln wash acts as a protective barrier, preventing glaze from sticking to the shelves and making removing any accidental drips or runs that could ruin your earthenware easier.
Avoid 5: Underfiring or Overfiring Your Pieces:
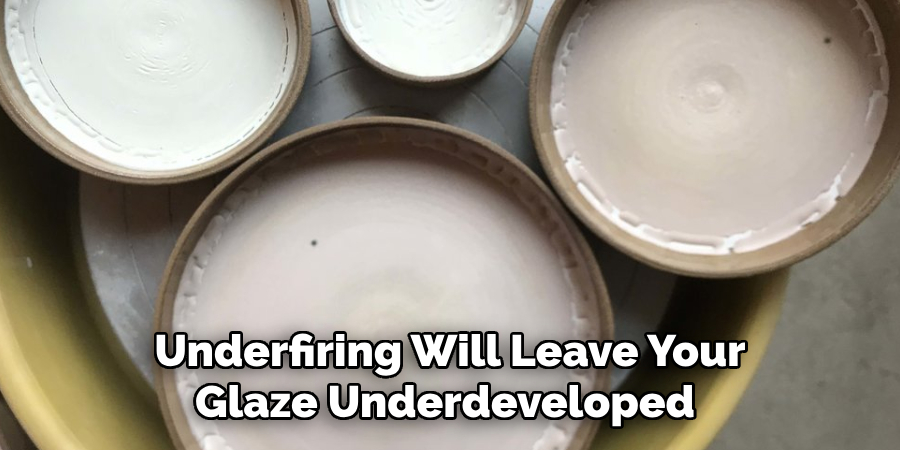
Always be accurate with your firing temperatures. Underfiring will leave your glaze underdeveloped while overfiring can melt the clay to the deformation point. Stick to the temperature guidelines specific to your clay and glaze.
Avoid 6: Neglecting Cleaning and Maintenance of Equipment:
Lastly, pay attention to the importance of regularly cleaning and maintaining your equipment. This includes appropriately wiping down your wheel, brushes, and other tools after each use to prevent any clay or glaze buildup that could affect future projects. Proper maintenance will extend the life and effectiveness of your equipment.
By avoiding these common mistakes, you can ensure the success and longevity of your earthenware pieces.
5 Different Design Techniques for Earthenware
Technique 1: Sgraffito
Sgraffito is a decorative technique where a layer of slip (liquid clay) is applied to the surface of the earthenware piece and then carefully scratched away to reveal the contrasting color underneath. This process can create intricate designs and patterns on your pottery.
Technique 2: Mishima
Mishima is a technique that involves carving designs into leather-hard clay and then filling in the carvings with colored slips. The surface is then smoothed out to create a raised, inlaid effect.
Technique 3: Stamping
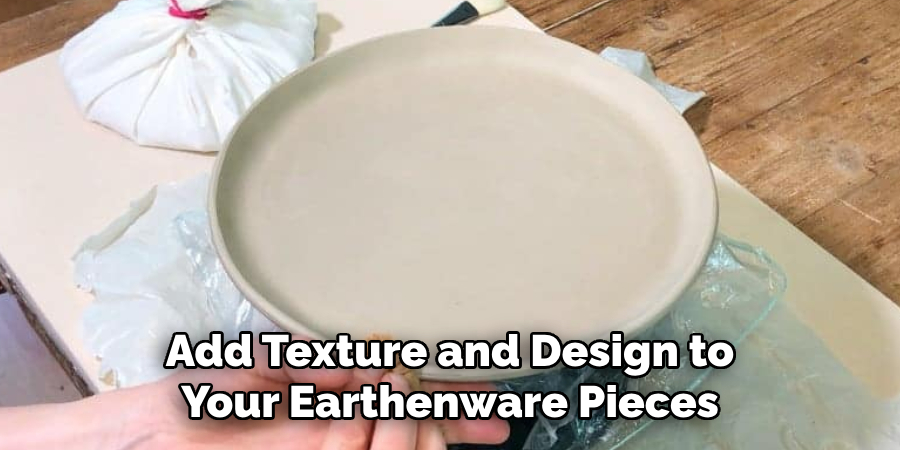
Stamping is another way to add texture and design to your earthenware pieces. Using found objects and carving tools, you can use pre-made stamps or create your own.
Technique 4: Relief Carving
Relief carving involves using carving tools to remove clay from the surface of a piece, creating a raised design. This technique can be used on both leather-hard and bone-dry earthenware.
Technique 5: Slip Trailing
Slip trailing is a method of decorating pottery using a slip (liquid clay) to apply raised designs and patterns onto the surface. This technique allows for intricate detailing and can create beautiful, unique results.
Incorporating these design techniques into your earthenware pieces can add more depth and interest to your creations. Experiment with different methods to discover which works best for your style and vision.
What Do You Use Earthenware for?
Earthenware is versatile and can be used for various functional and decorative purposes. Some common uses of stoneware include:
- Tableware: Plates, bowls, mugs, and other dinnerware are popular items made with earthenware clay due to its ability to withstand frequent use.
- Garden Decorations: Due to its durability in outdoor conditions, earthenware is commonly used for creating garden ornaments, planters, and outdoor sculptures.
- Home Decor: Earthenware pieces can also add a touch of style and personality to your home. Vases, candle holders, and decorative dishes are just a few examples of how earthenware can enhance your living space.
- Functional Kitchen Items: From baking dishes to utensil holders, earthenware is a popular choice for creating practical kitchen items due to its ability to withstand high temperatures.
- Artistic Creations: Many artists use earthenware to create unique and expressive art pieces such as sculptures, wall hangings, and pottery.
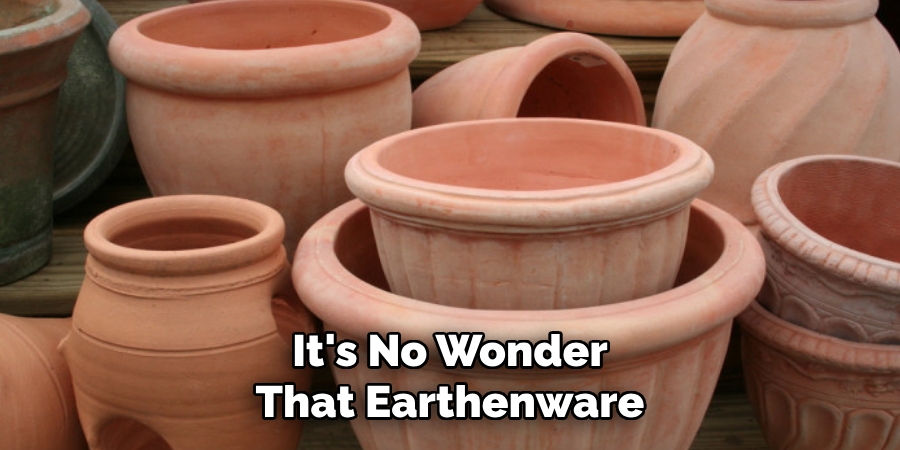
With its versatility and charm, it’s no wonder that earthenware has been a popular choice for centuries. Whether you are a professional artist or enjoy creating with your hands, earthenware clay offers endless possibilities for functional and decorative pieces that can be cherished for years.
Conclusion
In conclusion, how to use earthenware clay requires patience, practice, and a willingness to learn from experience. By avoiding common pitfalls such as exposure to extreme temperatures and improper glazing techniques and by embracing the wealth of design methods available—from classic sgraffito to contemporary slip trailing—you can unlock the full potential of this versatile medium.
Whether you aim to produce functional items or expressive art, earthenware offers a canvas limited only by the imagination. With each creation, you contribute to the ongoing tradition of ceramic arts, making pieces that can hold more than just physical weight—they can carry stories, history, and personal expression within their fired and glazed surfaces.
Toby Rede is a professional potter focused on creating functional and artistic ceramics. His work blends natural textures with modern forms, often inspired by sustainable gardening and outdoor environments. Toby’s pottery emphasizes both utility and beauty, reflecting his philosophy of intentional craftsmanship. On the blog, he shares insights on integrating handmade objects into everyday life.
Education
Associate Degree in Ceramic Technology, Alfred University
Professional Focus
Pottery creation with a focus on functionality and artistic expression
Techniques exploring texture, glazing, and sustainable materials
Professional Accomplishments
Work featured in regional art shows and garden exhibitions
Collaborations with local craft fairs and home decor shops